|
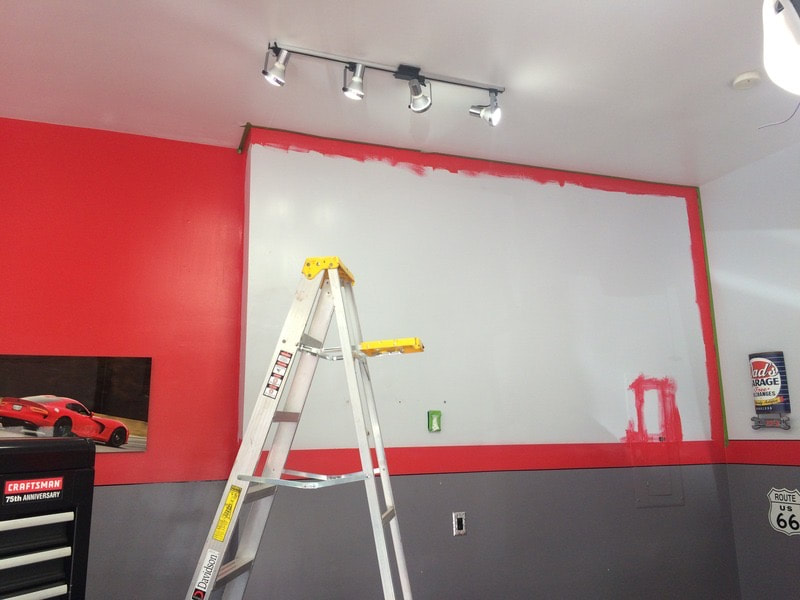
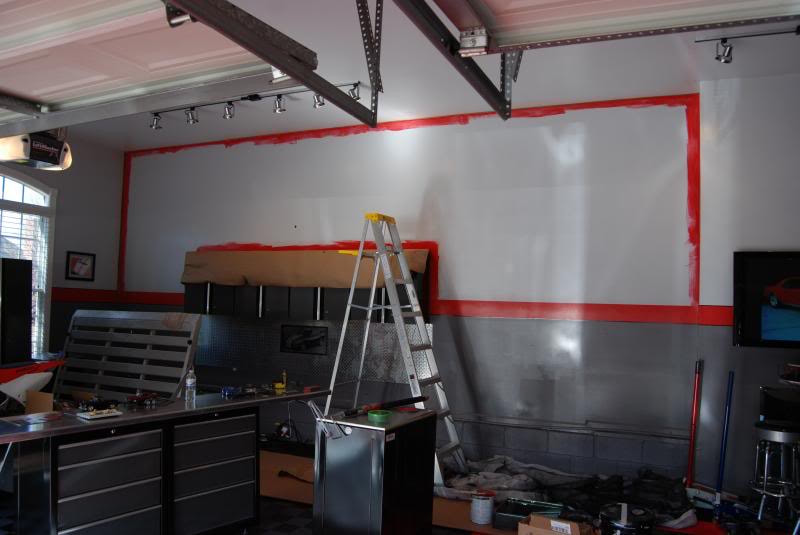
I have been an admirer of this garage for years, so I was pumped when the owner agreed to having it featured on my humble blog. This is a true car lover's dream garage that I really hope to one day see in the flesh. Everything you see here was created by the owner with the help of his family. I have followed each evolutionary change that he has made and the level of execution is simply amazing. You can learn a lot more about the history of this garage by checking out the build thread on garagejournal.com or his photo album on Photobucket. It's amazing to see how Chad and his family transformed this regular garage into something truly special and unique. Owner: Chad Location: Nashville, TN 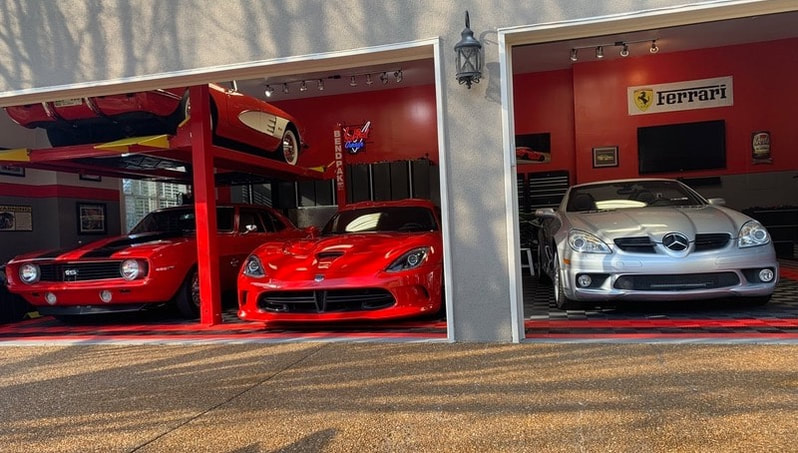 Garage vitals:
What inspired you to create the garage you created? I have always loved fixing ugly things up and that applied to garages too. I have enjoyed taking several houses that had the nastiest and ugliest regular old garages and trying to turn them into something that wows you when you open the door. With this house, we usually come in through the garage and my wife and I wanted to make it a beautiful and inspiring path to come into the house. She is a car fanatic too!
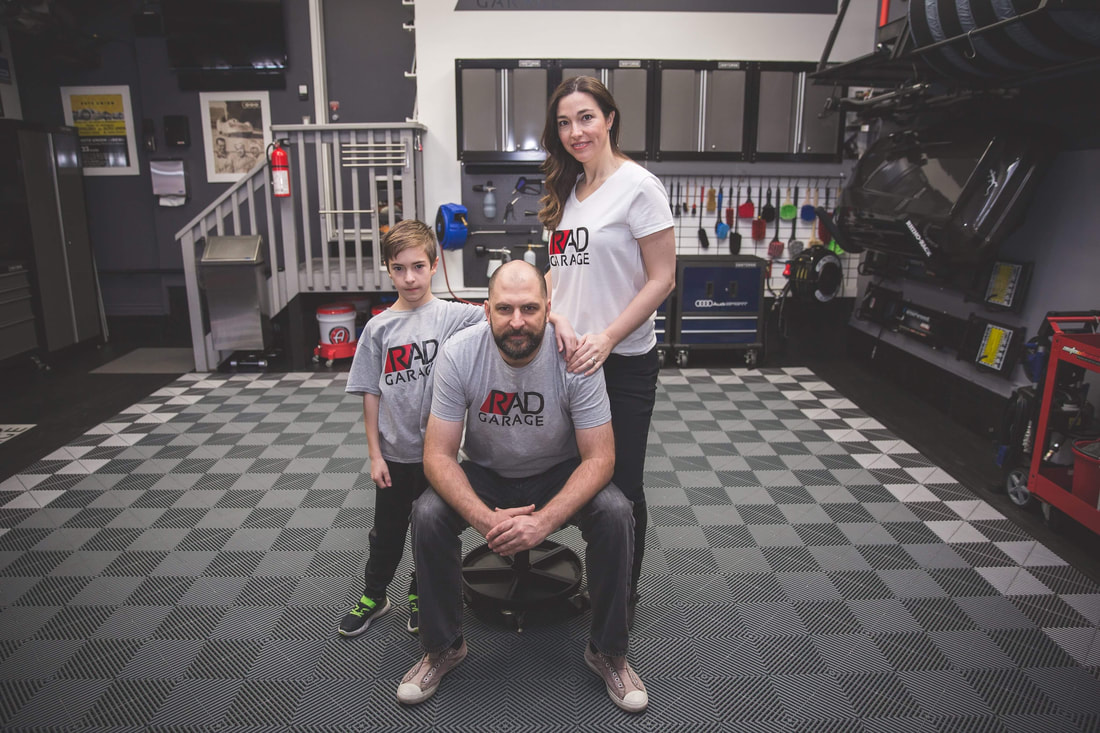
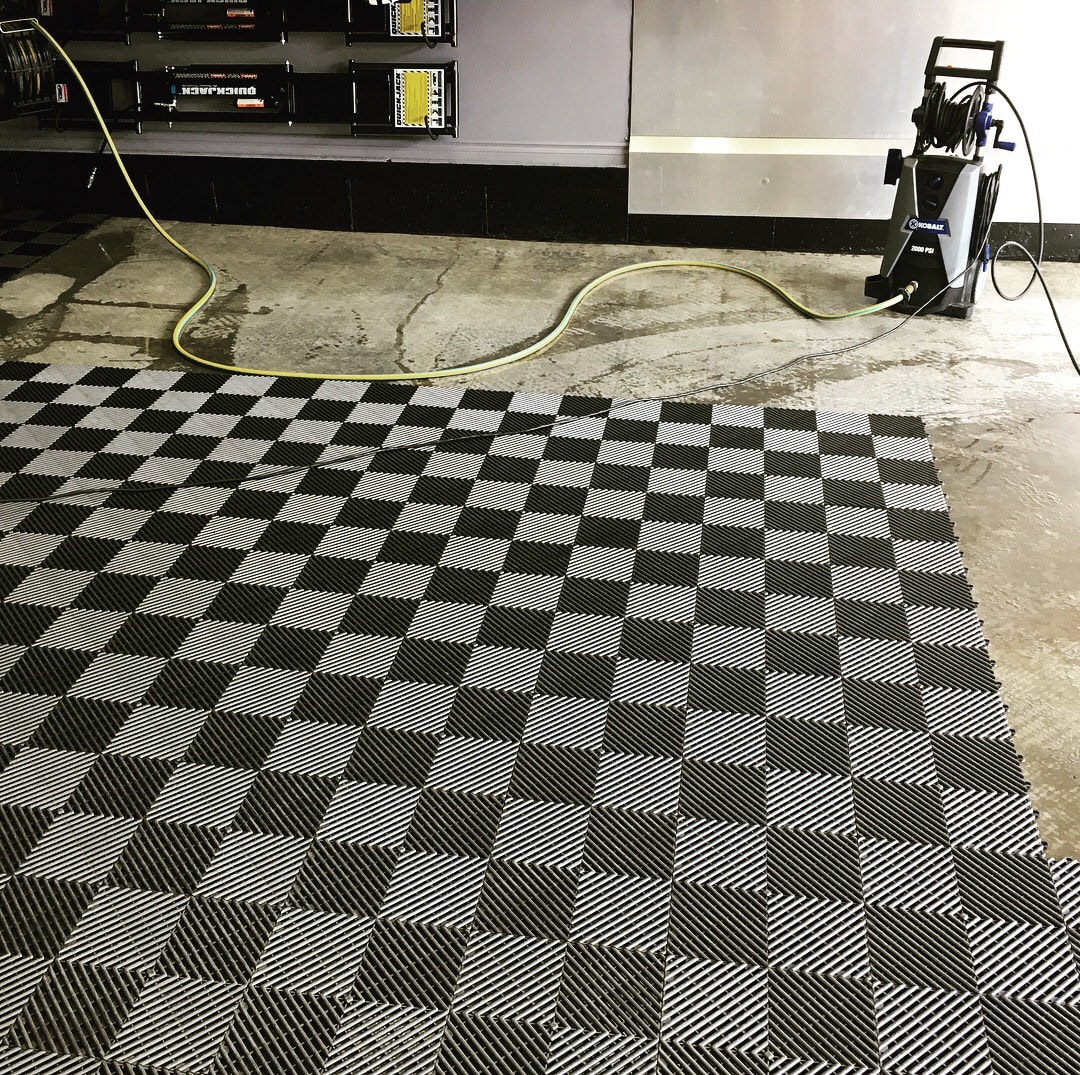
Our friend came by last weekend to photograph my garage. Heather is super talented and I am very pleased with the final results of her work. Here's a little gallery highlighting her talent and the beauty of my place! 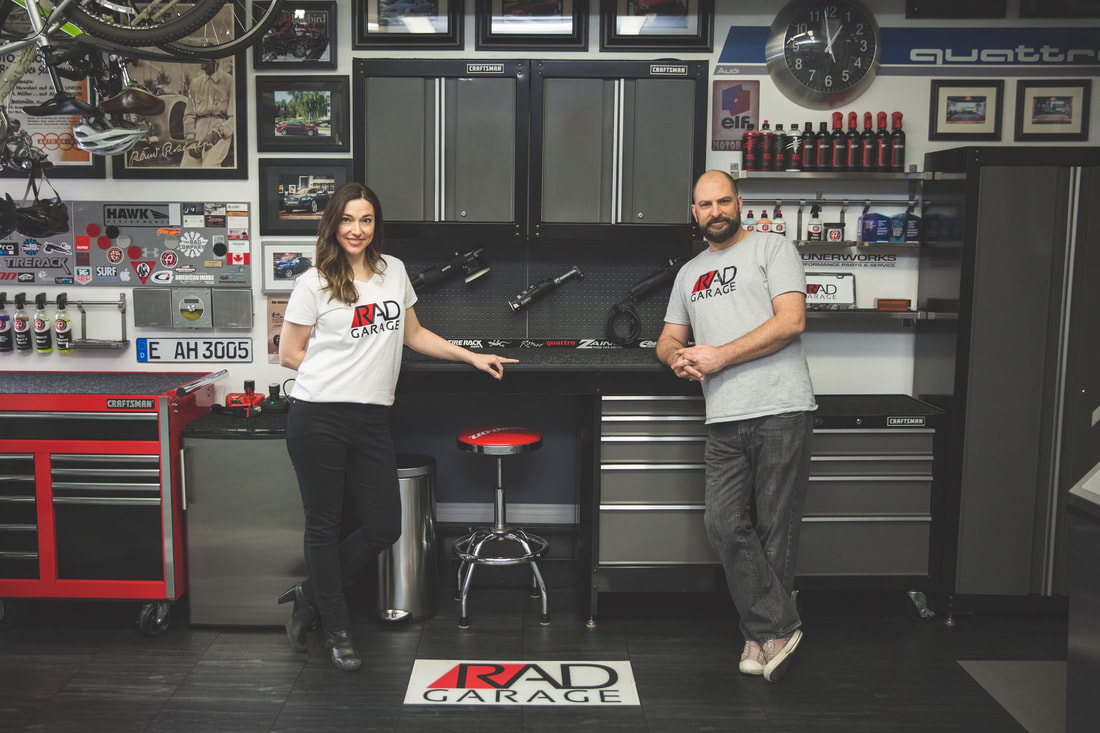 Last weekend, a good friend came by to snap some photographs. She is quite talented so I am very eager to see how they turned out. She sent a few teaser pics and they look great. I even convinced my family to pose for a few. My plan is to use her shots to update my website. Since I had the garage tidied up, I did a new tour video because the last tour video is a couple of years old and things have changed a bit since then. Because my home has a north-facing front, the driveway gets no sun. Ever. That means the driveway ices up pretty quick if I try to clean my floor with my pressure washer. But, when the weather throws me a bone, like it did today, I feel guilty if I don't take advantage and perform a complete clean of the garage floor and driveway. Here's a little look at how I deal with the floor in the winter. The first step is to disconnect the middle portion (slate grey colour) of the floor. Since I have one car, and I park in the center of the garage, filth only accumulates in the middle of the garage. I unfasten the connectors with a paint lid removal tool and drag it out to the driveway in two equal sections. I use my pressure washer to wash the debris that has accumulated under the floor to the front of the garage, but not quite onto the driveway. Once I have the bulk of the muck at the apron, I use a squeegee to push it into a pile. The thick mud and rocks then get sucked up in my Shop-Vac. I rinse any leftover dirt and residue into the gap between the slab and the driveway and do a final sweep of the concrete floor with my pressure washer and squeegee it dry.
I am excited to share this charming garage from Reykjavik, Iceland. Brynjar Hartharson is a mechanic who works primarily on GM cars. He has created an impeccable detailing environment he uses to care for his cars and the cars of others. I have been a fan of his space since I first caught wind of it on his Instagram. It was instantly apparent that Brynjar and I have similar tastes in many regards. Like me, he is an avid hobbyist detailer, obsessively pampers his German car, and prides himself in maintaining a very neat and organized workspace. I am thankful he agreed to answer my questions about his garage story and I was extremely flattered he mentioned my garage as one of his design inspirations. I am confident you will be as impressed with his space as I am. So, off we go to Iceland!  The vitals
The inspiration I have always been passionate about cars, dreaming of one day buying my own house with a garage. After I stumbled upon The Garage Journal in 2011, I spent a lot of time looking at garage projects and getting inspiration for my own in the future, I had designed the basic layout and look in my mind long before I had a garage.
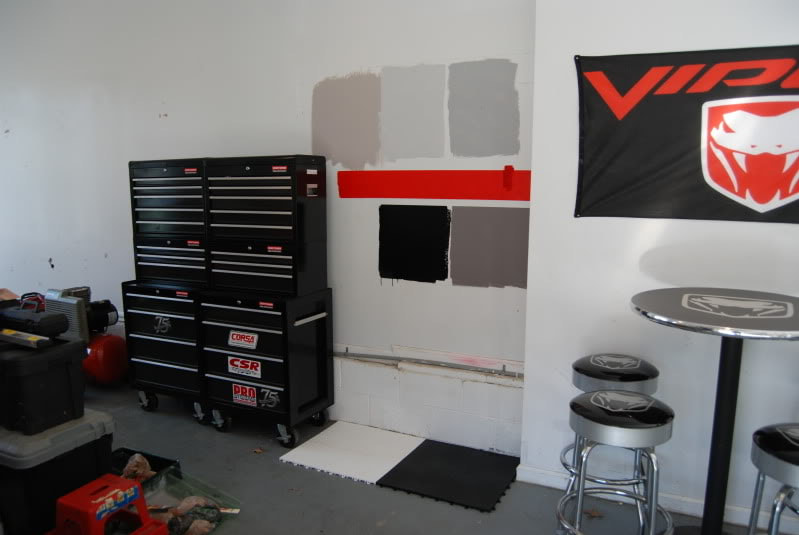
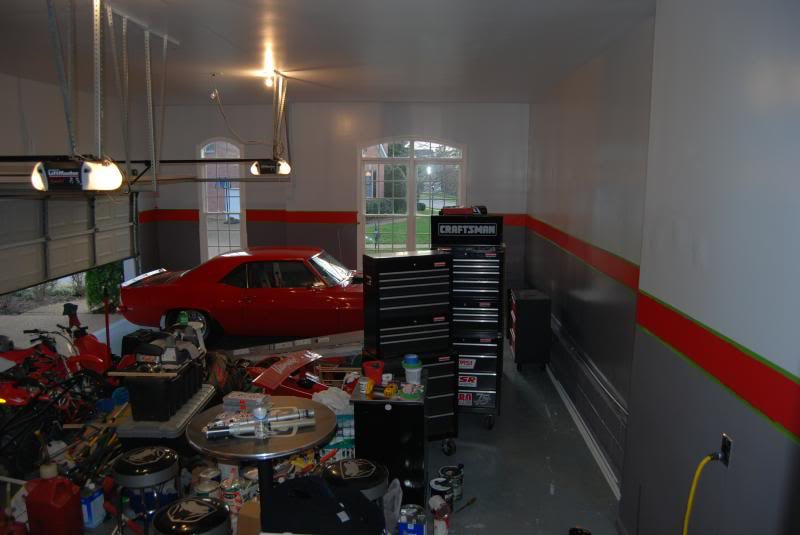
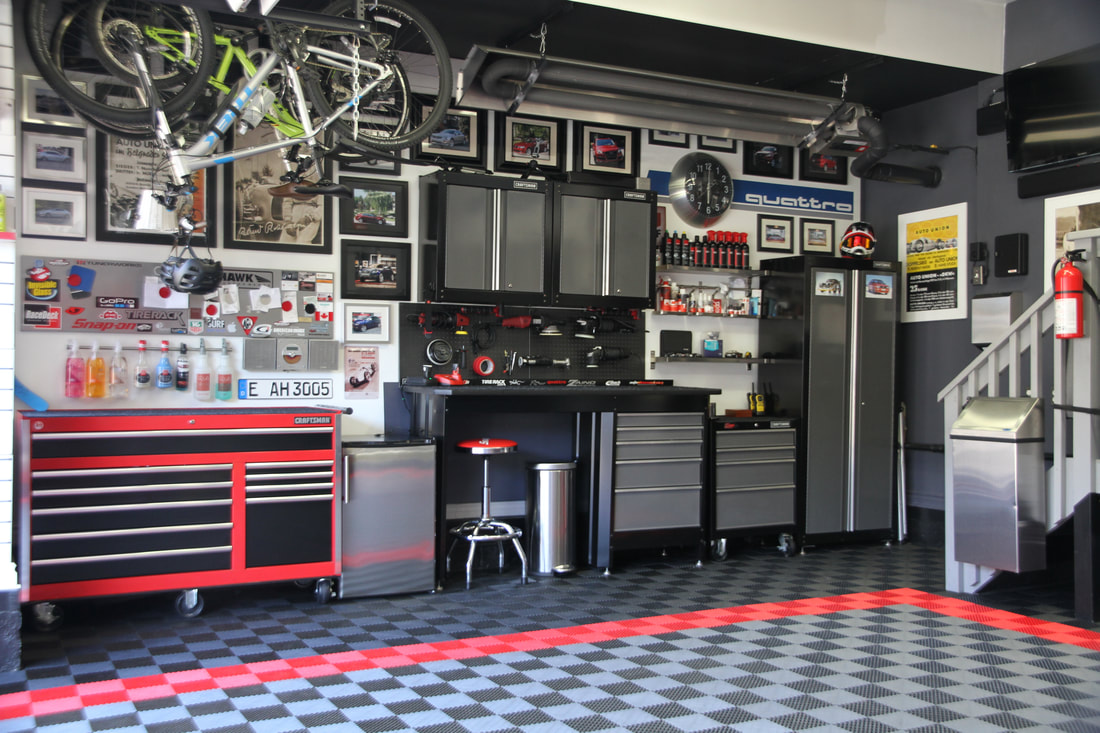
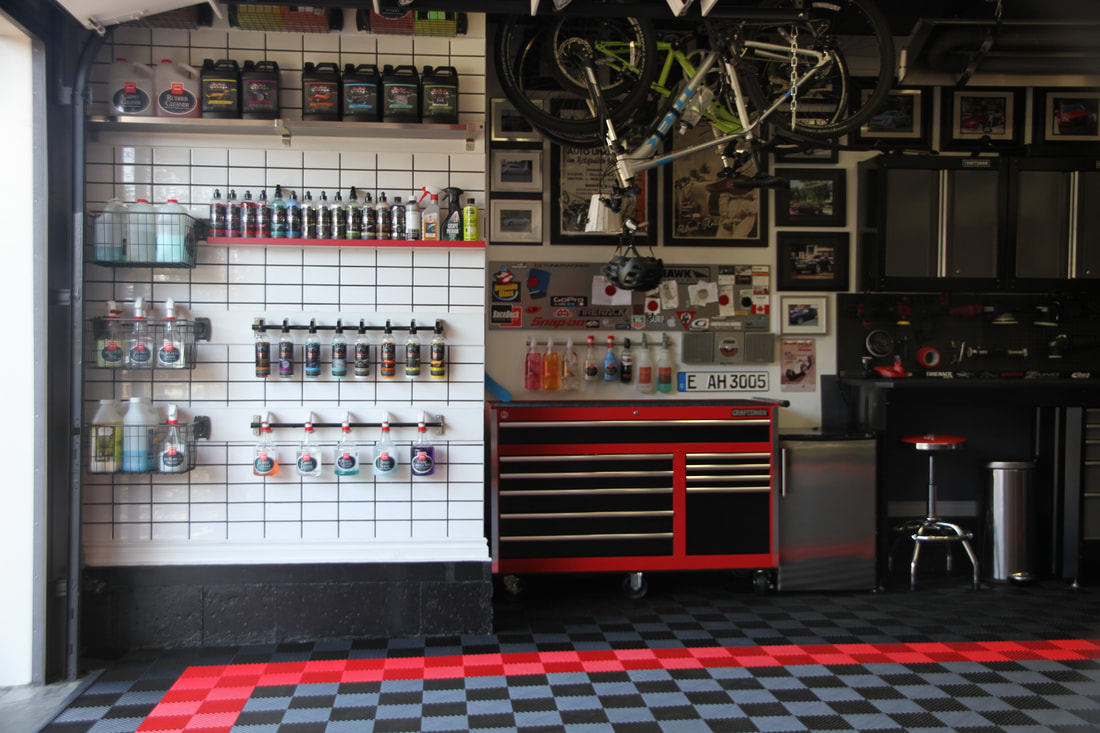
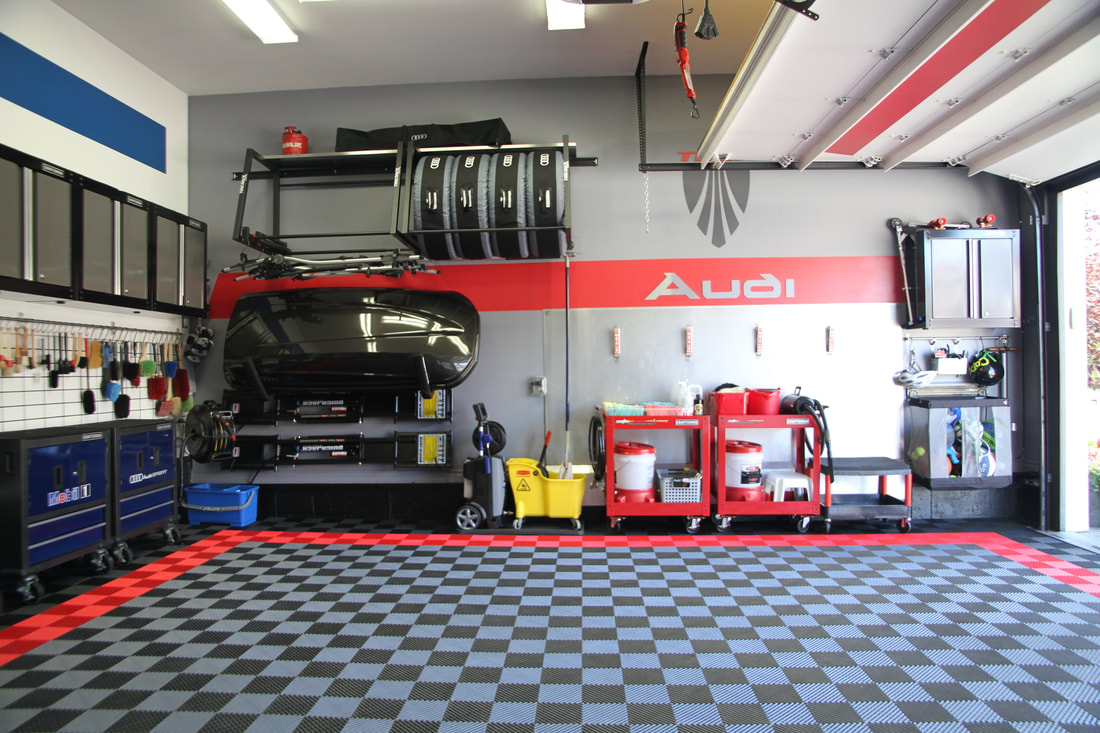
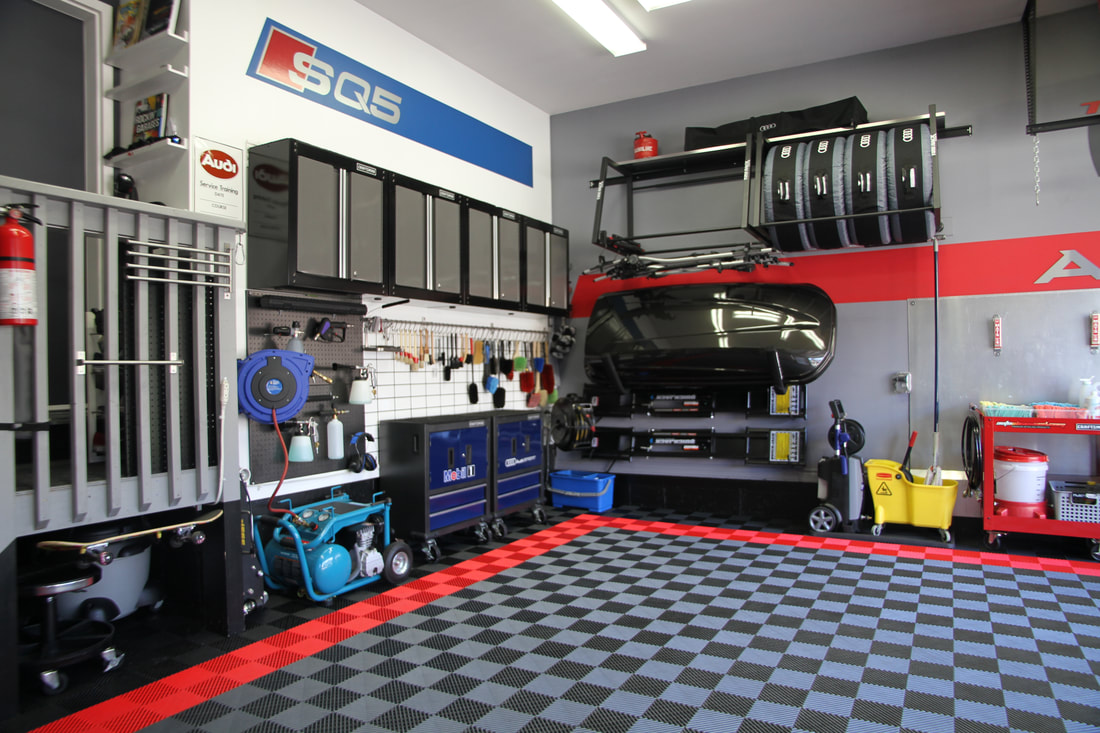
Take a look at this spectacular North Carolinian estate belonging to my longtime garage buddy, Larry. For years, I have been a fan of Larry's clinically clean and expertly organized garage, but what impresses me even more is Larry's remarkable detailing work that he completes inside it. When I made the decision to feature garage spaces of others on my blog, I immediately sent Larry an invite and he graciously accepted. He furnished me with comprehensive responses to all of my questions along with quality photos that showcase the pristine environment he has created to pursue his passion for detailing.  Name: Larry Bishop Location: Charlotte, NC Garage vitals:
We moved to Charlotte from the DMV area in mid-2016 and built our first single family home. Construction was completed late August and I quickly started on the garage. Fortunately, the builder finished both garages and installed baseboards which gave us a great starting point. In the first month of ownership, we completed the epoxy, lights, and all the gladiator wall tracks/cabinets. Since we built the house, I spent the construction period researching and accumulating products which meant I had the bulk of the items upon move in. I originally met Rick on Garage Journal, where I spent a good amount of my research time. Yes, I went through all 88 pages of Rick's build journal and contributed greatly to his 630k views! I lost steam on my garage journal thread but the following is what I started: Click here to connect to Larry's informative build thread on garagejournal.com
I'm always talking about and showing off my own garage, but I also spend a significant amount of time obsessing about other peoples' garages. One garage that has always impressed me is the one that belongs to Tyson Hugie. This past holiday season, Tyson emailed me to share a flooring project he was undertaking. He had an epoxy coating applied to his garage floor and he wanted to share the process with me. I enjoyed the story and photos he sent and thought it would be interesting to share the story here on my blog. 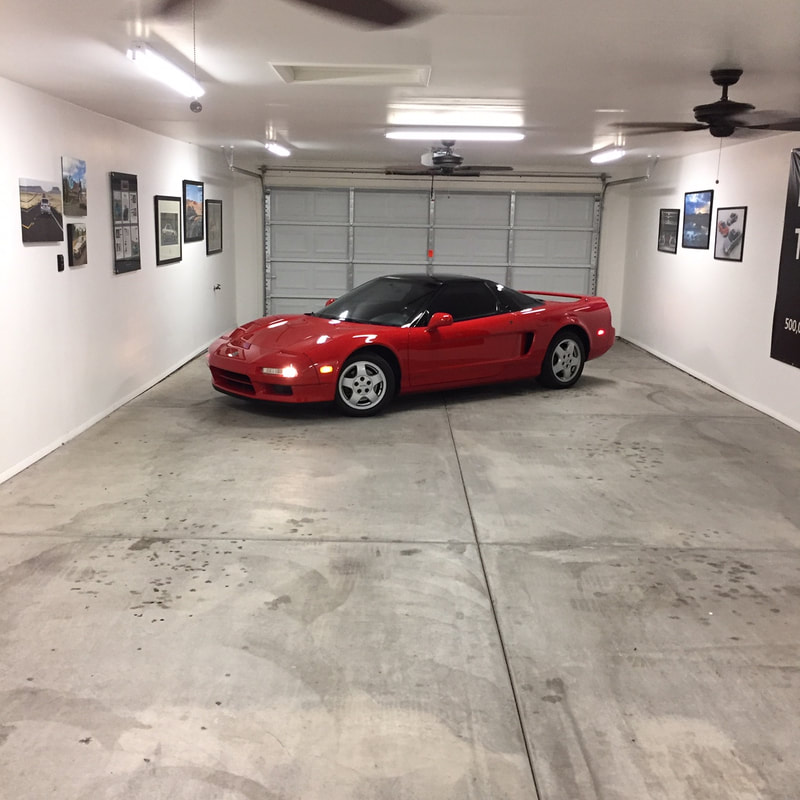 Tyson's Arizona garage is a shade under 1000 square feet and is set up in a triple tandem configuration (6 cars). In addition to being large, it is home to an extensive collection of Acura cars. Currently, he owns eight of them! What makes his collection even more impressive is that they are all impeccably maintained and driven on a regular basis. In fact, he gained notoriety a few years back when his pristine 1994 Acura Legend coupe surpassed the 500,000 mile mark. In the early summer of 2013, Acura honored this incredible milestone with a red carpet ceremony. Six months later, Acura presented him with the keys to a silver 2013 ILX. Tyson has done a fantastic job of documenting his automotive passion and accomplishments on his "Drive to Five" website and has been featured in a number of videos on Acura's YouTube channel.
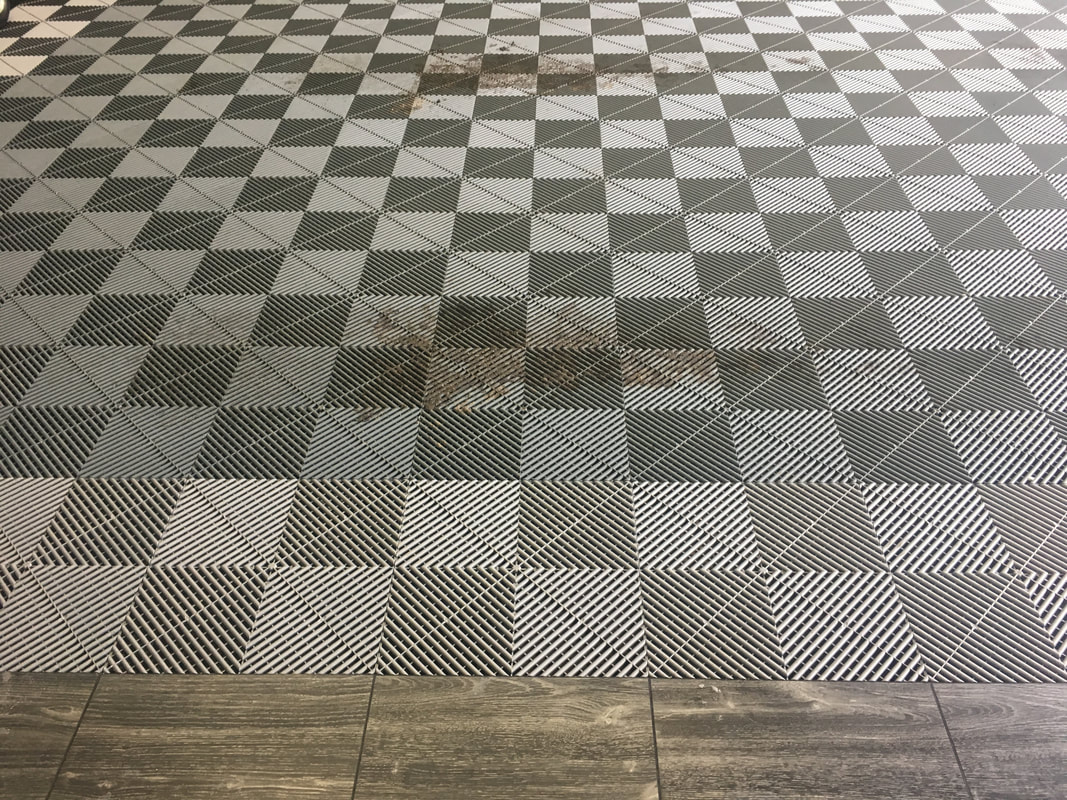
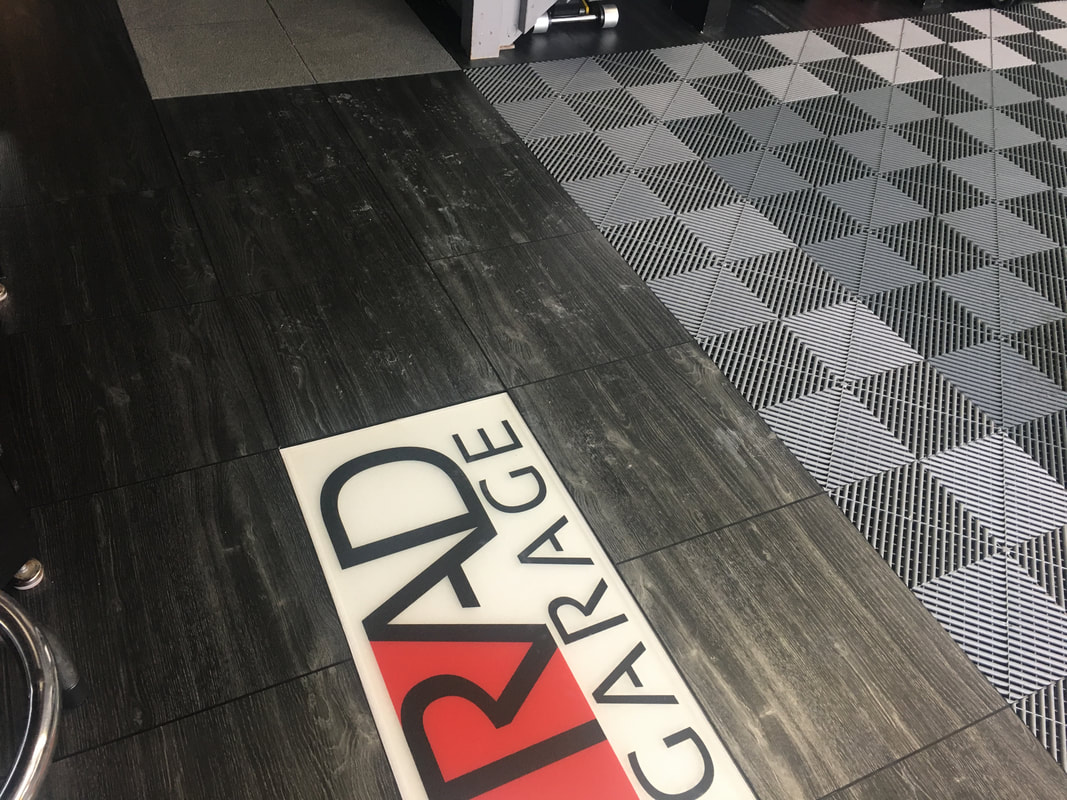
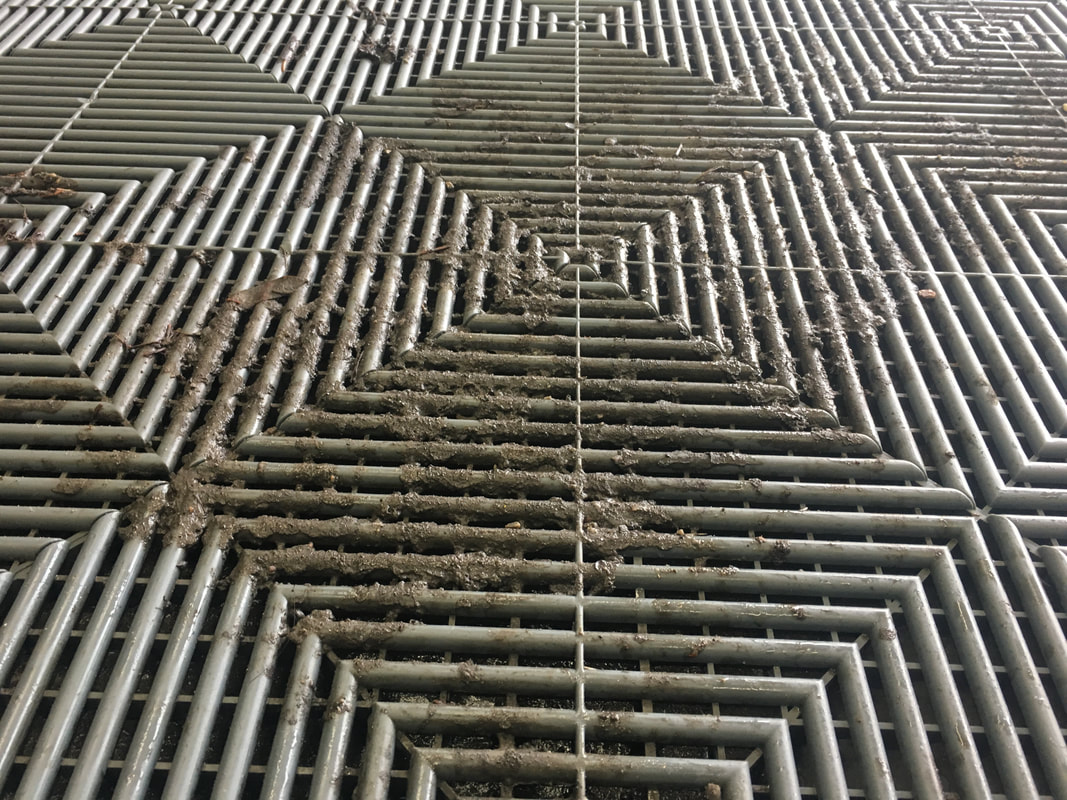
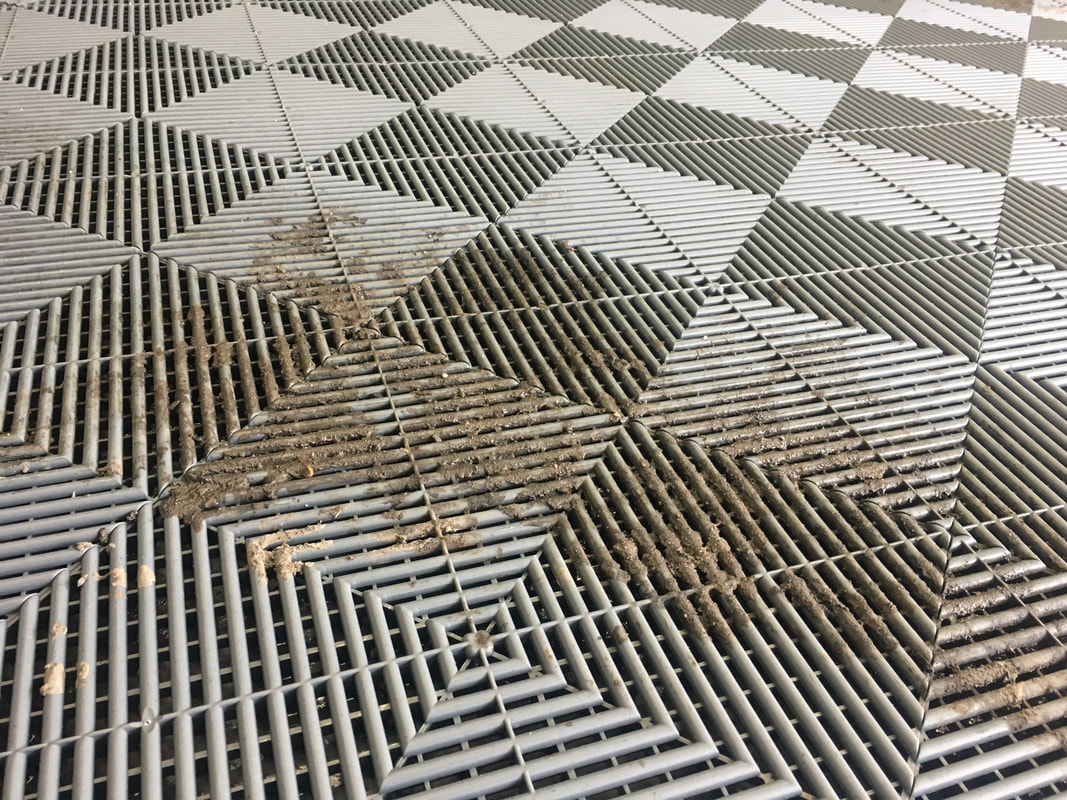
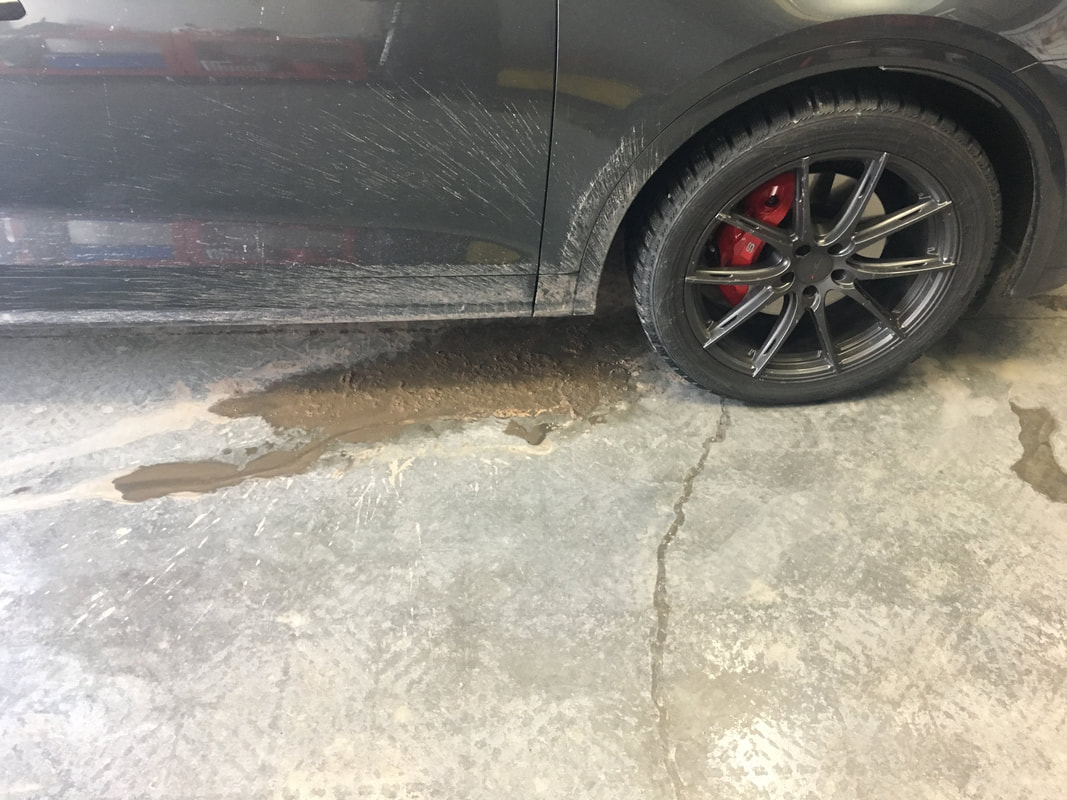
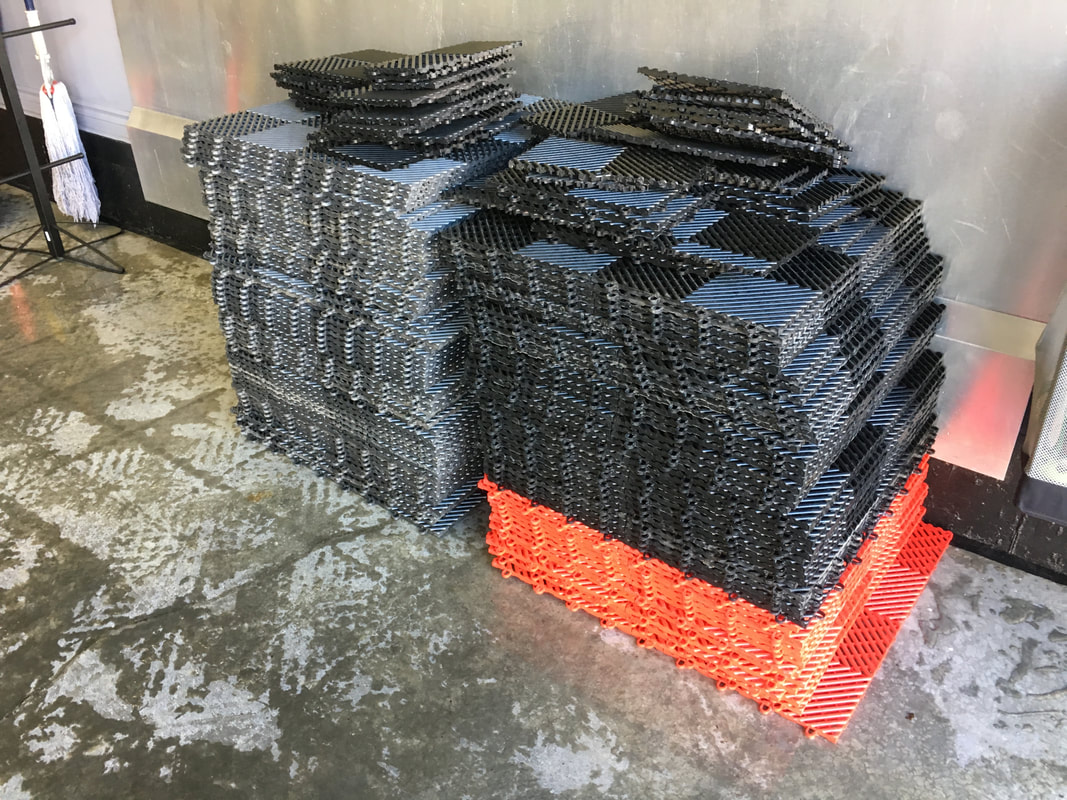
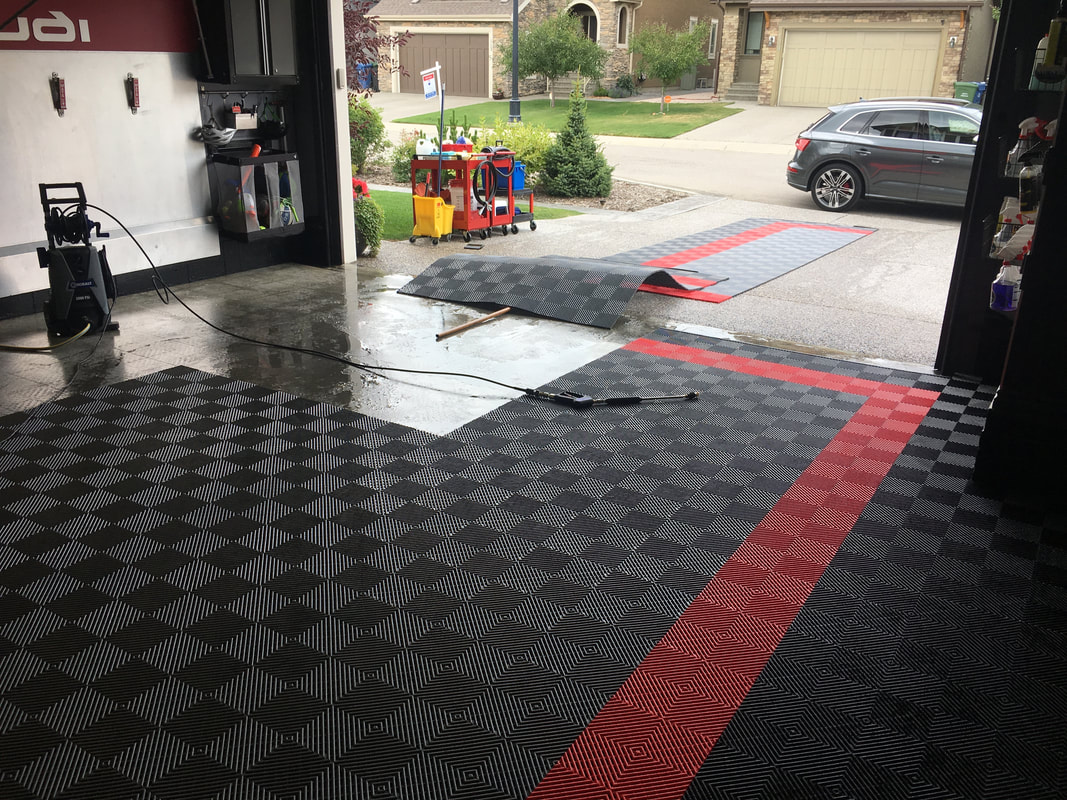
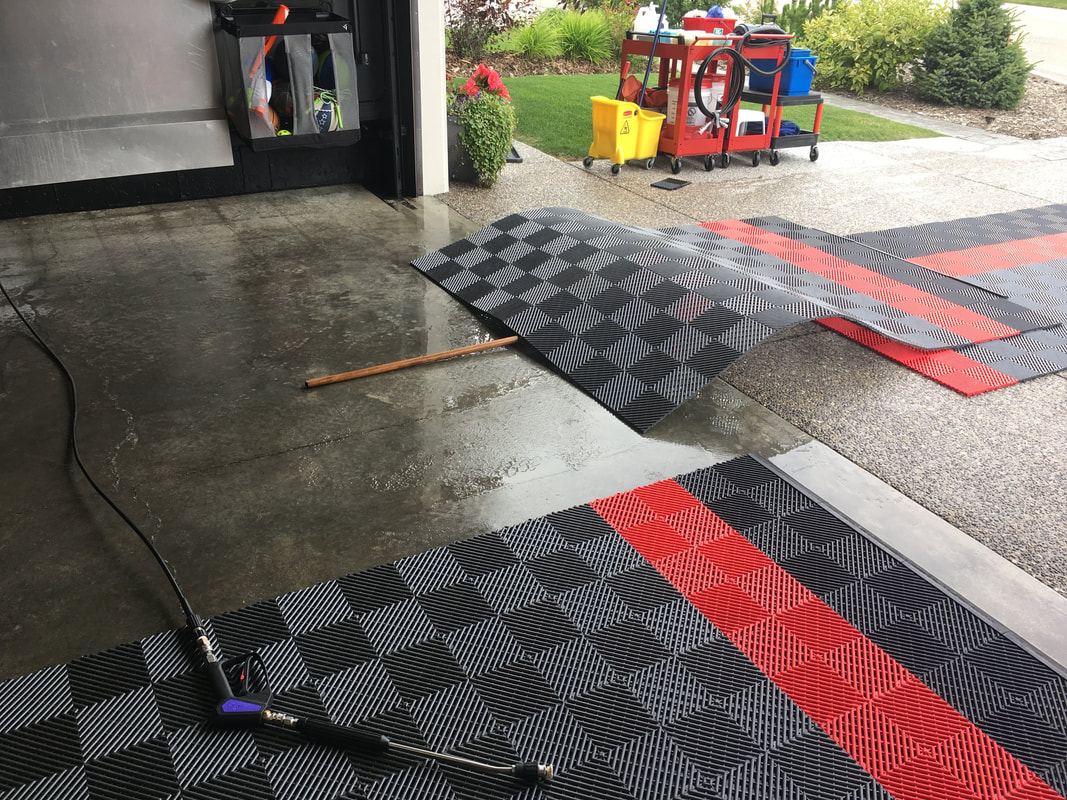
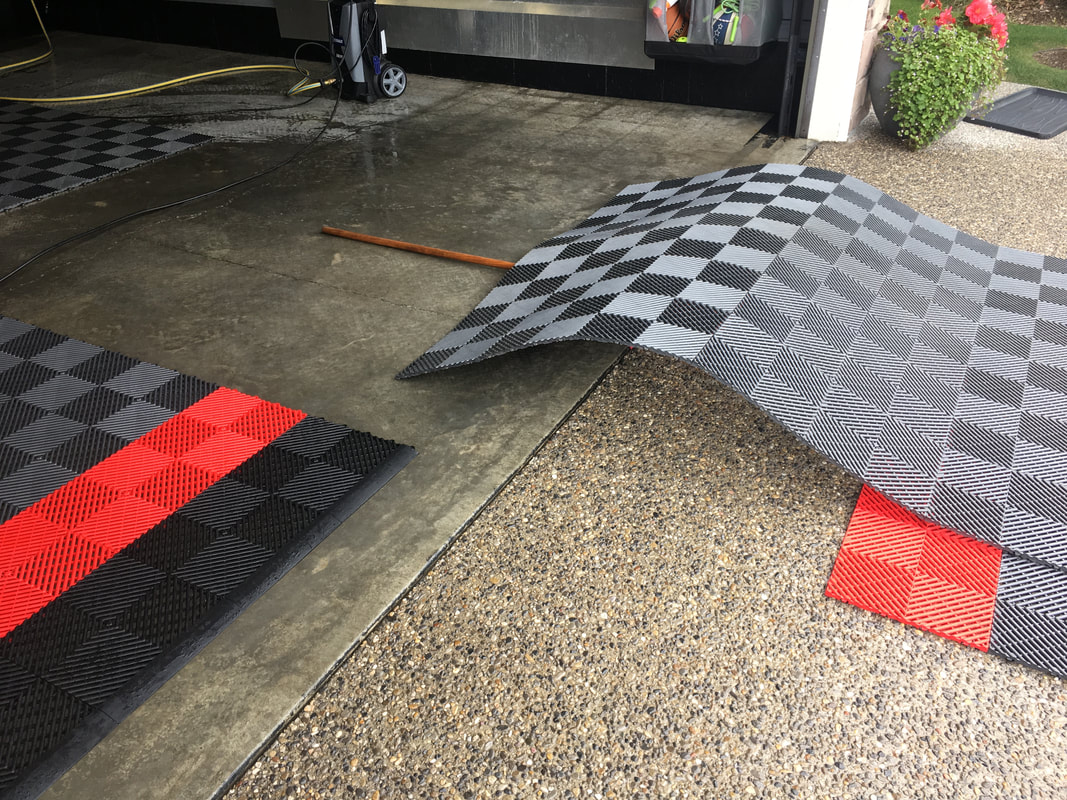
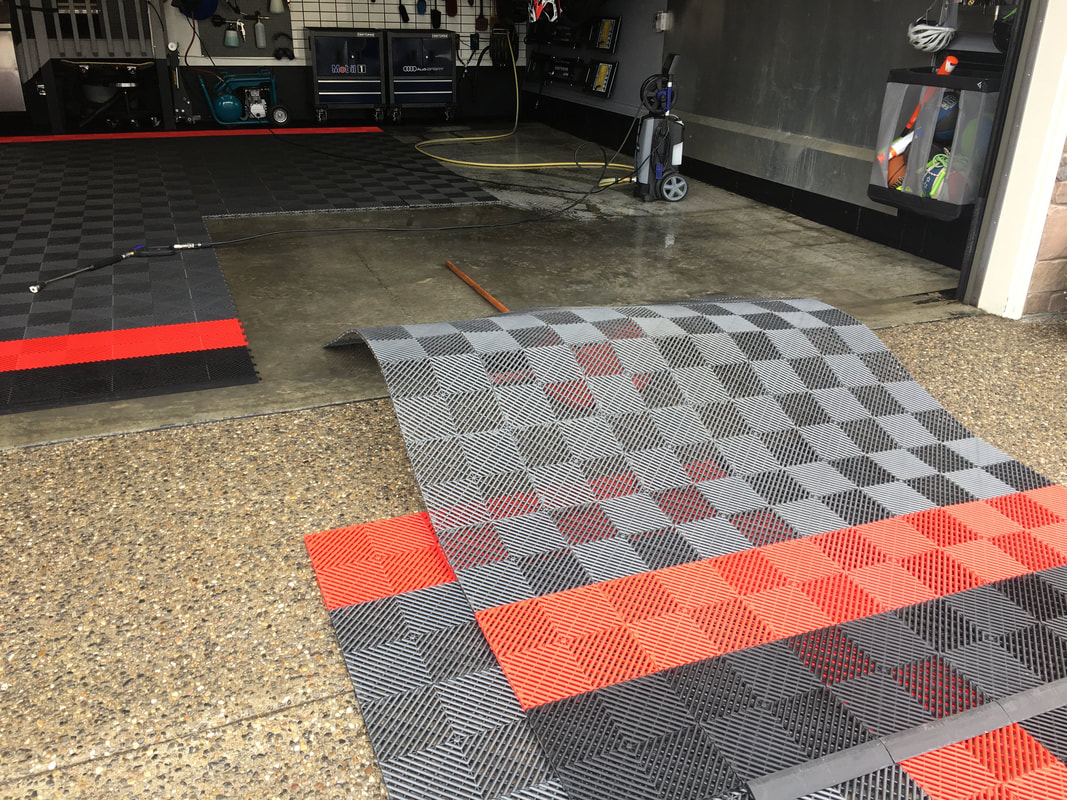
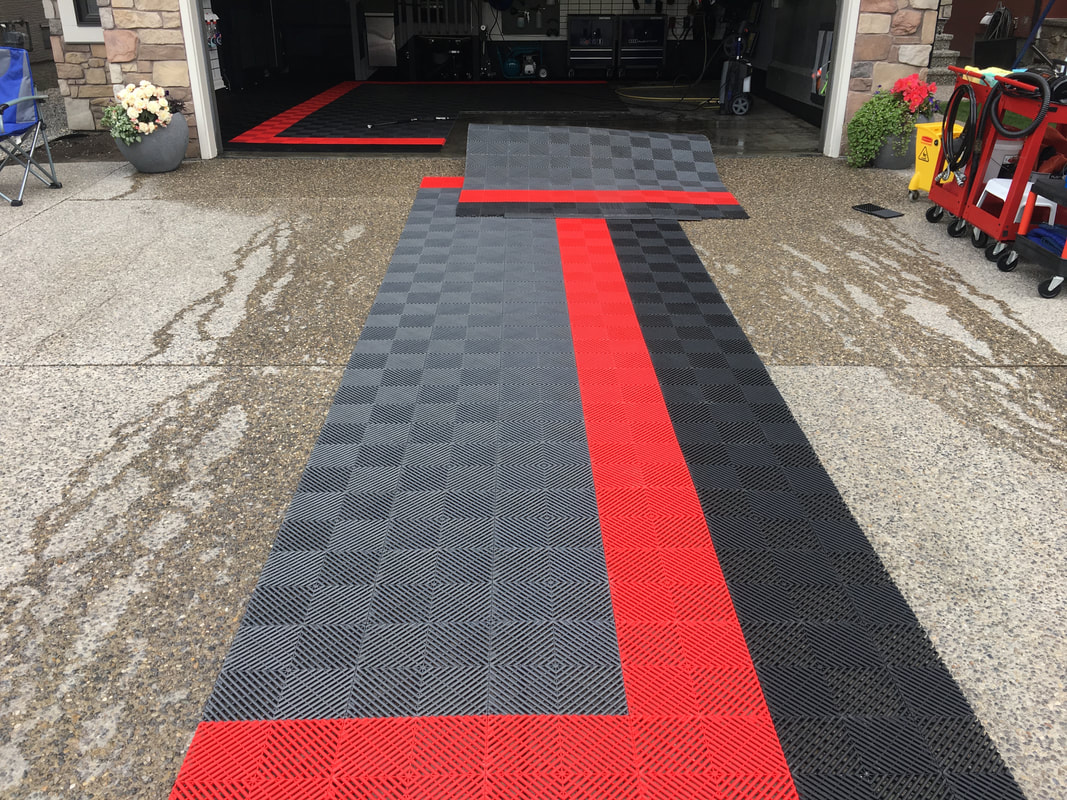
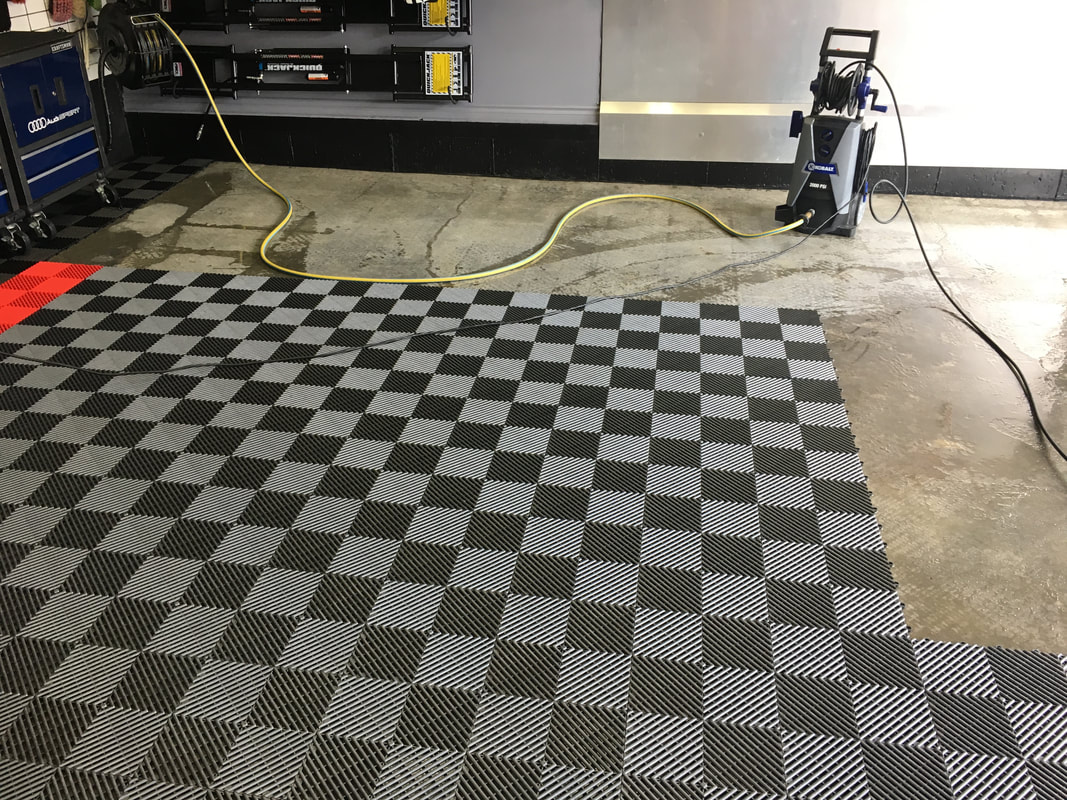
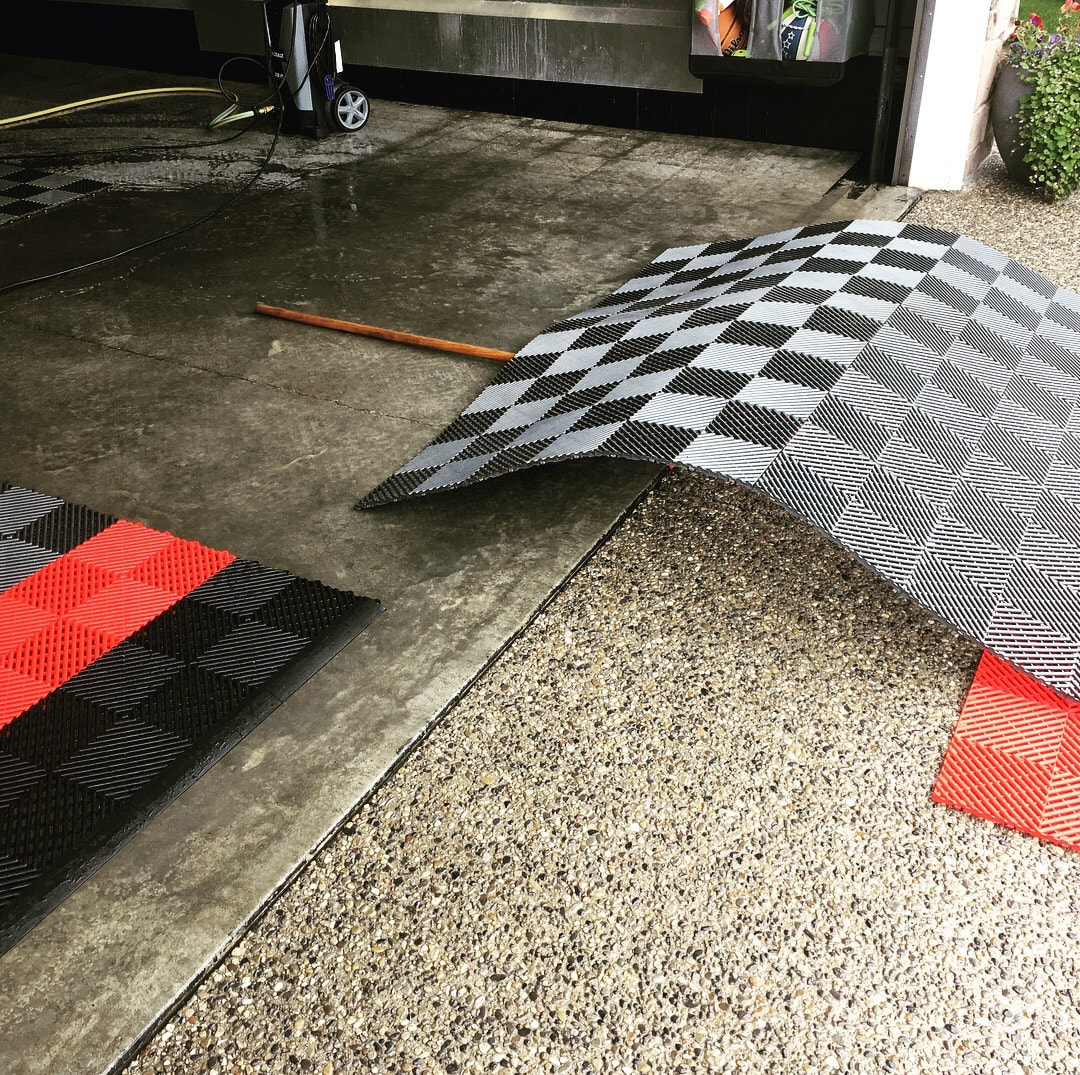
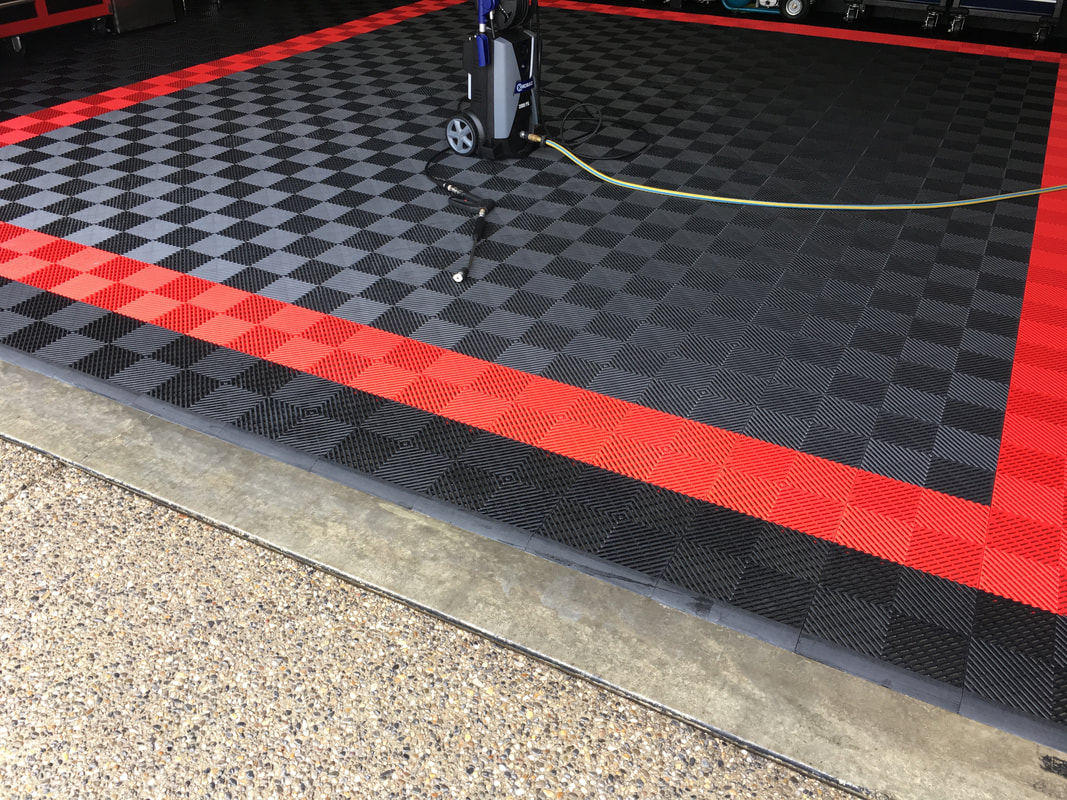
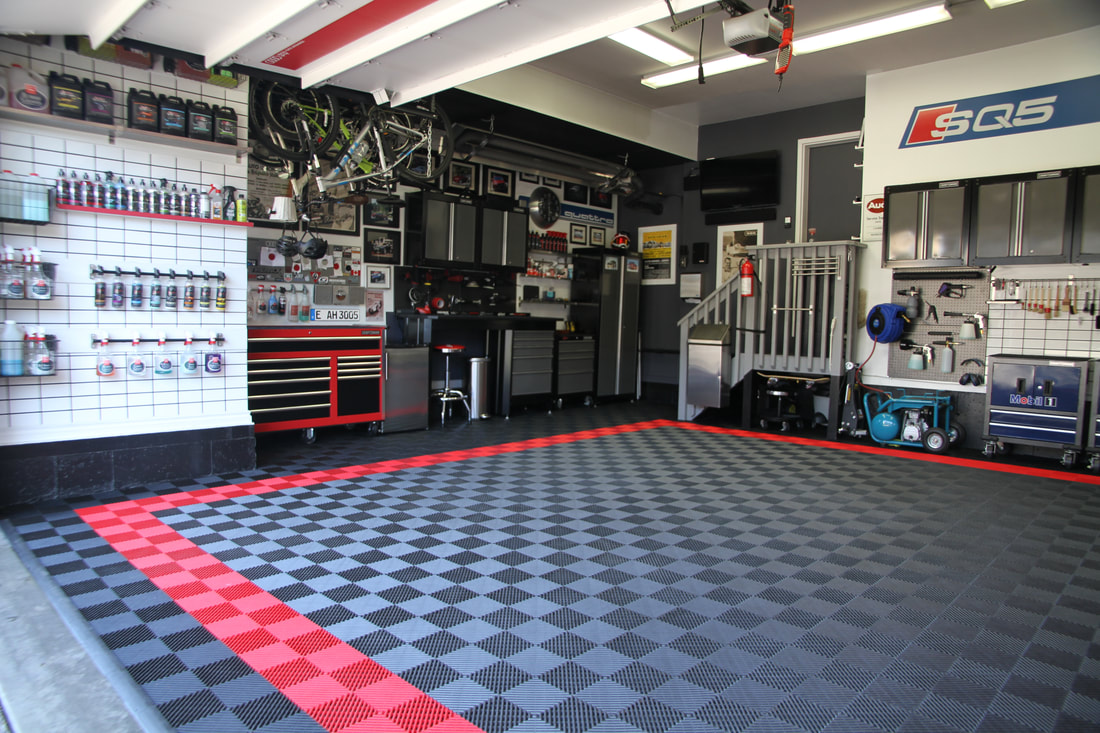
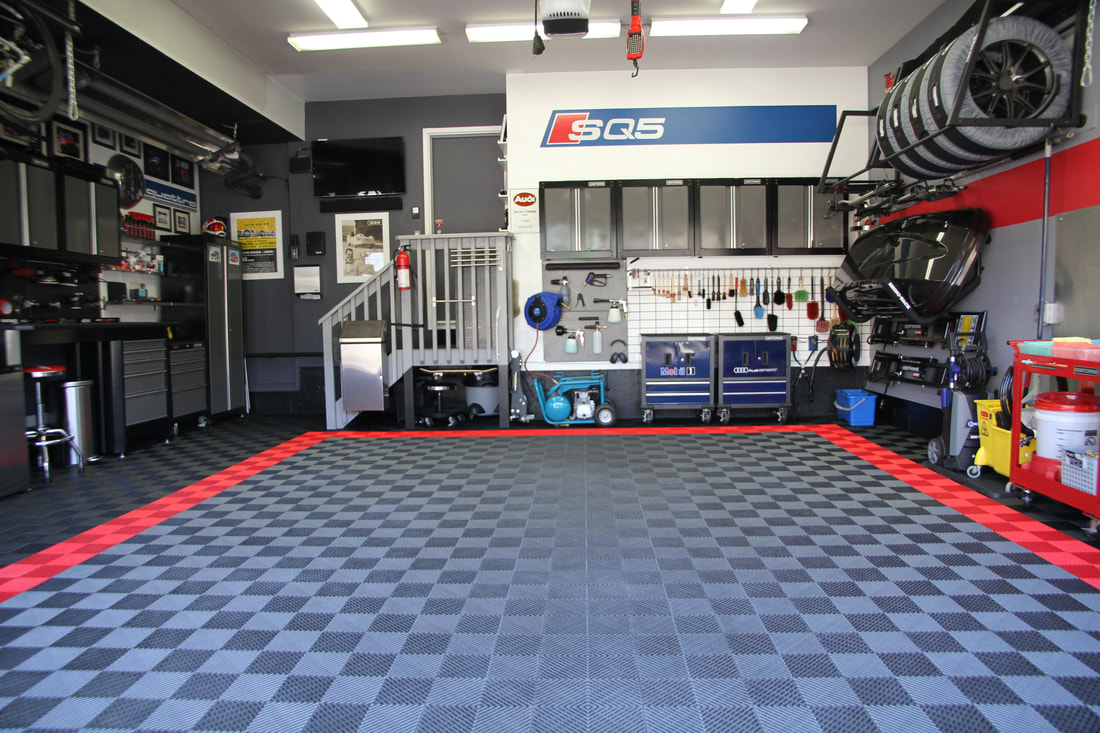
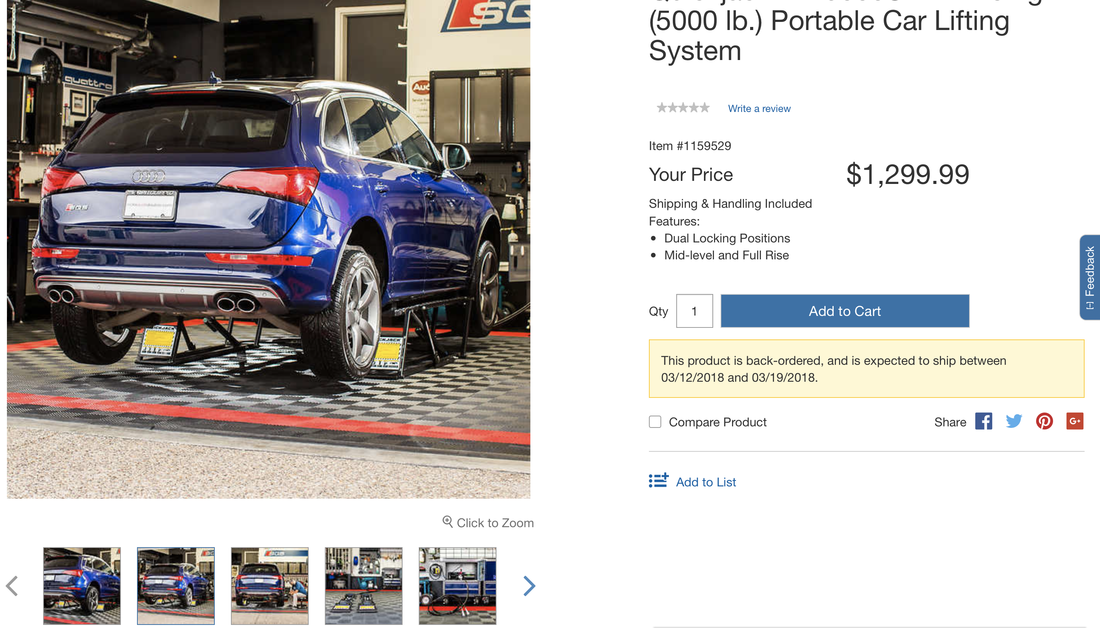
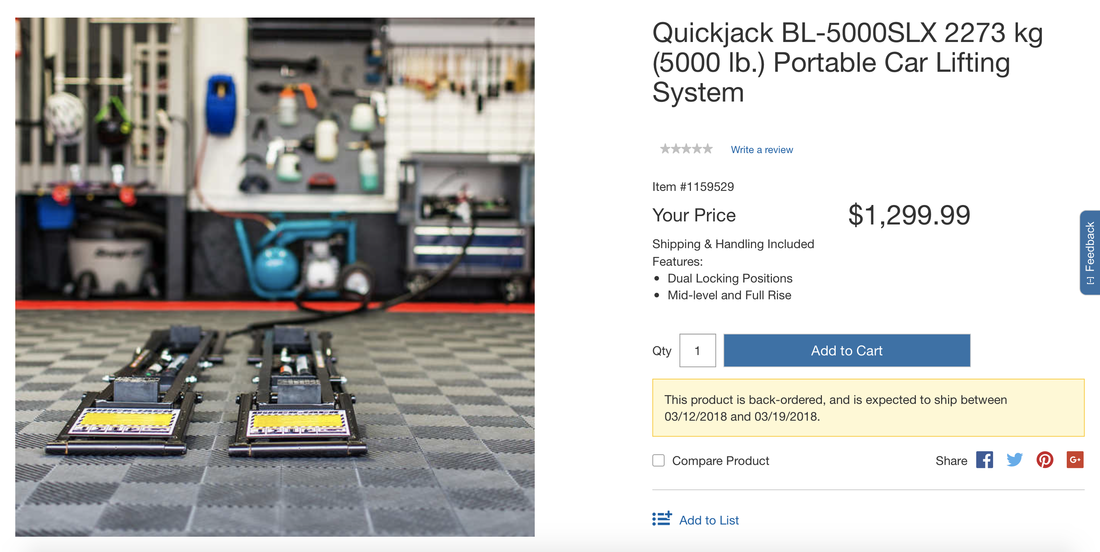
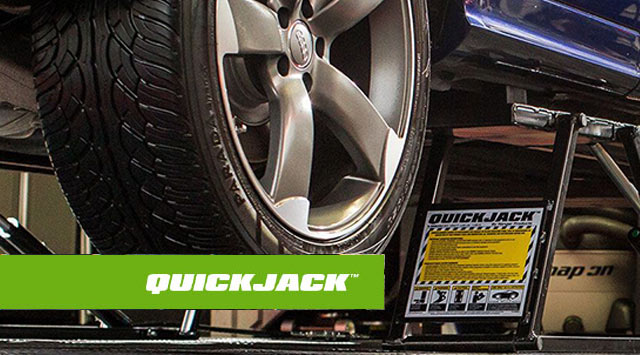
After I parted ways with my RaceDeck Free Flow floor, there was a period of time when I was living with a bare concrete floor. Thankfully, it was only for a few weeks, but the experience left a mark on me and helped to solidify my belief that a modular flooring is a better option than an epoxy coating. These photos demonstrate the constant battle I face with water accumulating on the floor. After two weeks of having to watch where I stepped so I didn't track the filth all over the garage and into my car, I was relieved when my Swisstrax order finally arrived. I understand that epoxy is the option some garage owners prefer, but not having to worry about where I step, or what I step in is a massive advantage, in my mind, to having a modular tile floor. My Swisstrax floor is always dry despite the constant snow that gets tracked in on the tires and undercarriage of my car. While I do think epoxy coatings look nice, I would be constantly dancing around the garage trying to avoid slop and water and that's just not something I have any interest in doing. After three weeks of suffering with a bare concrete floor, my Swisstrax floor arrived this weekend. Here are some photos of the install process and final result. I am very pleased with how things have come together. I need two Pearl Grey tiles and the edges weren't included with the order, so it's about 98% complete at this point. I am looking forward to putting it to good use and sharing my insights into its performance. Here's a video I put together:  After many years, I have decided to part with my RaceDeck Free Flow floor. I found a local buyer who picked it up a few weeks ago. Living without a flooring system for the past little while has been terrible. I am really looking forward to installing my new floor soon. Stay tuned to see what I have planned! Completing a number of detailing projects meant the floor was in dire need of a cleanse. Here are some photos showing the process I follow when the floor needs cleaning. Here's a collection of photos that represent the current state of my garage. No major changes, just little tweaks here and there. I'm pretty much satisfied with how I have things laid out. Time to just use and enjoy it.  If you click, on "Automotive and Tires" on the main page of the Costco website, you will see a large advertisement for the QuickJack portable lift featuring a stunning photo of my old SQ5 in my garage. Over the years, I have been fortunate to have formed some wonderful relationships with some of my favorite retailers. The team at QuickJack and I have enjoyed a mutually beneficial relationship since I first added a QuickJack to my garage back in the Spring of 2016 and I am pleased to see these amazing shots getting some good press. I recently performed a "no rinse" wash on my SQ5. The weather here has been cold and sloppy so a no-rinse wash is about all I can do to keep my car clean. Here is a video I put together demonstrating my wash process when it is too cold to use my typical 2-bucket wash system. In addition to cleaning my SQ5, this video shows how I quickly clean my garage floor ahead of performing the no-rinse wash. A recent spat of mild weather enabled me to do a thorough spring clean of the garage. The floor wasn't too bad, but a lot of grime and debris was lurking in the vents of the Free Flow tiles and it was time to get rid of it. The entire process took a few hours. I put a video together that demonstrates each step of the process. Enjoy. It's probably the most common question I get; is a RaceDeck Free Flow floor system a good idea for people who endure winter? The answer is dependent on a number of factors, but my short answer is "Yes". The Free Flow tiles provides a crucial layer of protection from the dirty water that constantly pools on garage floors during the winter. Some of the muck that drops off the undercarriage dries to the top of the tiles, but that is easily dealt with by a shopvac and mop. I can walk around my garage in my socks minutes after pulling into my garage. Another thing I appreciate about the RaceDeck is that I am not grinding gravel into an epoxy finish every time I pull into the garage. Right now, the floor of my garage is a total mess. I have a few months of compiled crud on the floor, but it's all hidden below the tile floor. I know it's there, but I don't have to do anything about it. When the next heavy chinook hits, I will perform a thorough clean of the floor and tiles. In the meantime, here's a quick little vid I posted on my Instagram account. You will hear the crackle of gravel and debris as I walk on the tiles, but the mic on my iPhone is making that sound much louder than it actually is. Just imagine doing this on an epoxy-coated floor. The RaceDeck Free Flow system has been my saving grace since its install six years ago. Some maintenance is required, but there is no floor that will keep itself clean during the winter. Let me know if you have any questions about my floor by shooting me an email here.
It's been quite a while since I updated this blog. The holiday season was a whirlwind with family staying with us, and winter's tight grip on the city has been keeping me busy. After about a month of freezing temperatures, the mild weather arrived so I have been doing my best to combat the salt and mud that the nice weather generates. Keeping the exterior clean is a hopeless endeavor, but I will never let the mess infiltrate my interior! Floor protectionI have two sets of all-weather interior mats. One set by Husky and the other by WeatherTech. I can't say I am in love with either of them, but they are what I have so I make the most of it. It's nice having a second set at the ready for when the other set is caked with salt residue and mud. The Husky's don't fit as well as the WT's, but they do offer more protection. The WT's have a lower profile which allows water to escape and stain the carpet. I had to remove some salt residue that had dried into the carpet. I used my Mytee Steamer and Rupes iBrid as you can see in the photos below. I used Griot Garage's Carpet Cleaner and used my steamer to open up the carpet fibres. I worked the cleaner into the carpet using my iBrid. The slideshow below should give you a good idea of the various steps I take to maintain a clean interior. I have had to perform this job numerous times in the past month or so. Cleaning Garage FloorI have not been able to perform a full maintenance wash of my floor this winter. Each day, my car is dragging in mud and slop and it ends up falling to the floor and seeping through the cracks in the Free Flow tiles. On particularly bad days, huge chunks of debris fall from the undercarriage and wheel wheels and compile on the tiles. I use my shopvac to clean up the mess and finish with a quick mop. It is not a particularly difficult job, it just takes a bit of time. I am waiting for some really mild weather to hit so I can actually drag the floor out to the driveway and clean the mess off the garage floor. As it is now, there is a lot of mess under the tiles, but the tiles themselves remain clean as long as I mop the floor. The slideshow below should give you a good idea of what I'm dealing with.
Since purchasing my BL-5000SLX QuickJack lift, I have been putting it to the test quite regularly. I have taken the wheels off a number of times to gain access to the wheel wells and I have been able to perform some touch ups on the paint around the rotor hats. It has been a helpful tool as well as a cool one. My friend, Geoff popped by a little while ago with his camera gear to snap some shots of the QuickJack in action and here's a little slideshow that demonstrates how it has helped me raise my detailing game. The photos give you an idea of how I have the system set up. Like I have said before, it works great for my needs and it is a purchase I am very happy with. I bribed my photographer friend, Geoff to snap some more shots of my garage. This time, I wanted to focus on some of the work I perform in the garage (detailing, wheel swaps) as well as some of the main equipment I use. The QuickJack got quite a bit of camera time, and I'm very eager to see how the shots turned out. Geoff sent me this teaser pic, so I hope the rest are just as cool. Stay tuned. 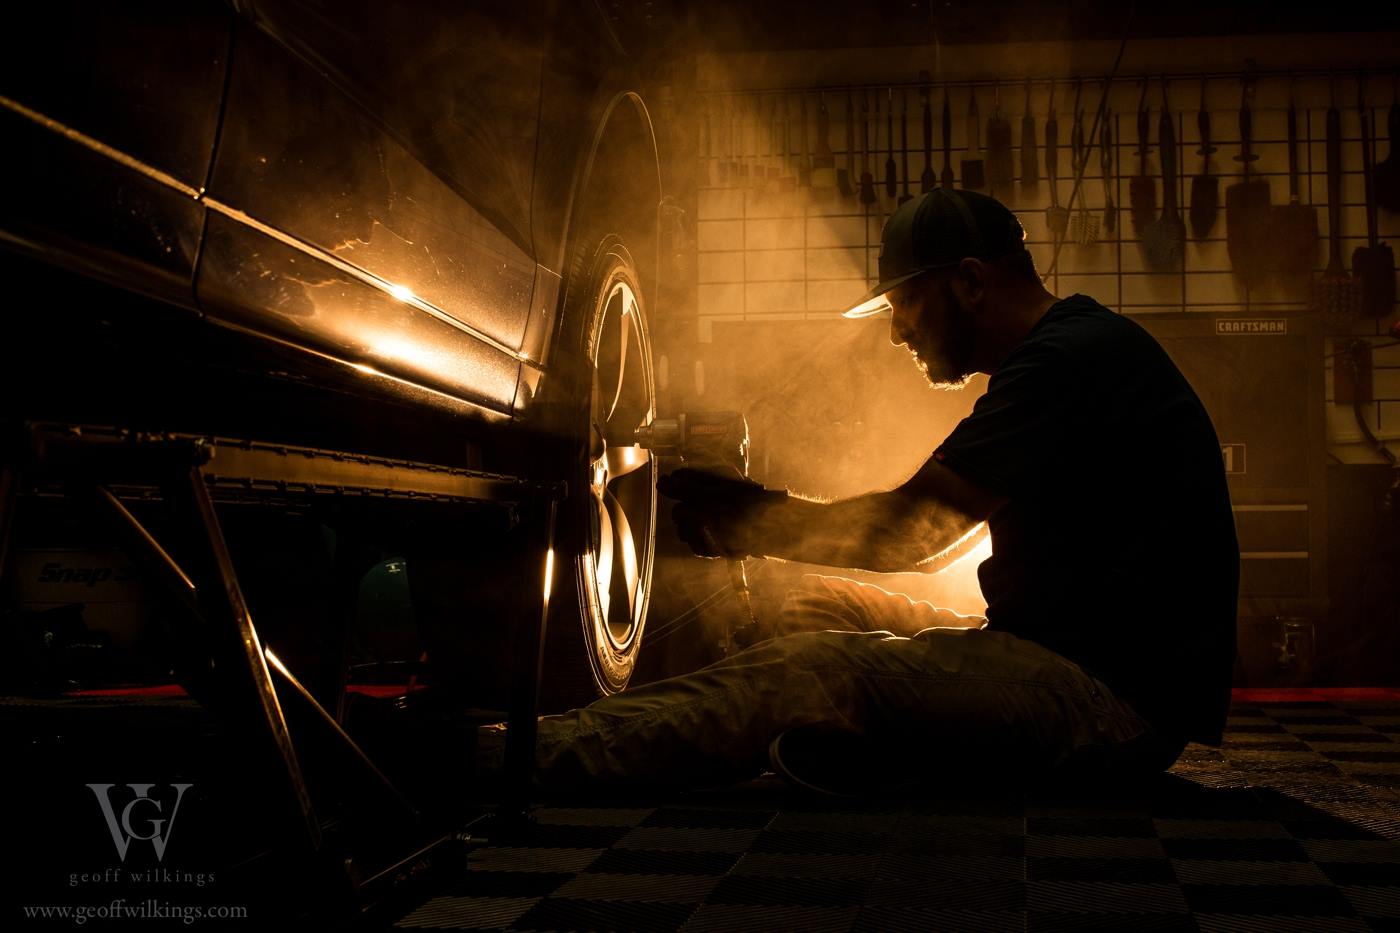 The title says it all. I finished applying the high gloss acrylic sealer to the aggregate driveway. I do this every year to combat premature aging due to the sun and the salt on the winter roads. Here's some photos that illustrate the process. The annual process of sealing my garage floor and driveway is in full swing. I removed the RaceDeck floor and pressure washed the concrete. I allowed it to dry for a few hours and then took my Master Blaster Car Dryer to the cracks to ensure all the moisture was dealt with. I started by using a 1" brush to apply a liberal coating of sealant to the cracks in the pad. I really let the sealant seep down into the cracks and fill up the little gaps. Then, it was time to apply a thick coat of the sealant to the vulnerable parts of the pad. The stuff dries relatively quickly, so I will be pulling the floor back in soon. At that point, I will shift my efforts to completing the driveway. Sidenote: The sealant went up in price from $119/pail last year to $168. Robbery! Here's a slideshow showing my work: This virtual tour should give you a great sense of how things are laid out in my garage. I have to say, things are approaching perfection. It's just a matter of fine tuning the little details at this point. I hope you enjoy. I had a few hours to myself today, so I decided to give the floor a thorough clean. This meant removing every RaceDeck tile and power washing the entire floor underneath. Moving items in the garage is a breeze with the RaceDeck floor, so its a relatively easy process. Here's some shots of the big event. The QuickJack does what it says it does, and it lifted my SQ5 in fine fashion. I was very pleased that the even weight distribution of the QuickJack meant there were no divots or impressions in my RaceDeck Free Flow floor. Here's some shots, but you'll have to excuse the current state of the SQ5, it has been a busy and messy week. We actually had some snow on Thursday. |

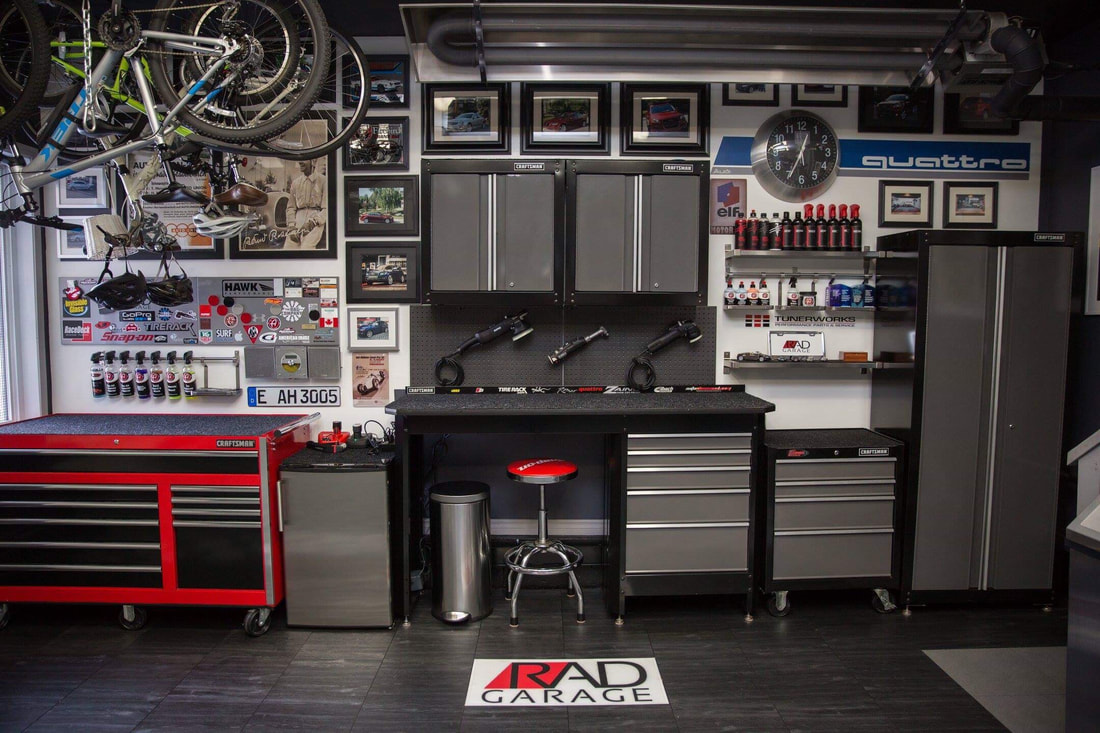
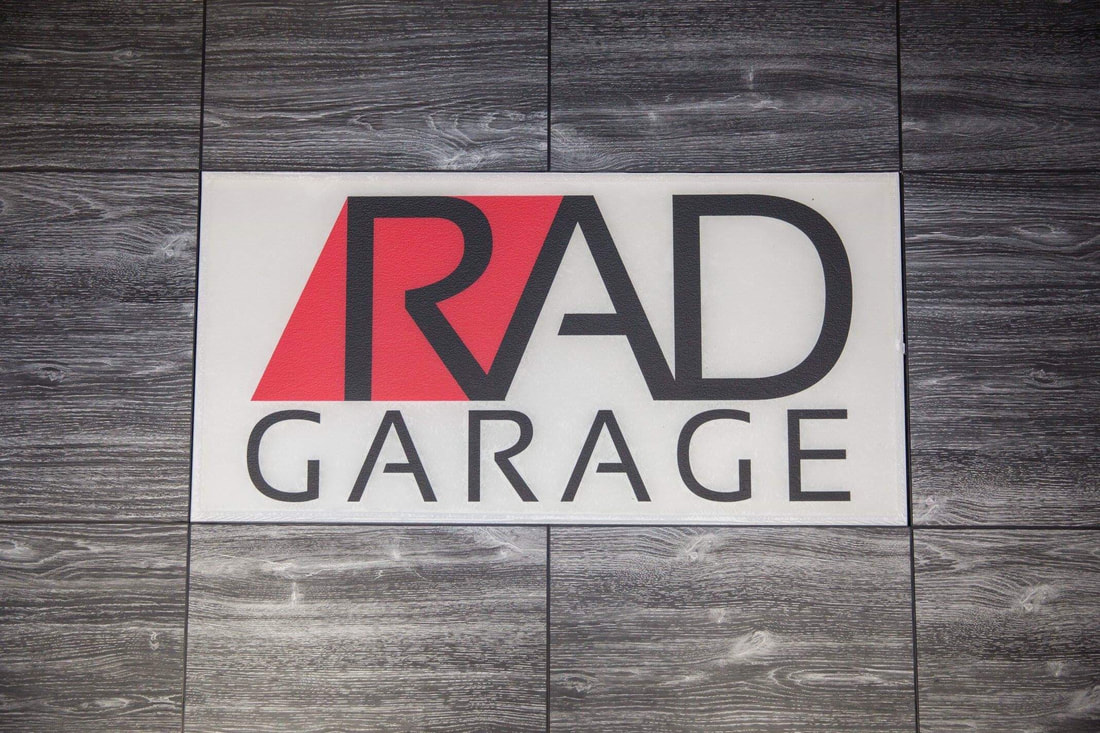
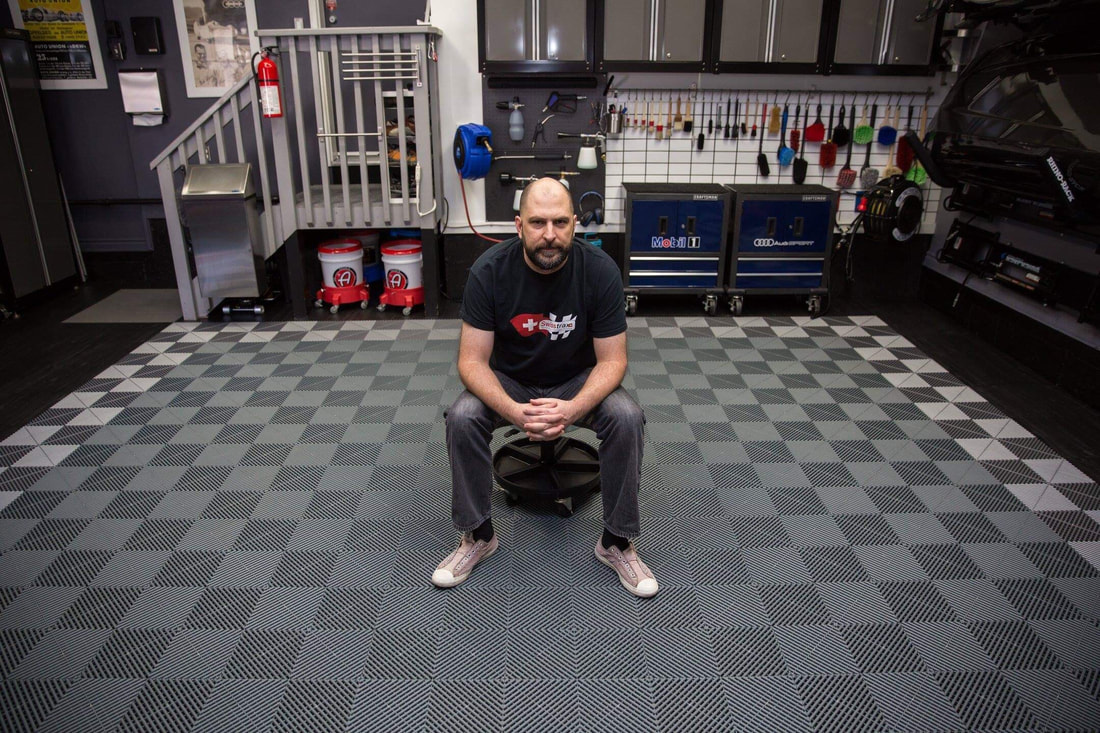
RAD GARAGE is my personal detailing theatre. I am a teacher who finds immense pleasure in completing deeply therapeutic, thorough and highly satisfying detailing projects in my residential garage. I have converted my suburban double car garage into a world class detailing environment and I enjoy caring for my own car and select cars belonging to others. The garage and the work I complete in it have allowed me to connect with other detailing enthusiasts from around the world.

I have teamed up with Teespring to offer viewers an opportunity to grab some RAD gear! Click here to see the current inventory of RAD merchandise available at my Teespring store!
Use "RAD10" to save yourself 10% until the end of March, 2021.

Carzilla is a local detailing store that caters to the North American community of professional and enthusiast detailers. I have been a longtime customer and I am fortunate to call the owner a friend. Besides stocking a vast quantity of top quality detailing products, the owner has supported various garage and detailing projects of mine over the years.
5% discount code
|


 RSS Feed