|
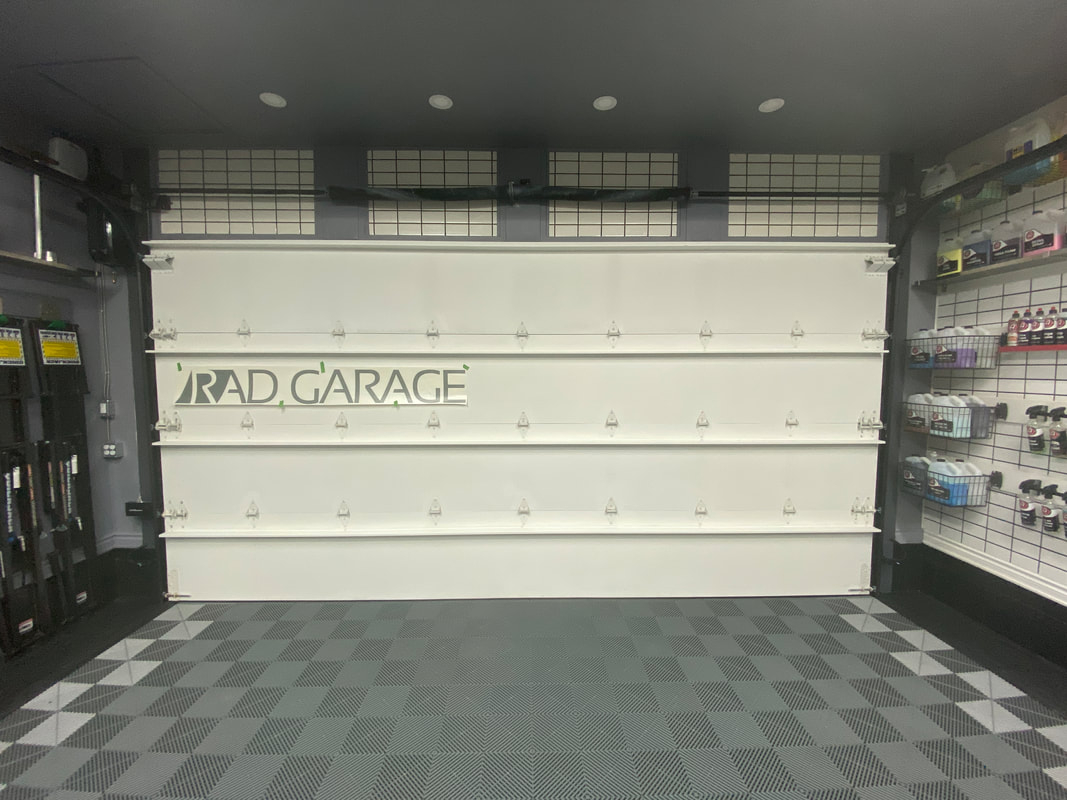
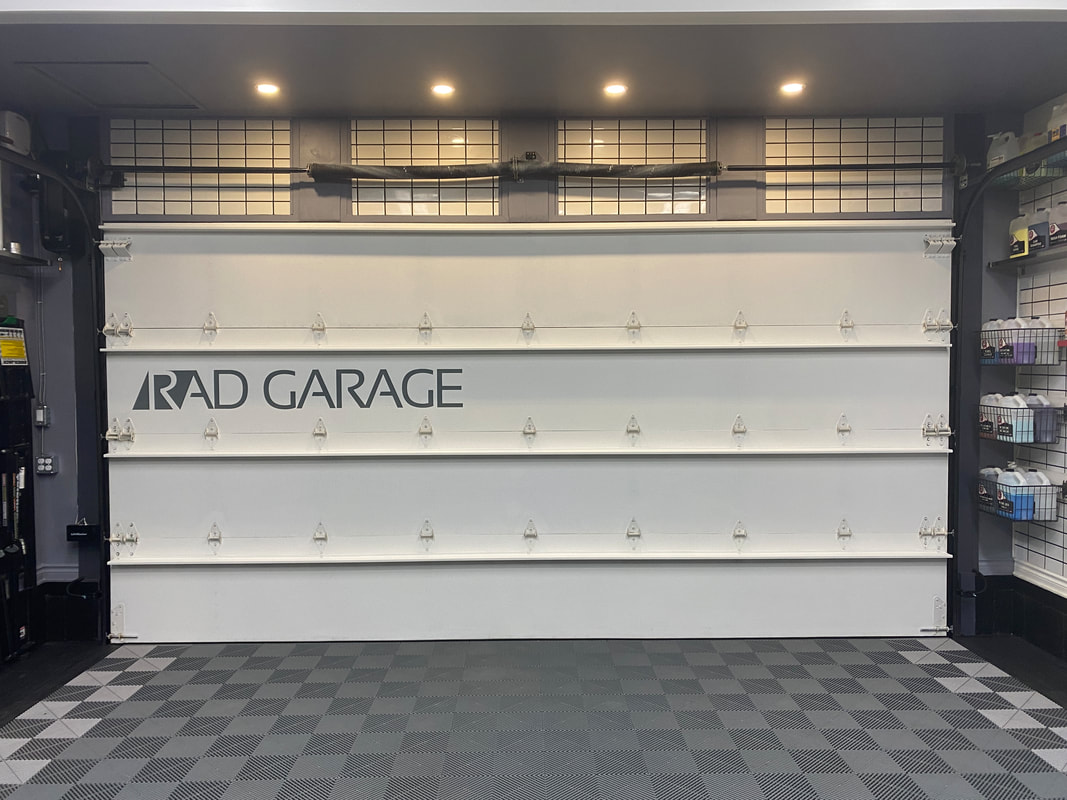
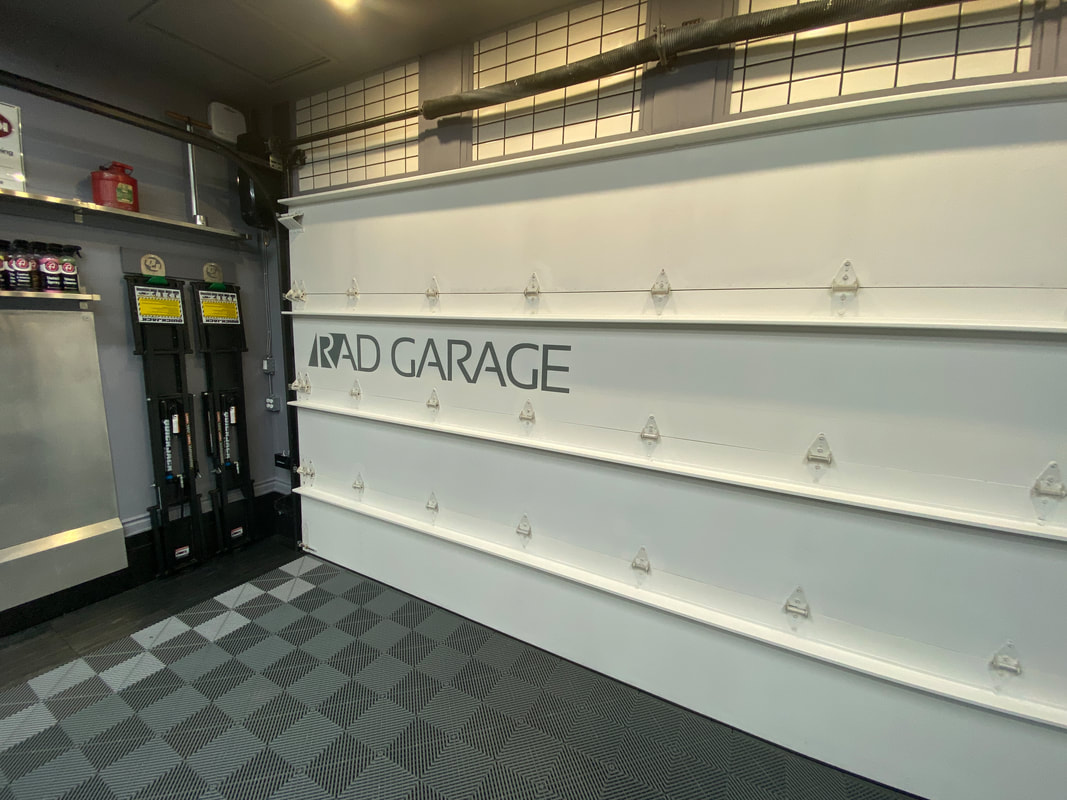
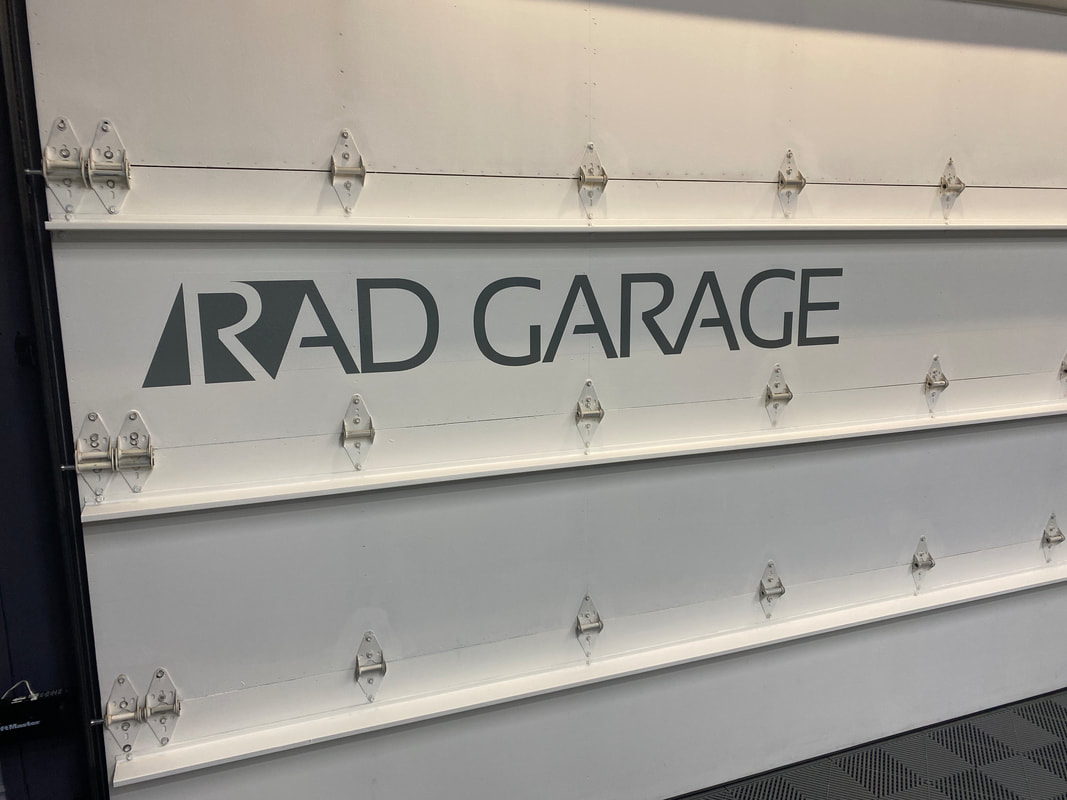
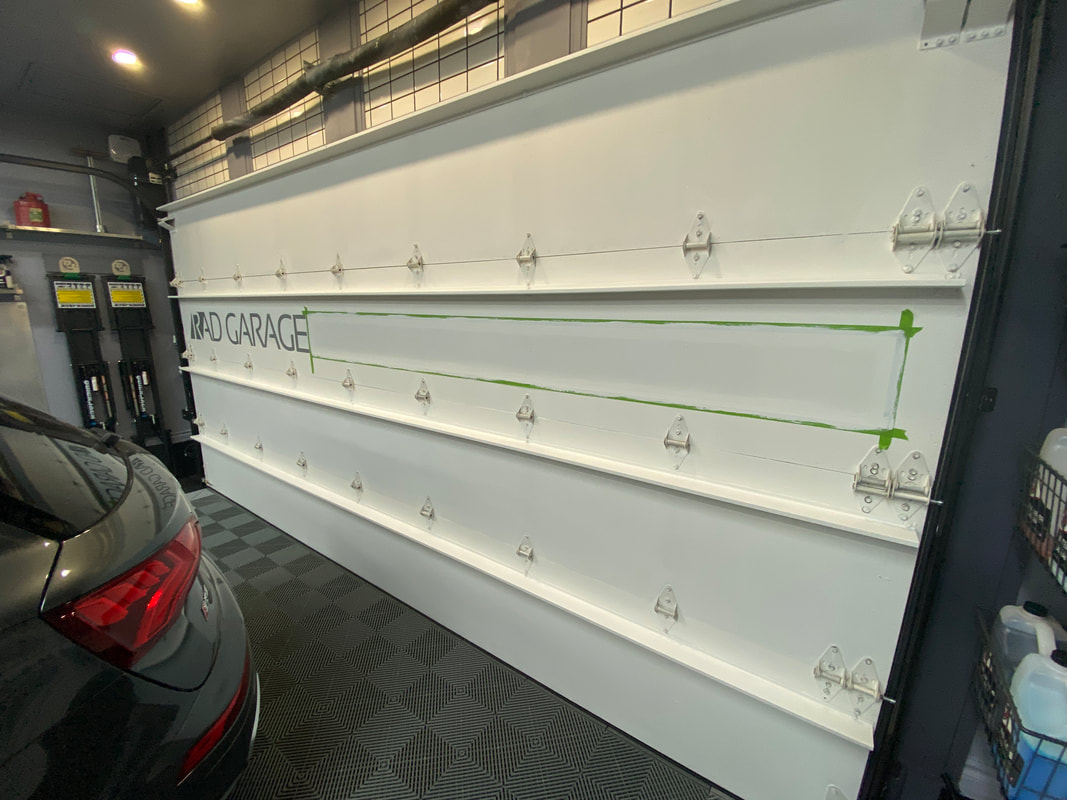
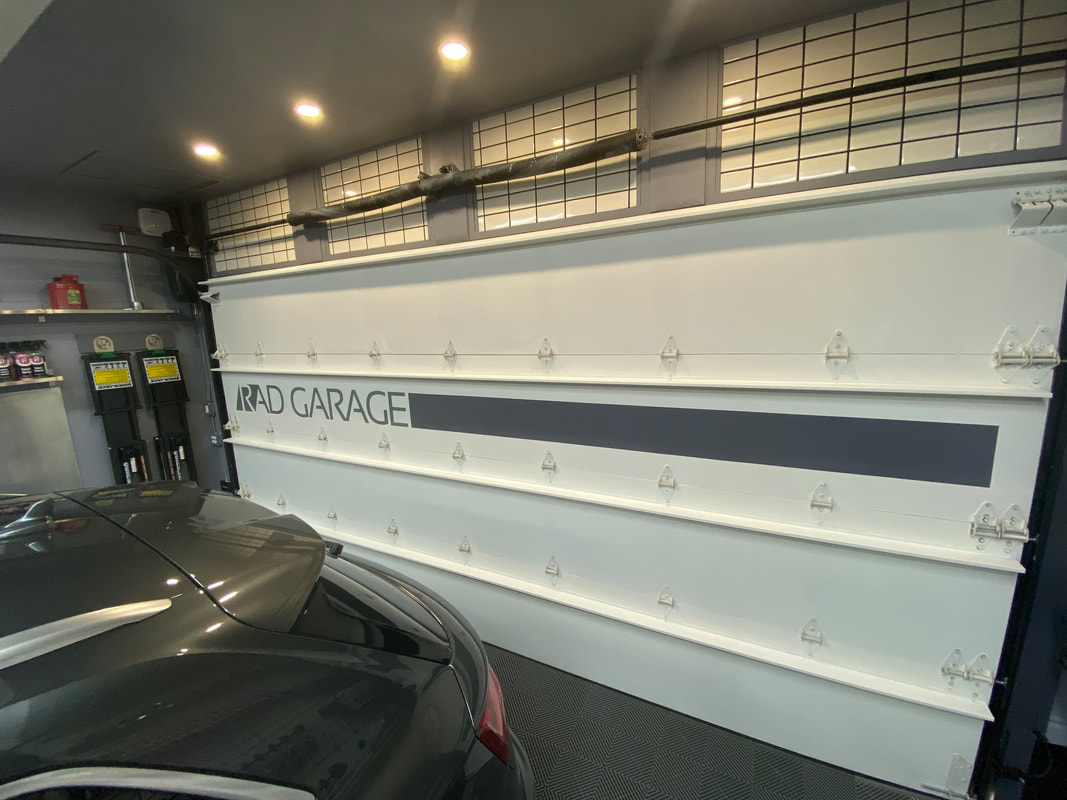
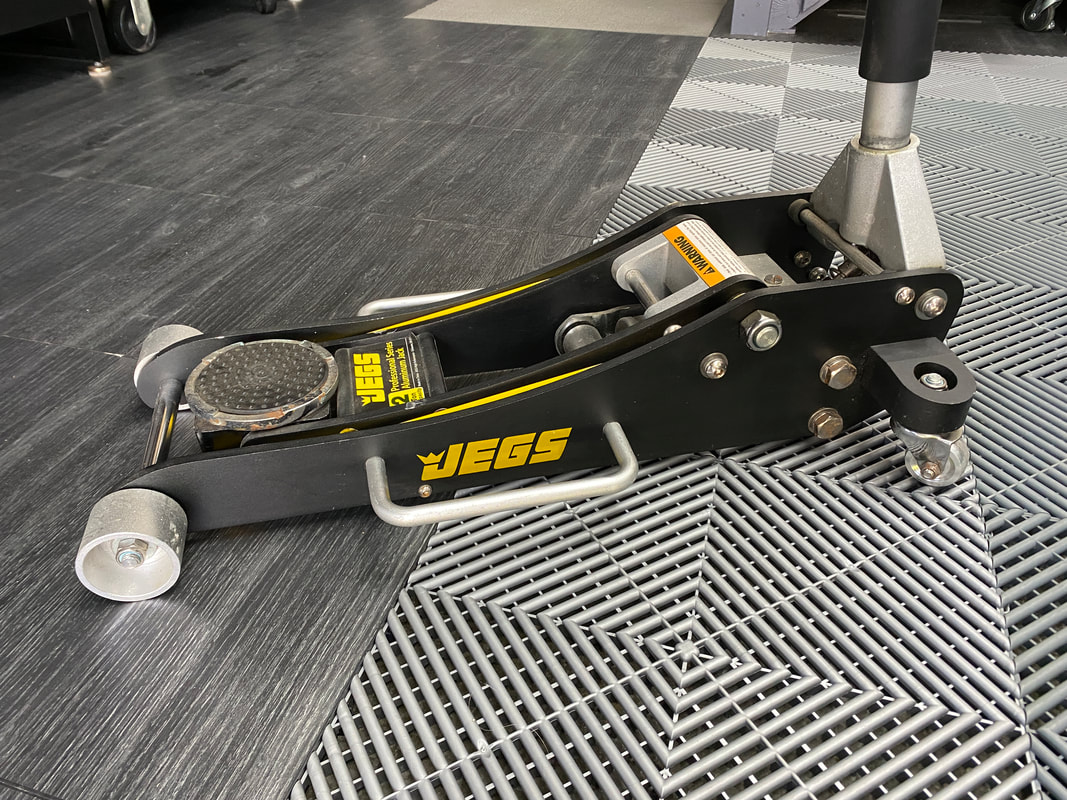
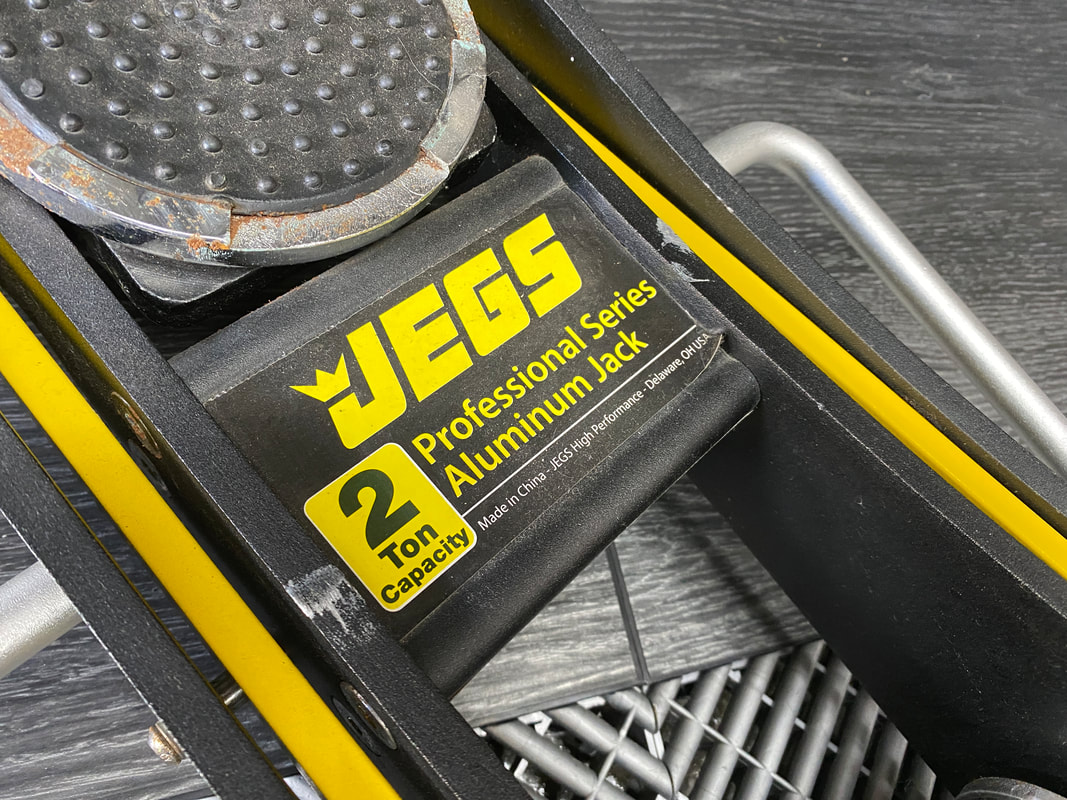
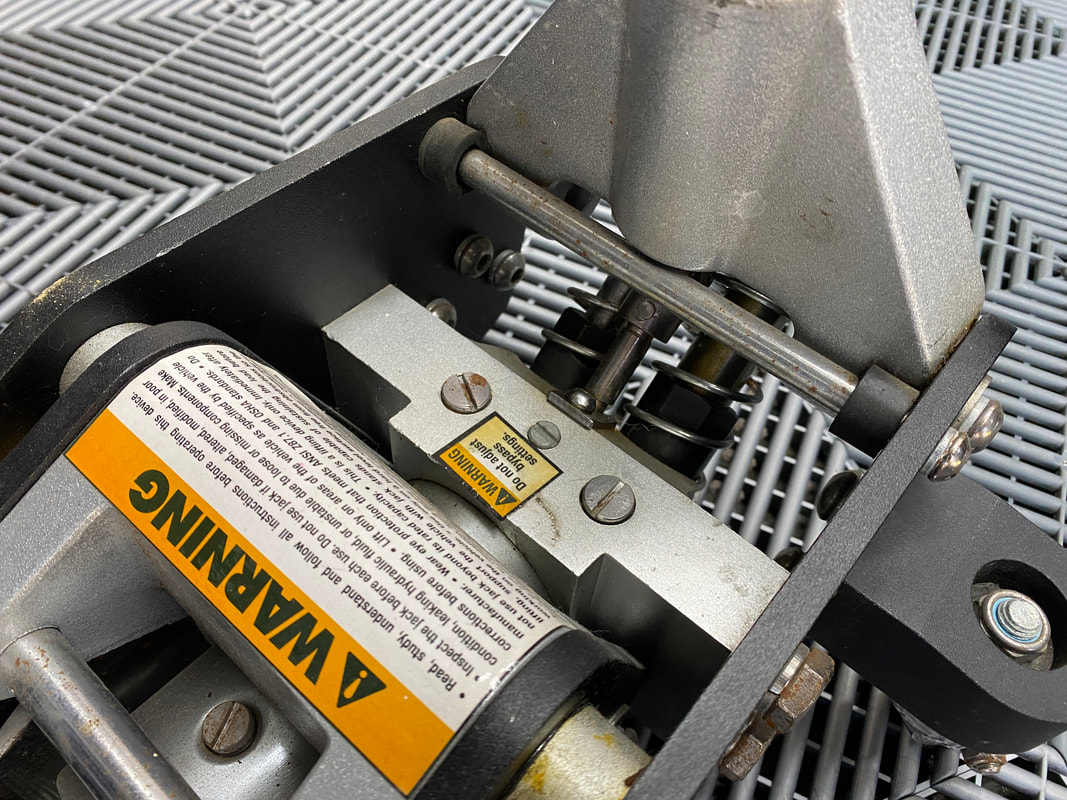
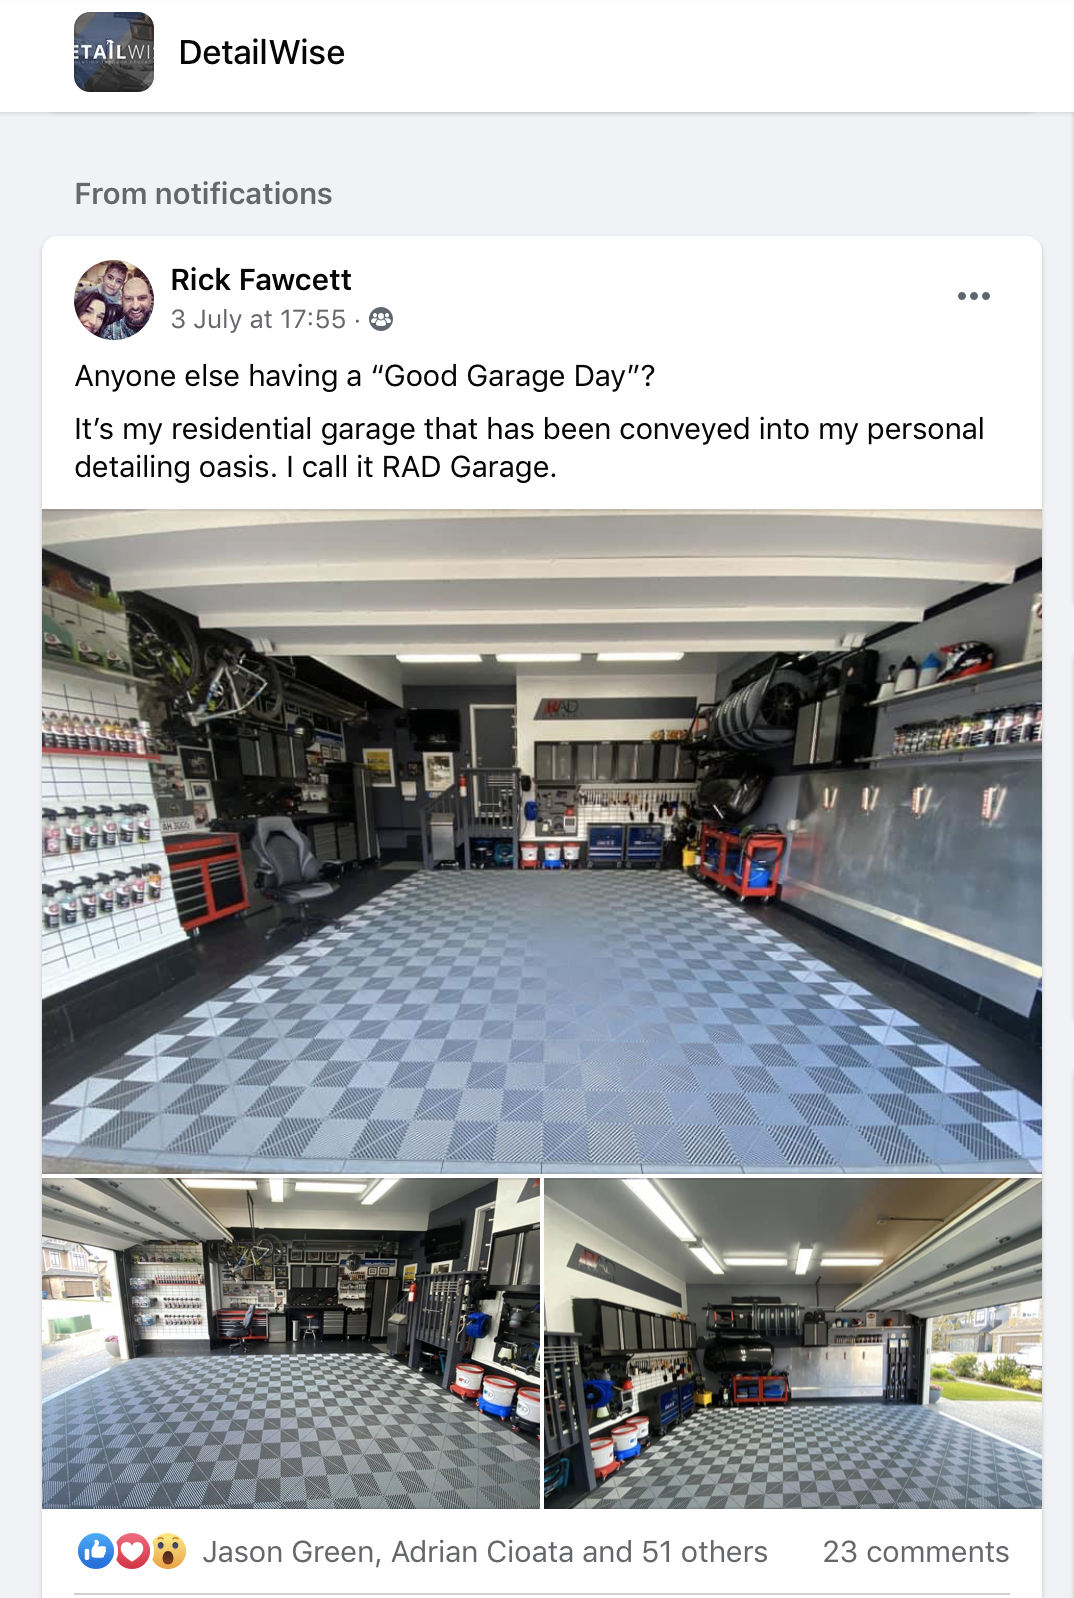
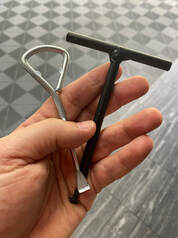
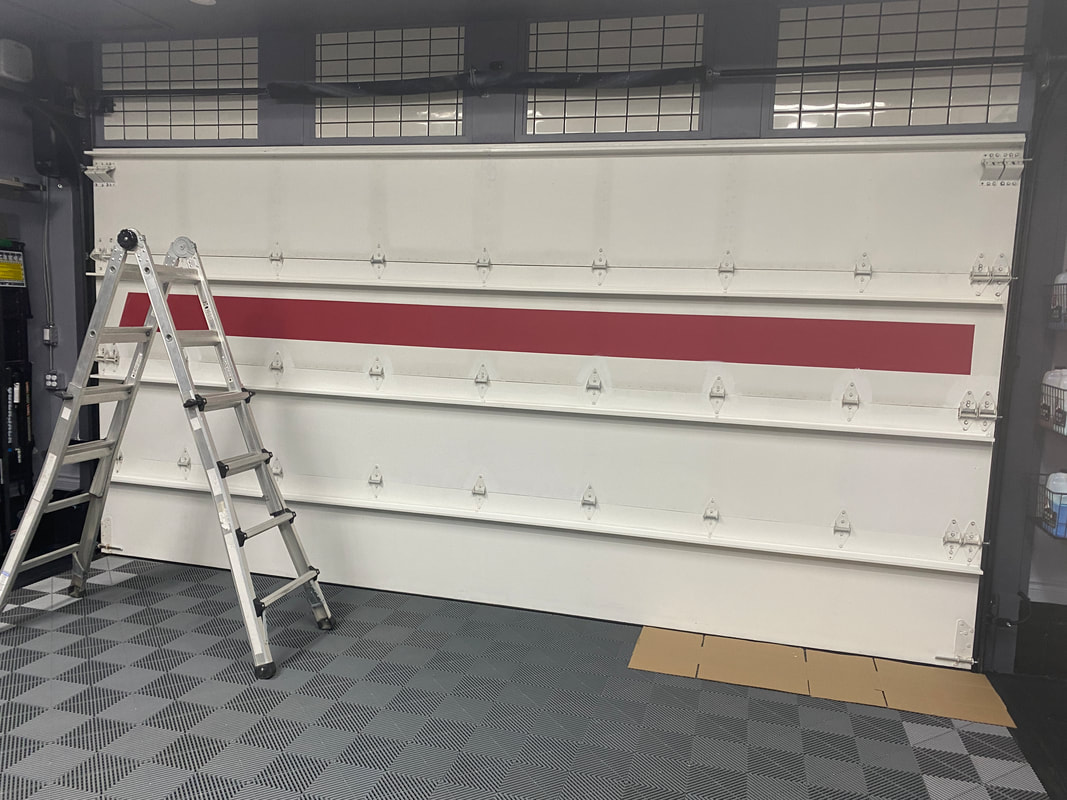
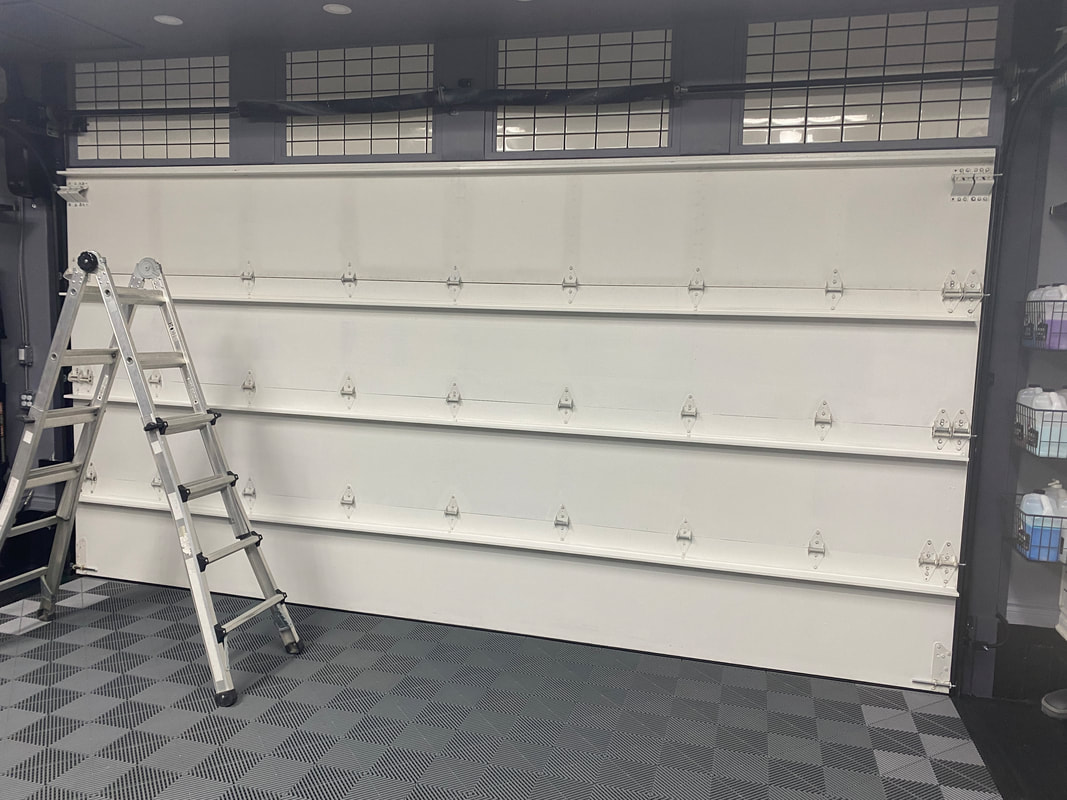
I refreshed the design on the back of the garage door. I had the team at Custom Decals YYC print me up a 9" decal and I then I painted a corresponding stripe. I went with grey for the decal and the stripe as to tie into the existing grey colour theme. I am quite happy with the results. * S O L D *This is such a great jack, but I just have no occasion to use it since I have the Quickjack. Rather than having it occupy valuable real estate under my stairs, I am looking to sell it. I'm asking $130. It was easily double that brand new. Let me know if you are interested. Local pick-up only. Click here to view the specifications for this awesome jack. I was feeling pretty good about the state of the garage the other day so I threw some photos on two different car/garage enthusiast Facebook groups I belong to. Obsessed Garage and DetailWise are private pages, but worth joining if you are interested in seeing the car and garage-related craziness other people are up to. I'm still in the research phase of this project, but I am starting to connect with potential contractors because I do have a vision for a system that would "catch" water before it leaves my garage. If you know someone who would be interested in helping me bring my vision to life, please shoot me a DM here. 
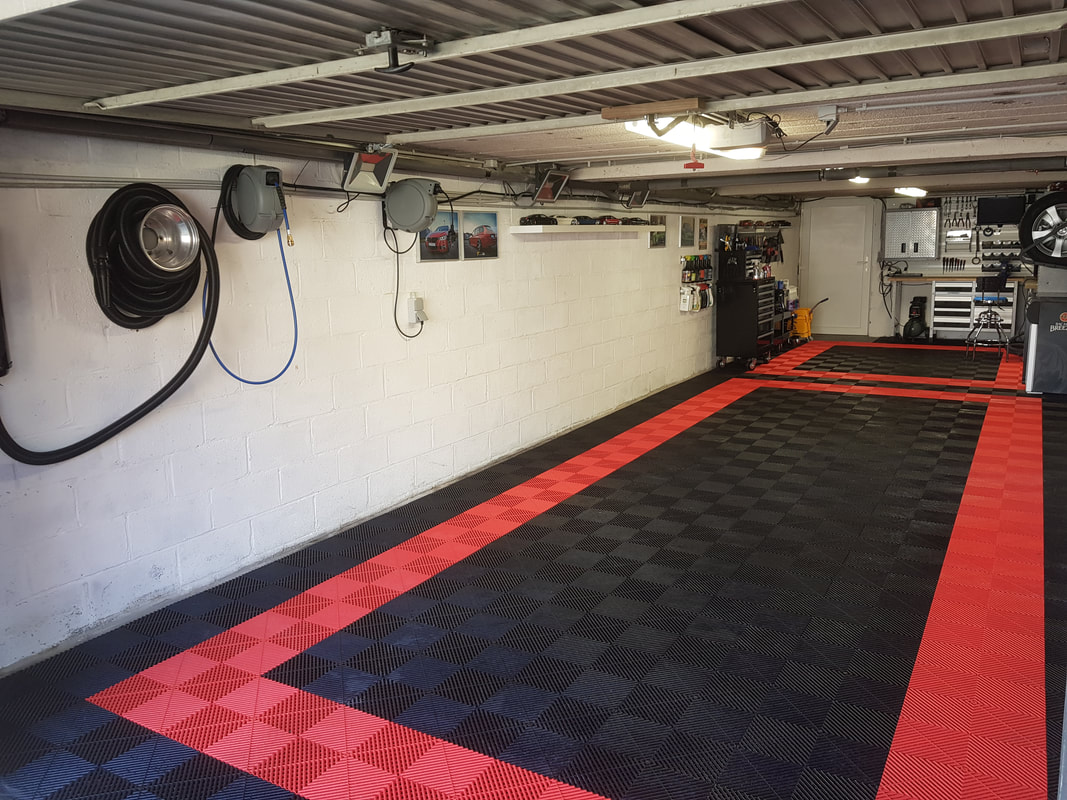
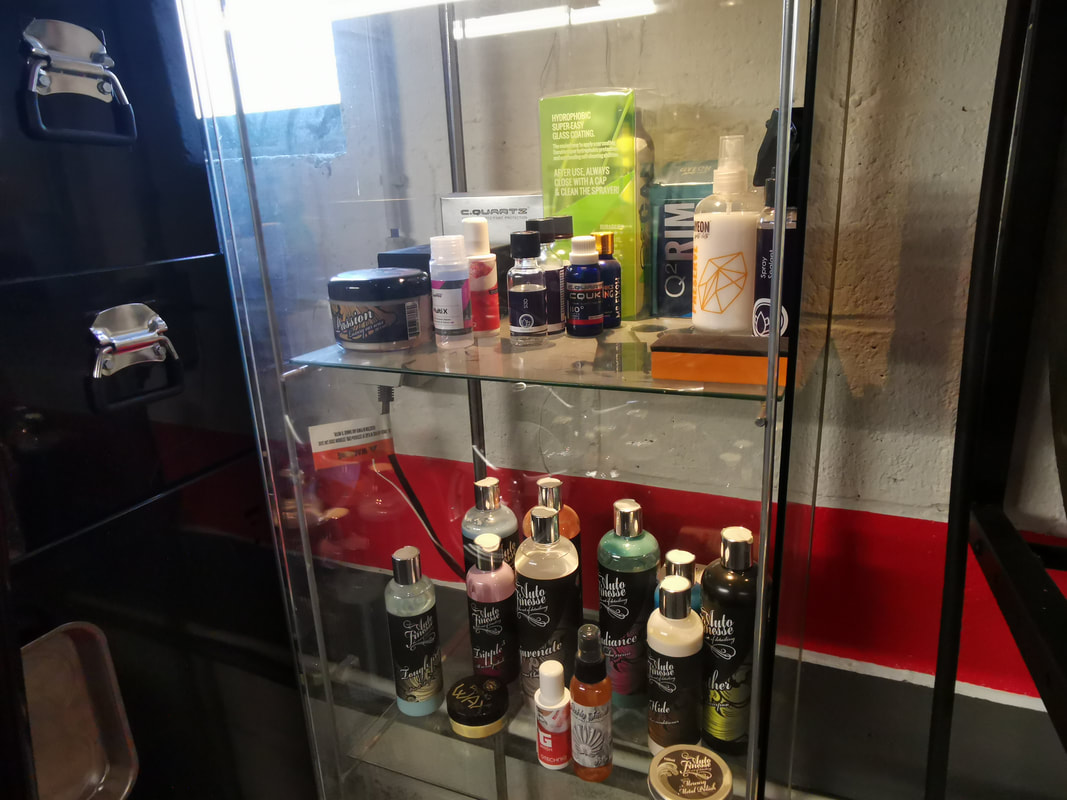
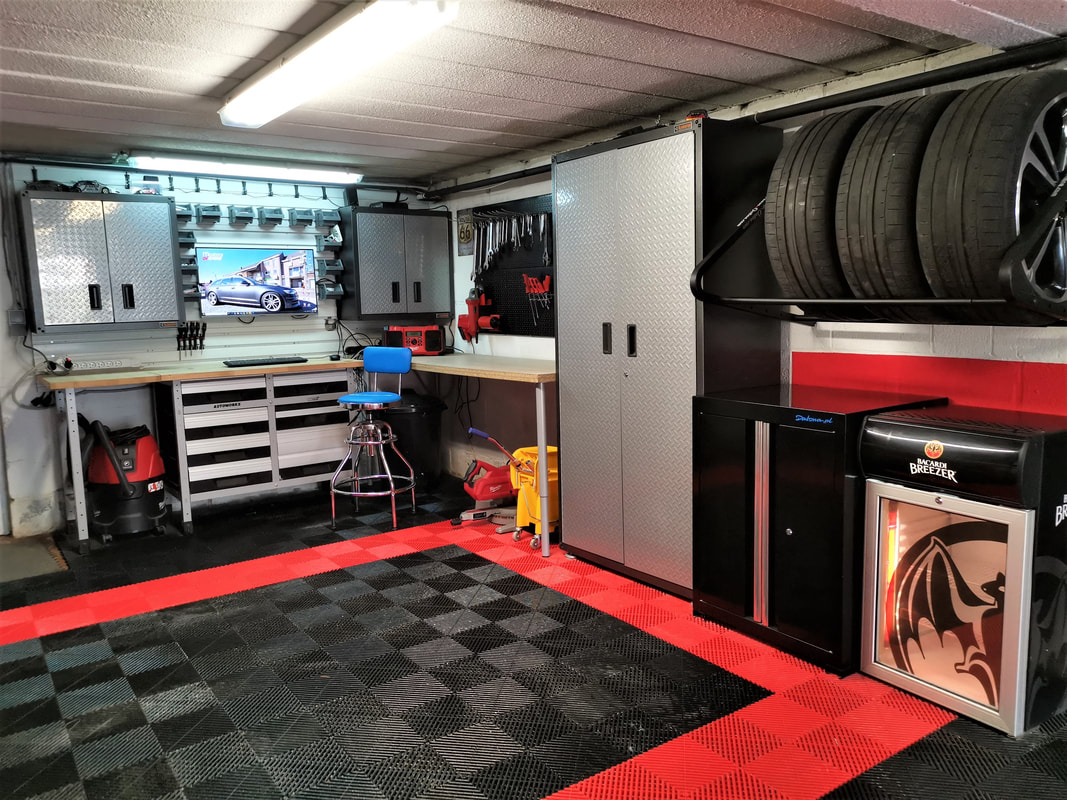
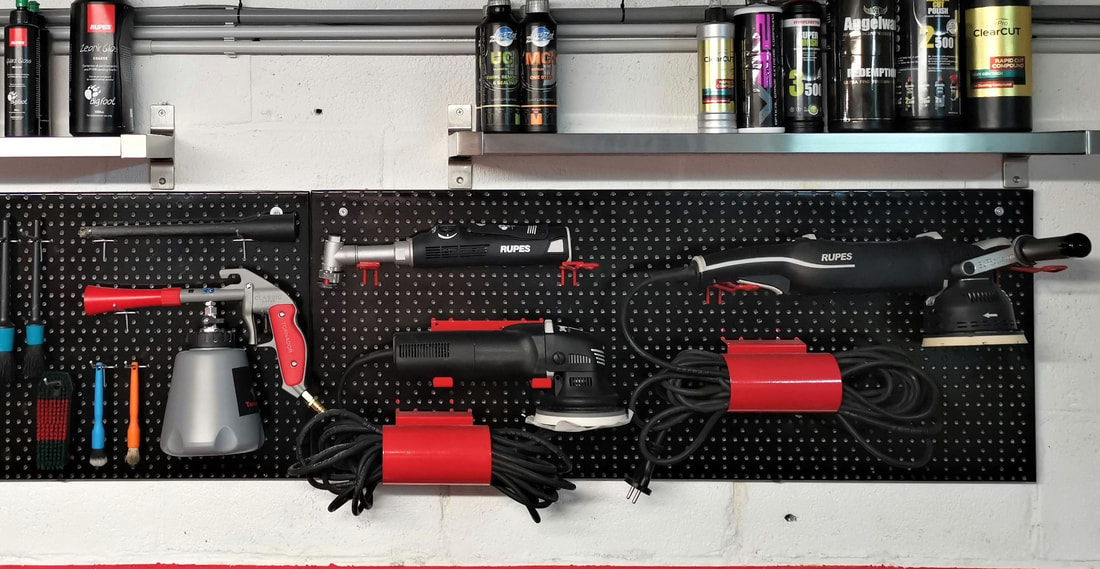
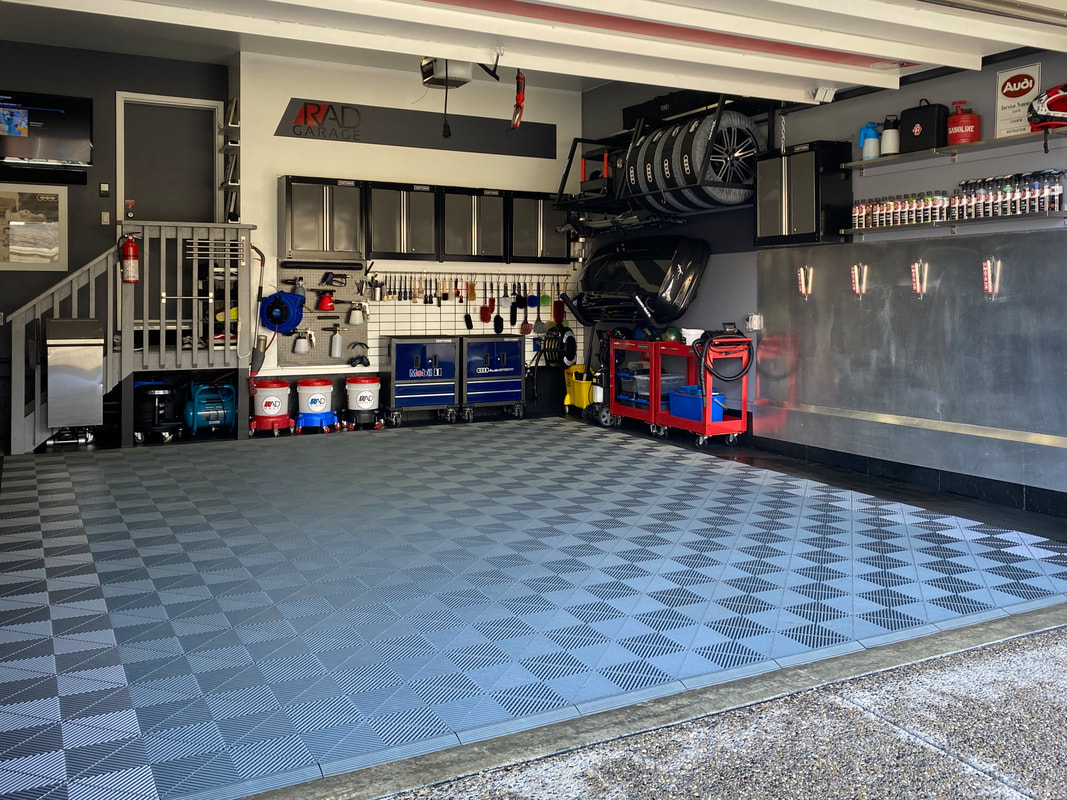
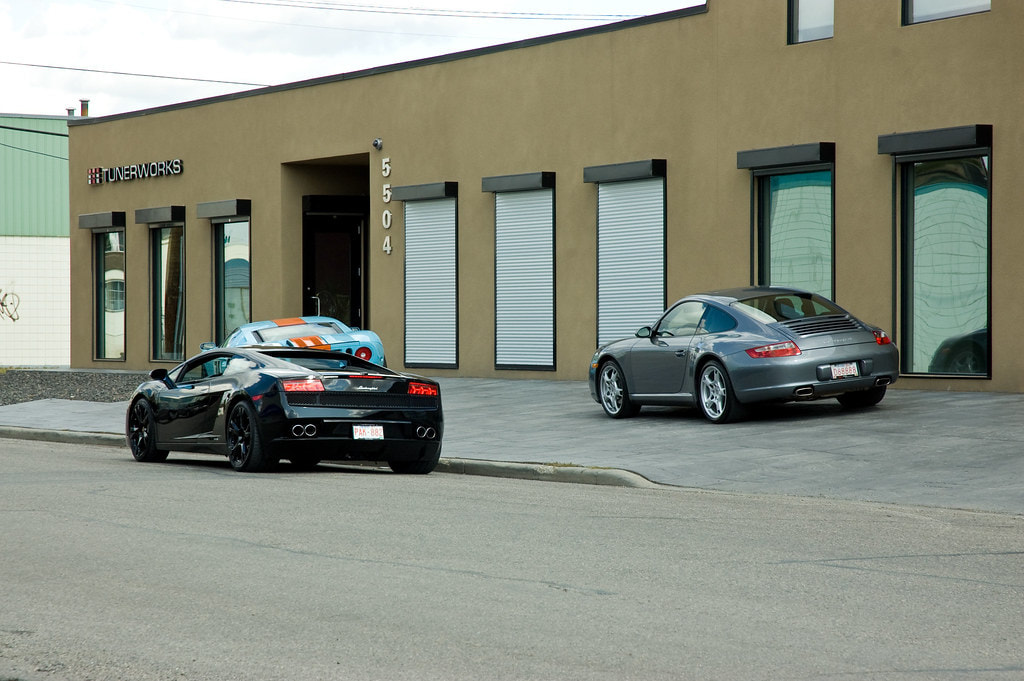
I made the trek to the other side of city to pop in on Chris at Carzilla. The shop was buzzing and there were so many boxes ready to ship out. I'm so glad things are busy for him because his shop is my favorite place to visit. I picked up a few things:  I'm obviously a huge fan of Swisstrax flooring. Recently, there has been a lot of conversation in the comment section of my videos as well as on the Facebook forums I belong to. I felt it was necessary for me to share my experience with a Swisstrax floor in terms of function, practicality and maintenance. I have uploaded two videos to my channel that hopefully provide the information a person would need in order to make a decision regarding the suitability of this floor to their garage.
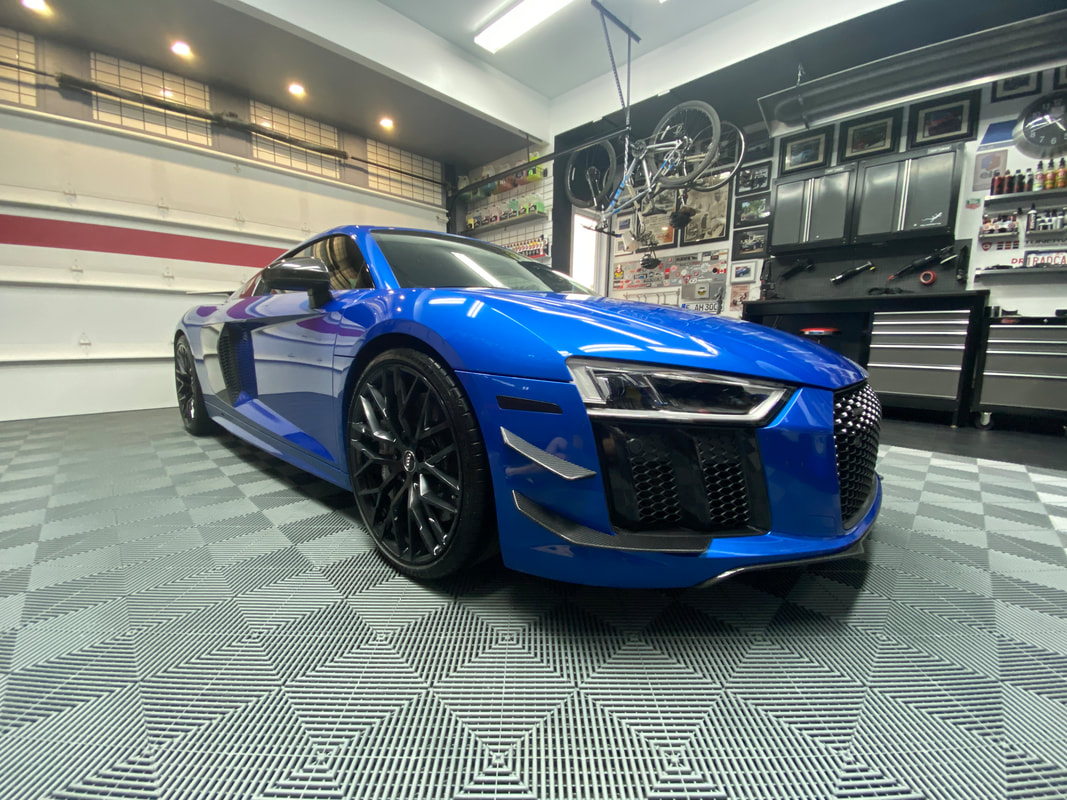
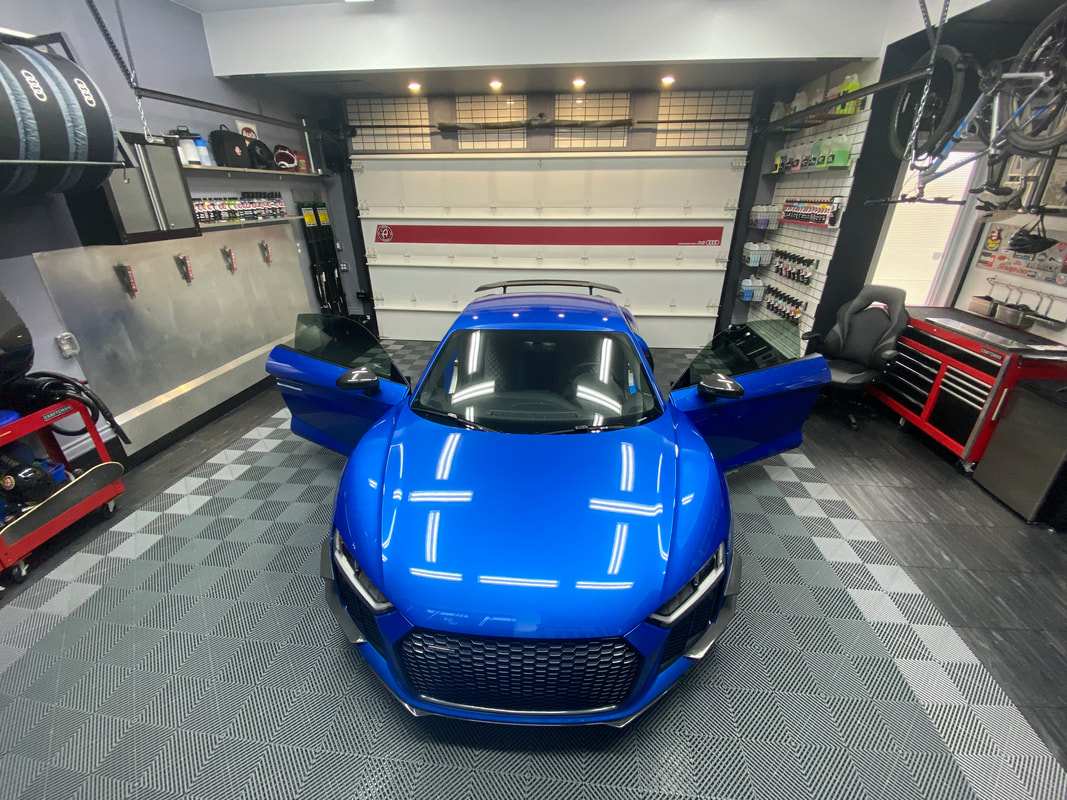
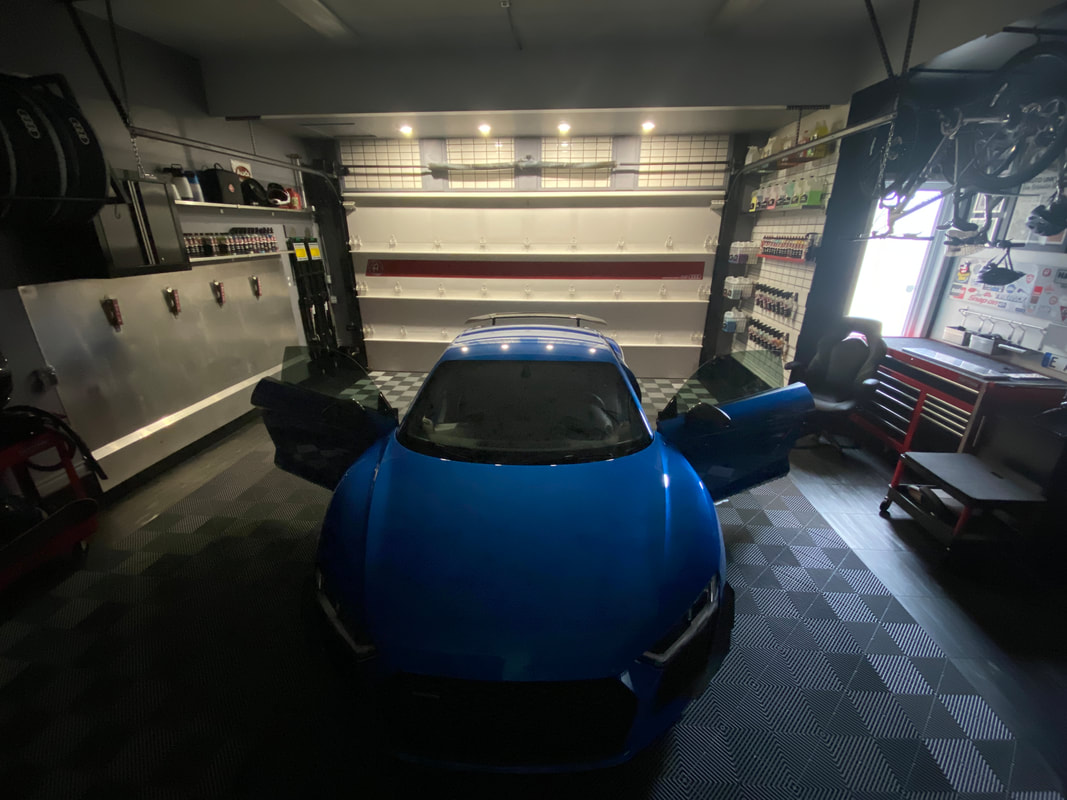
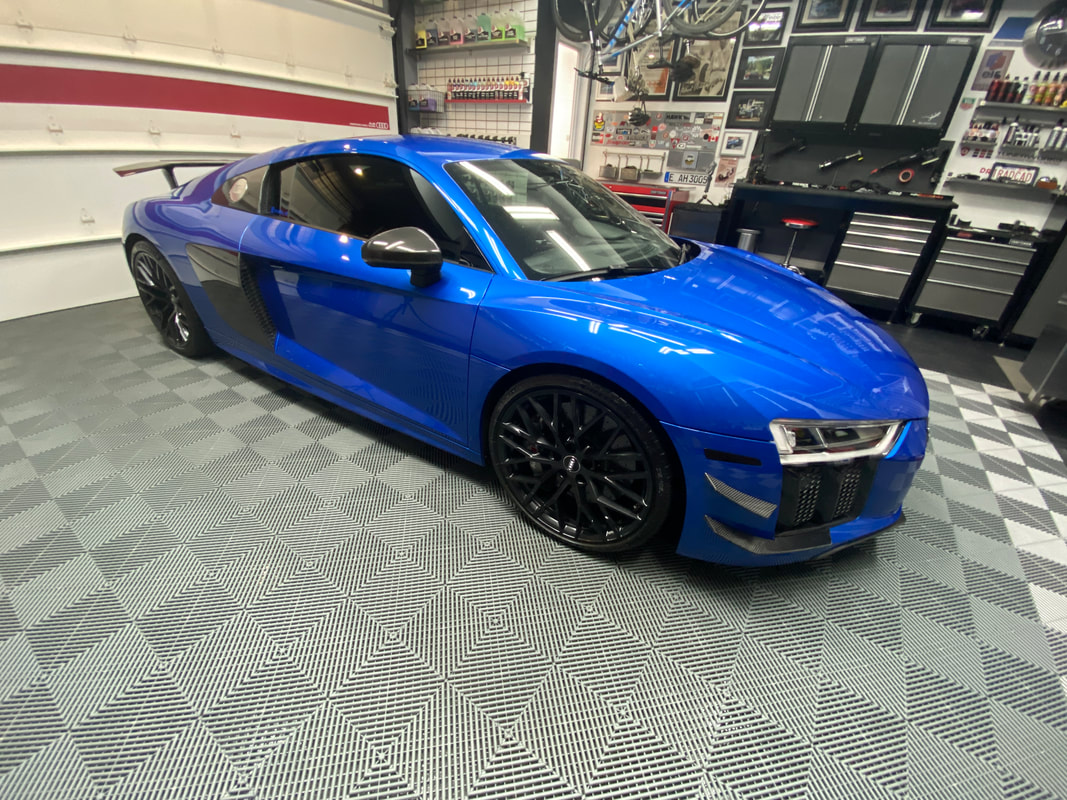
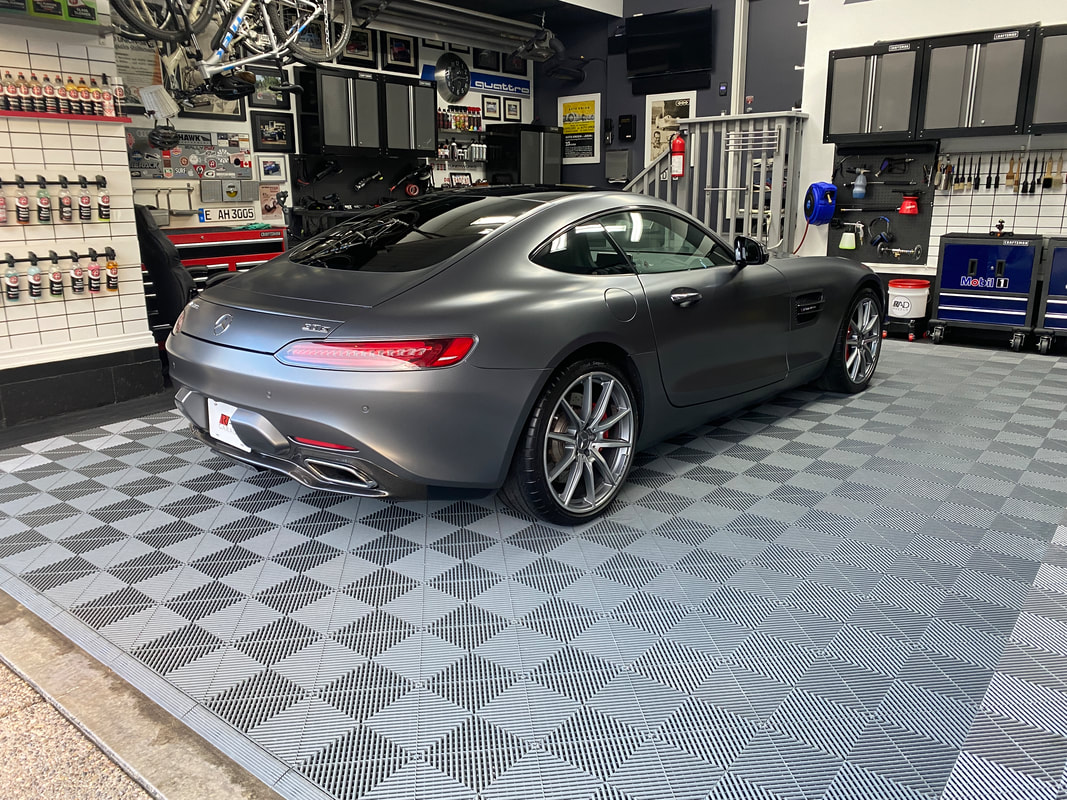
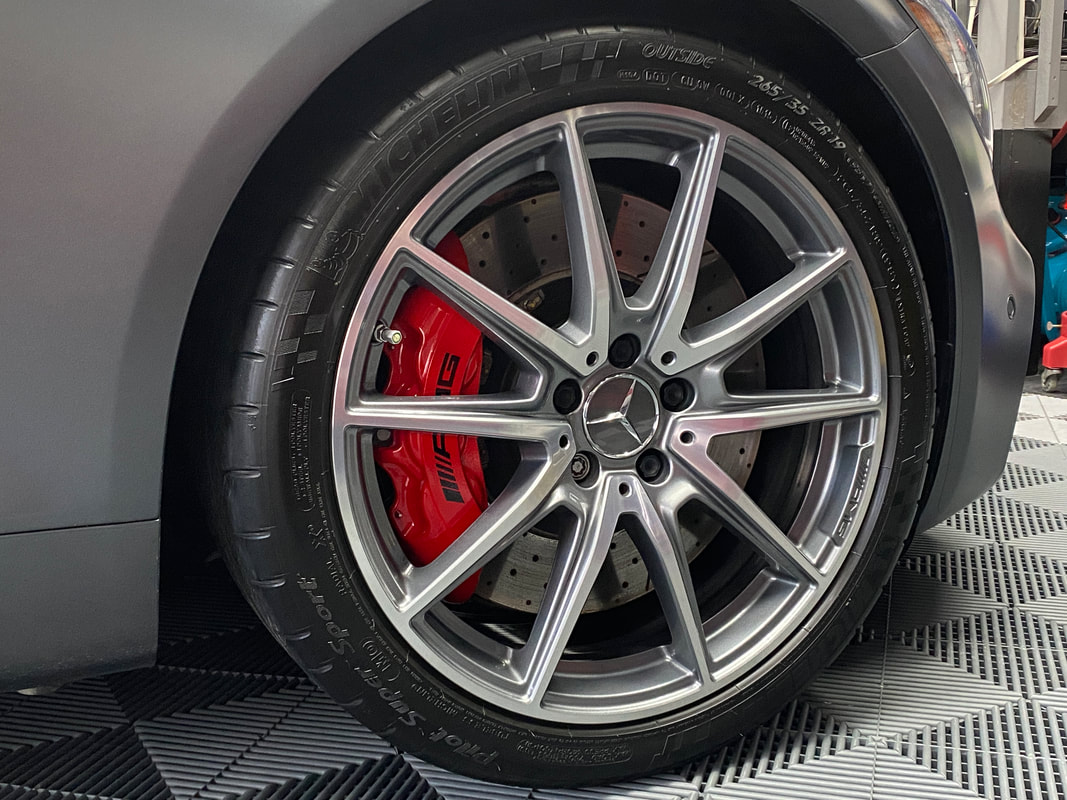
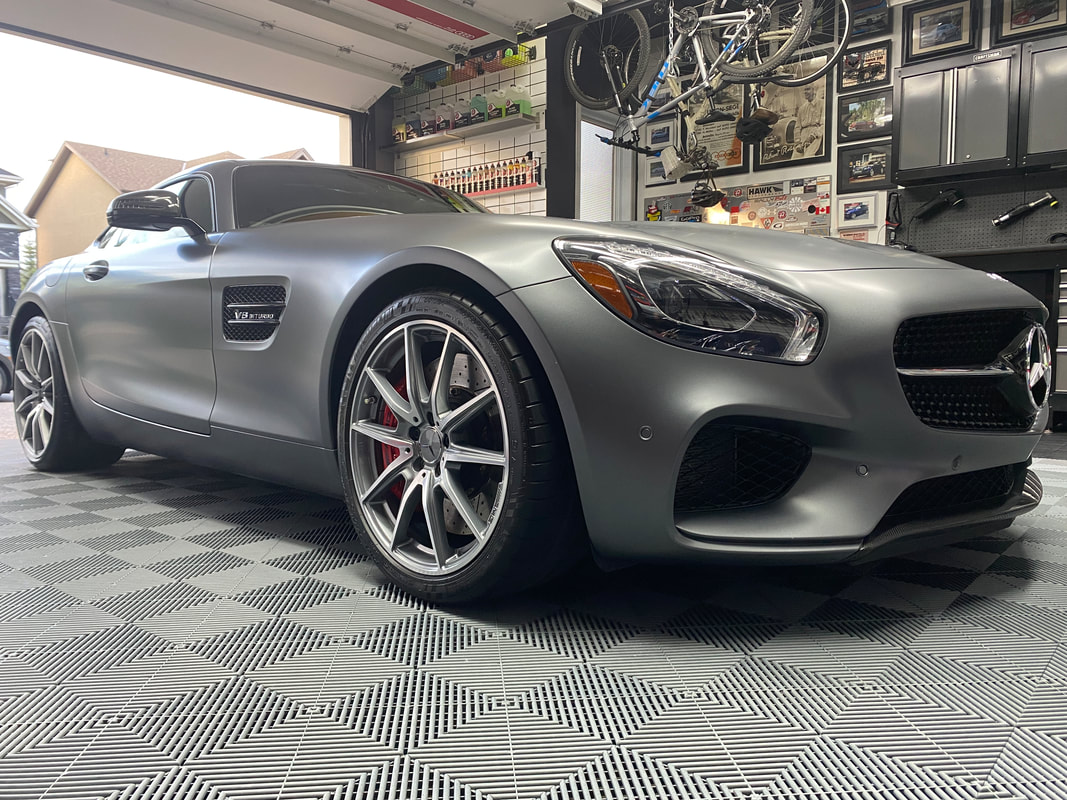
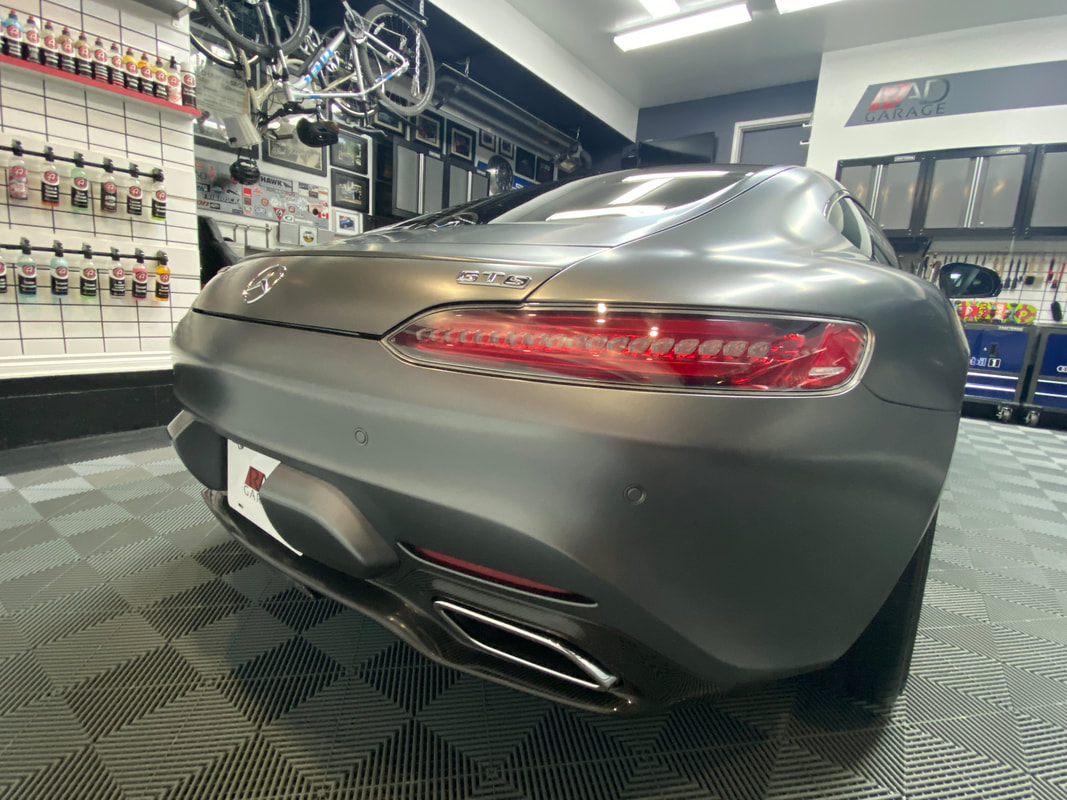
As with pretty much every aspect of my garage design, I am changing up the look of the inside of my garage door. I've enjoyed the red stripe in the Audi motif, but I thought it was time for a bit of an overhaul. I recently repainted the entire interior side of the door with a white eggshell paint from Rona. Now, what will I do with it? I guess you'll just have to check back in a few weeks to see. I spent the better portion of three days dialing in my brother-in-law's 2014 Audi S4. Initially, I planned on performing a pretty basic 4-6 hour interior/exterior detail with an "enhancement" polish, but the project just grew and grew until I had invested over 20 hours of my time. It was a chore, but it came out great. Here's the video: I had an amazing Father's Day Weekend hanging out in my garage detailing two amazing supercars. I spent over eight hours on the interior and exterior of this Ara Blue R8. This car is simply breathtaking. The new Vorsteiner carbon wing gives it that "performante" look and I just love it. Once I was finished with the R8, I spent eight hours dialing in a very unique Mercedes AMG GTS in a matte silver colour. The official name of the paint is designo selenite grey magno. I was highly satisfied with the final results of each project and I am equally proud of the videos I made for each of them.
I am excited about the projects that await me this summer. I am starting to make many connections with people in the high end car community so you never know what will be coming by RAD Garage. I'll keep you posted!
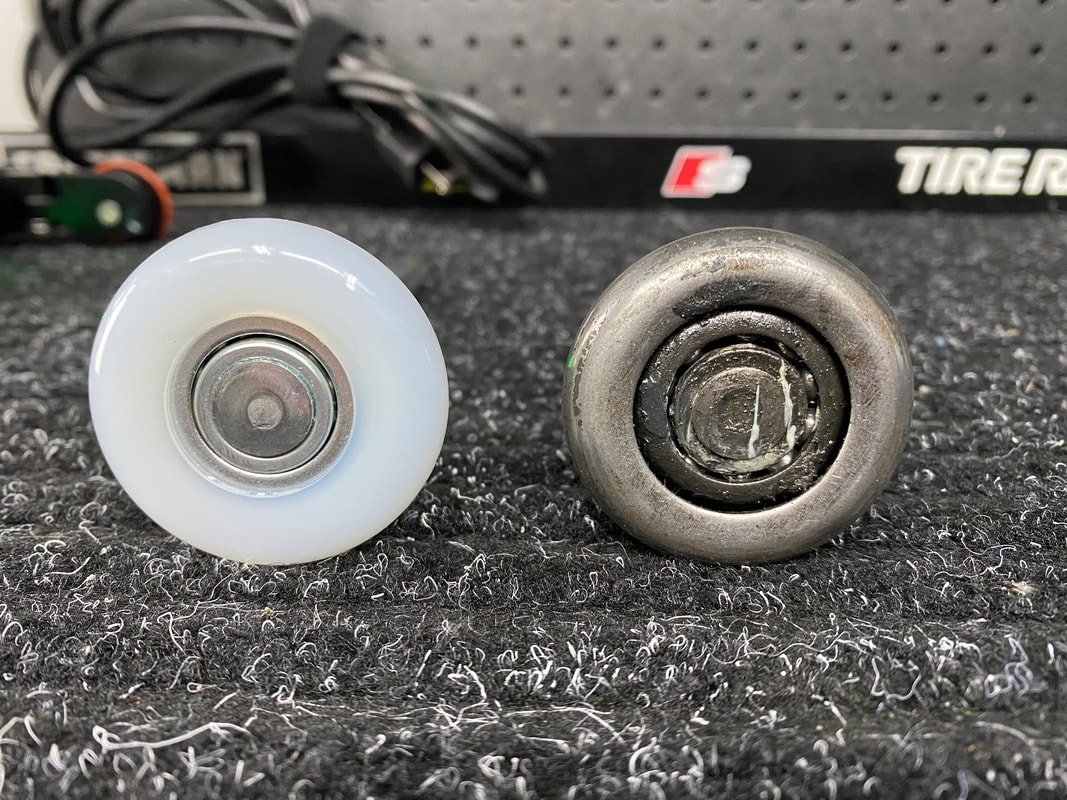
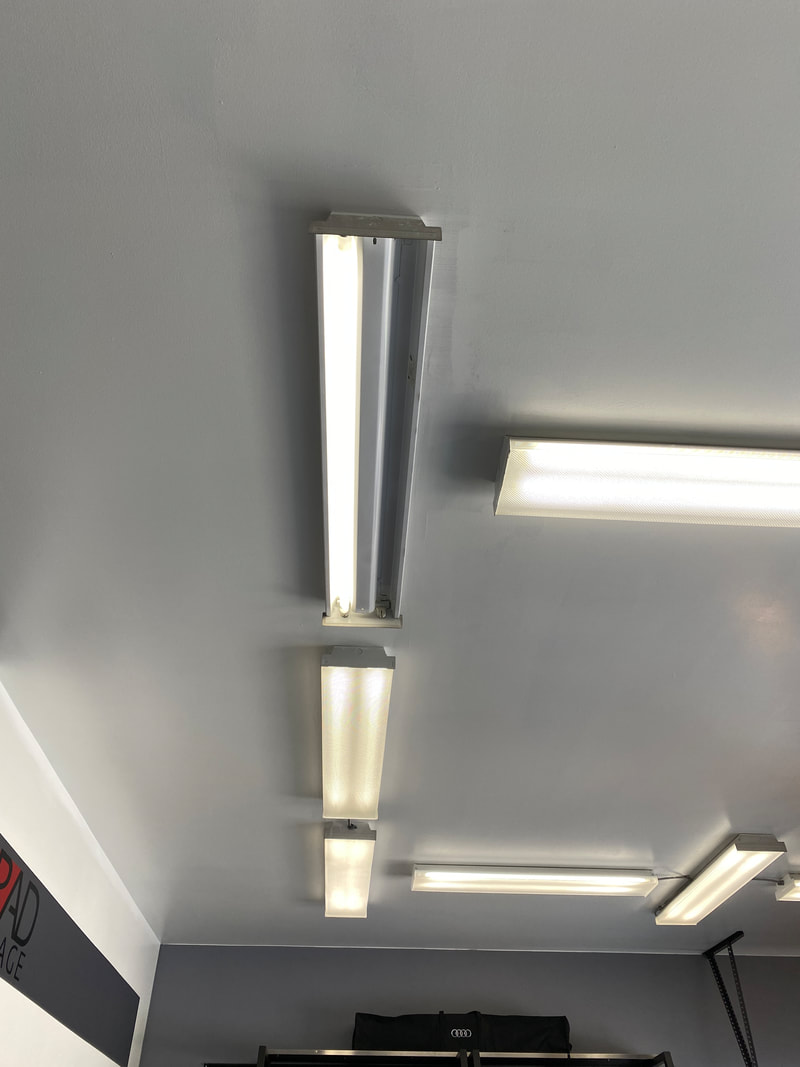
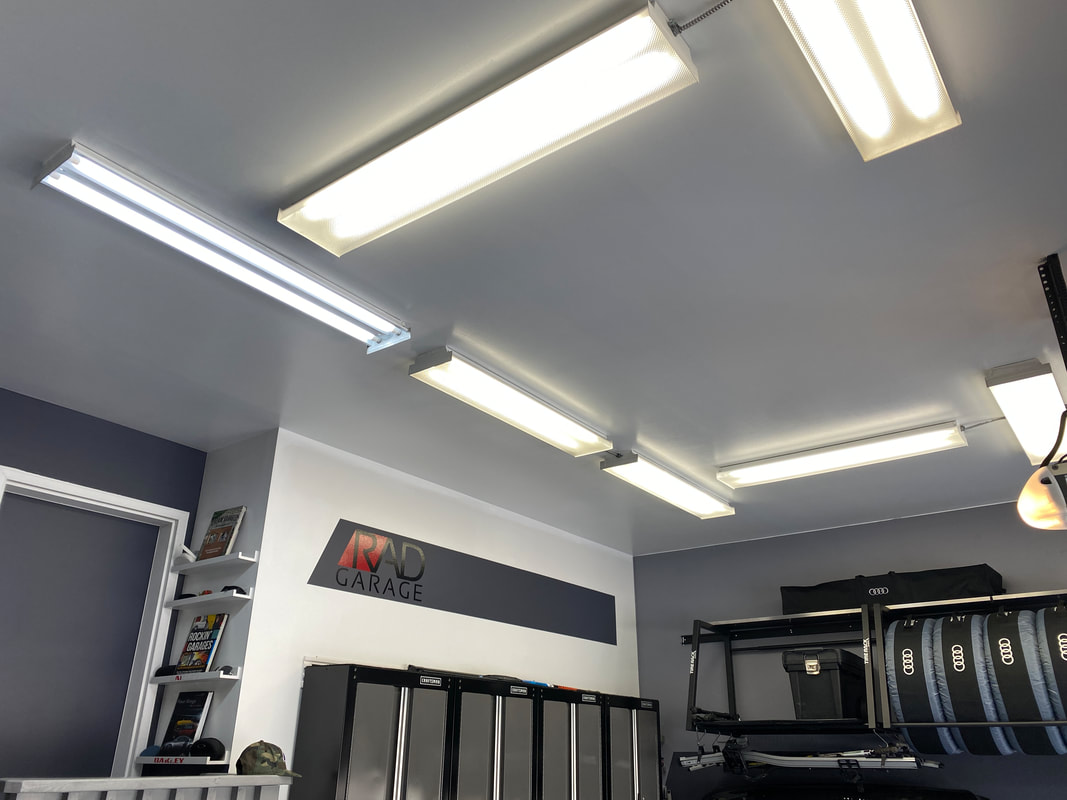
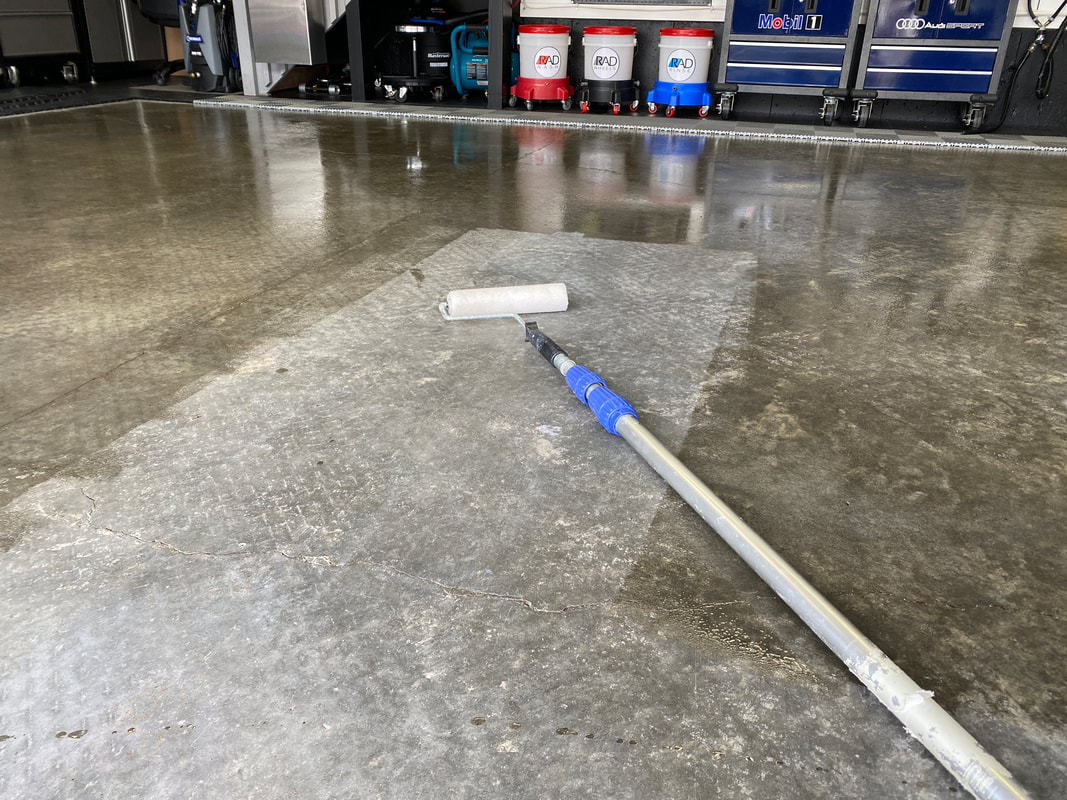
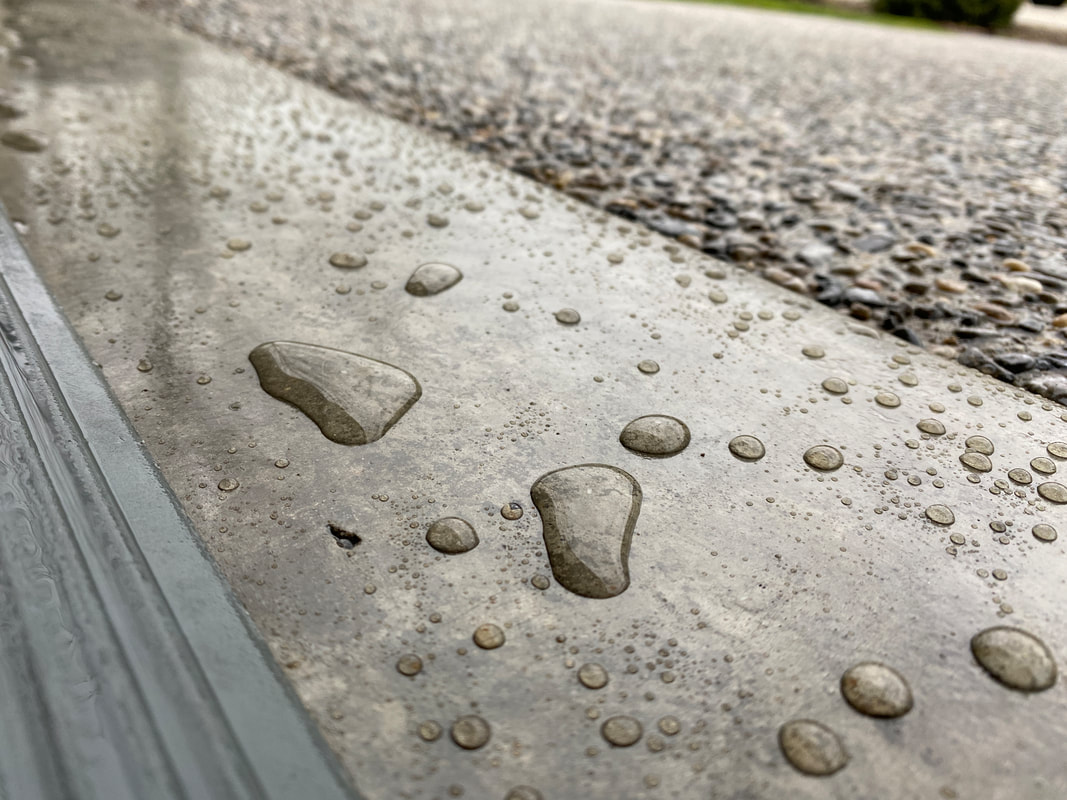
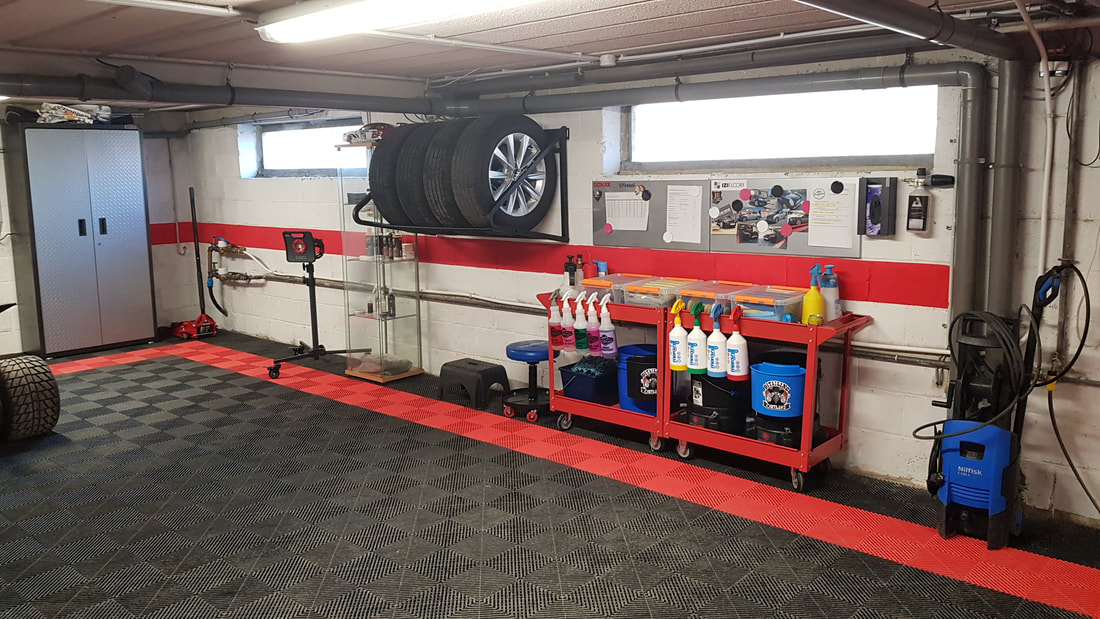
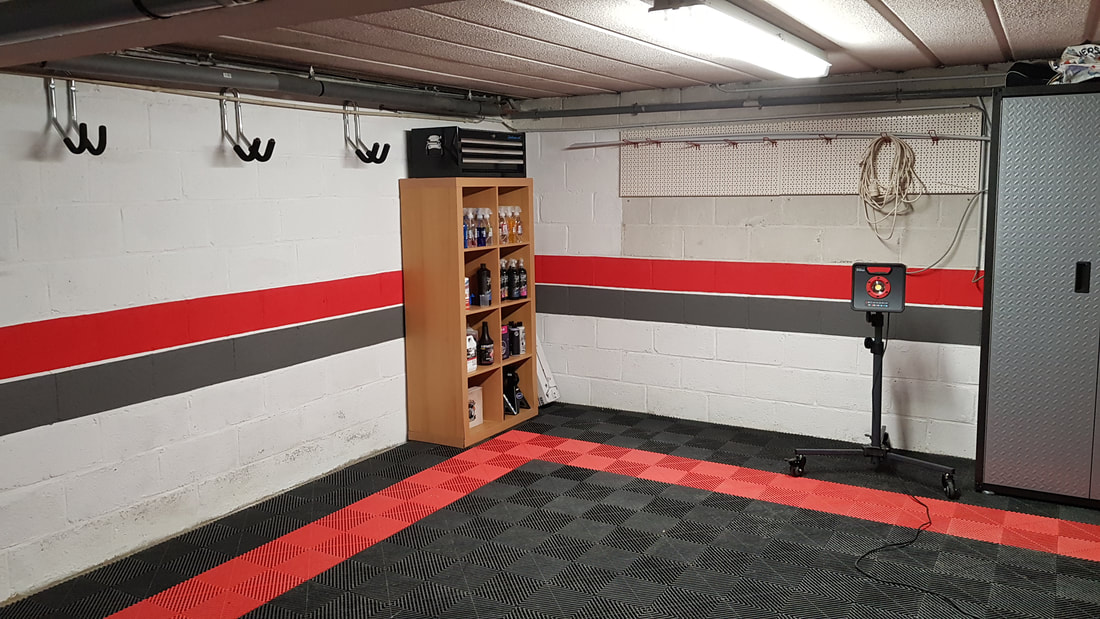
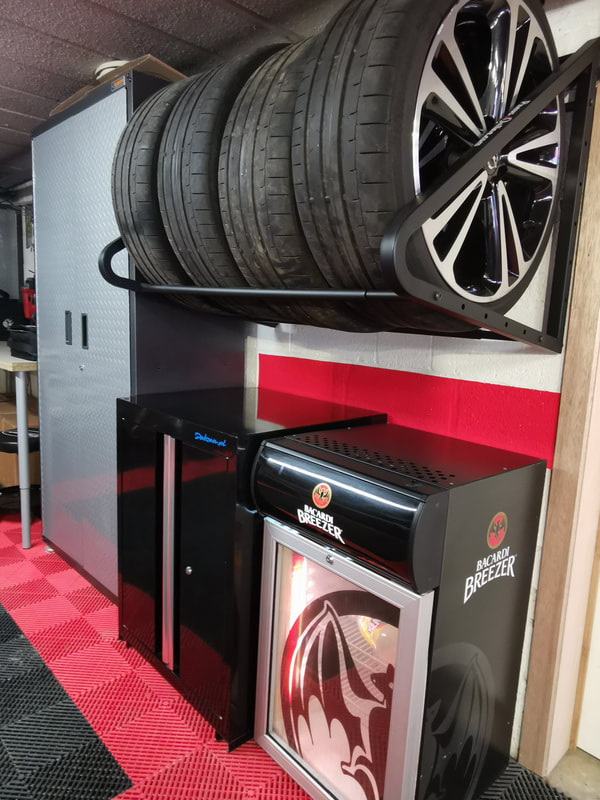
I was not happy with the performance of my aging garage door opener unit. It has served our family well for the past decade, but the entire system was dated and it was time for an upgrade. I connected with Mike Awada from Triton Door Services after a neighbor recommended him. He stopped by the garage and we chatted about all the possibilities and I settled on a Liftmaster 8500W side-mount "Jack Shaft" opener. The install process was somewhat complicated, but with the help of my amazing brother-in-law Ryan, we ran electrical service to the corner where the unit was mounted. We also rerouted the wall switch and sensor wires from the middle of the ceiling to the same corner. Then, we installed four slick little 4" LED pot lights (can lights) to provide some much needed task lighting to the lower ceiling portion of the garage. What an amazing difference these adjustable (3000-5000k) lights have made. This video isn't a complete step-by-step install guide, but more of a look into my thinking and how I integrated all the components into my already highly developed garage. If you are interested in upgrading your garage door opener, I highly recommend you find a qualified door technician in your area. It’s also a good idea to have a quality electrician on speed dial too! The ten metal rollers on the garage door were starting to make a lot of noise so I contacted a garage door technician to see if it was possible to replace them with something quieter. I now have these nylon rollers that have dramatically quieted things down. I am now planning on doing a few upgrades to the door opener. Stay tuned. I am excited about this project because I used a number of car care products sent to me by Tim, the mastermind behind Ethos Car Care Products. Tim has been someone I have looked up to over the years and to see him gaining such success and recognition within the detailing industry comes as no surprise. I put the Ethos products to the test by performing a complete interior/exterior detail of my buddy's gorgeous Audi Allroad. Watch the video, and I am sure you will agree the results were stunning. 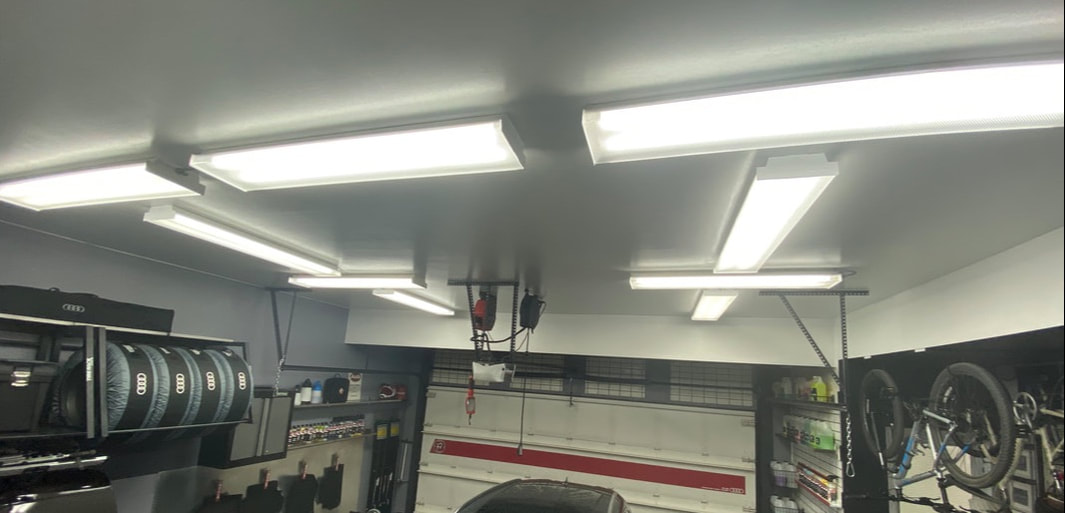 My garage now features 18 X LED 6500K "Daylight" bulbs After almost ten years, my first fluorescent bulb burnt out in the garage. I went down to the local Lowe's to source a new one but ended up leaving with 18 LED bulbs to replace all of my remaining fluorescents. I chose GE 15W LED T8 48-in Daylight bulbs that work seamlessly with my existing fixtures. The difference this had made to the overall amount of light in the garage is absolutely night and day. These bulbs are rated to last 36,000 hours. They emit light that measures 6500 on the Kelvin Color Temperature Chart. This temperature of light is often referred to as crisp and invigorating. It does give the garage a much more clinical tone, which I appreciate. These bulbs are rated at 1800 Lumens and rate 80 on the color rendering index (CRI). I admit, I don't know exactly what all of this technical jargon means, but what I do know is that my garage is way brighter than it used to be. Capturing the difference on camera isn't easy, but here are some pics I snapped during the replacement process. In addition to installing the new bulbs, I took some time to clean the diffusers and some of the dust that accumulated on the fixtures. I picked up a "contractor's box" of 16 bulbs ($127.49) plus an additional 2-pack ($28.04). I lucked out and found them on sale which left me with savings of almost $30. In the end, this was a very economical way of improving the overall amount and temperature of light in the garage and I couldn't be more pleased. 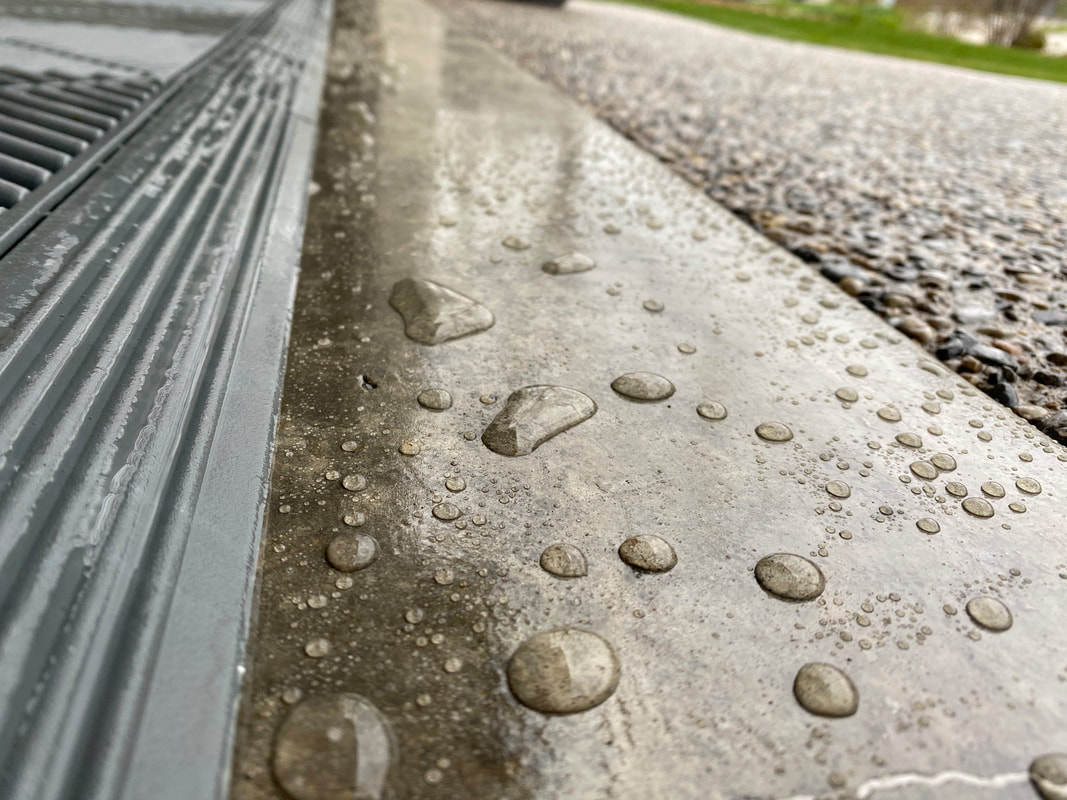 I used up the entire contents of my 18.9 litre bucket of high gloss concrete sealer on the driveway and rear patio, but my neighbor had some left over from his project. He generously allowed me to have it so I put it to good use on my garage floor. I do this every couple of years to add a layer of protection to the garage floor. The amount of road salt mixed with muddy water the floor sees in a given year is substantial, and by coating the floor it makes me feel better about the floor's condition and longevity. I have yet to see any signs of damage to the floor and I think the use of the sealer is the major contributor to its condition. Sealing the floor was easy. I just pressure washed the floor and allowed it to air dry before painting on the sealer with a standard paint roller. The whole coating process took less than fifteen minutes. I anticipate the sealer will last about a year. I found it comical that a professional concrete sealing company would leave a "door knocker" considering how good my driveway and walkway look. I guess they thought it was worth a shot! The amount of money these pros are asking is just ridiculous. For a job ANYONE with a paint roller can perform, I don't know where they get off charging what they charge.
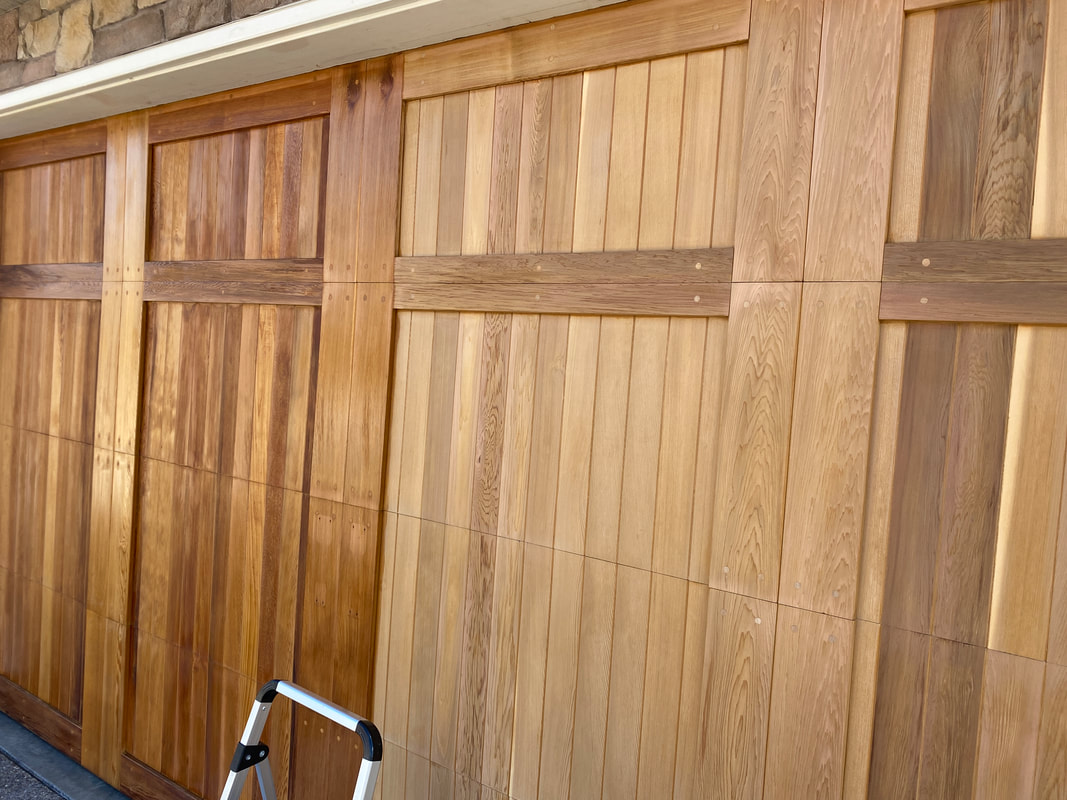
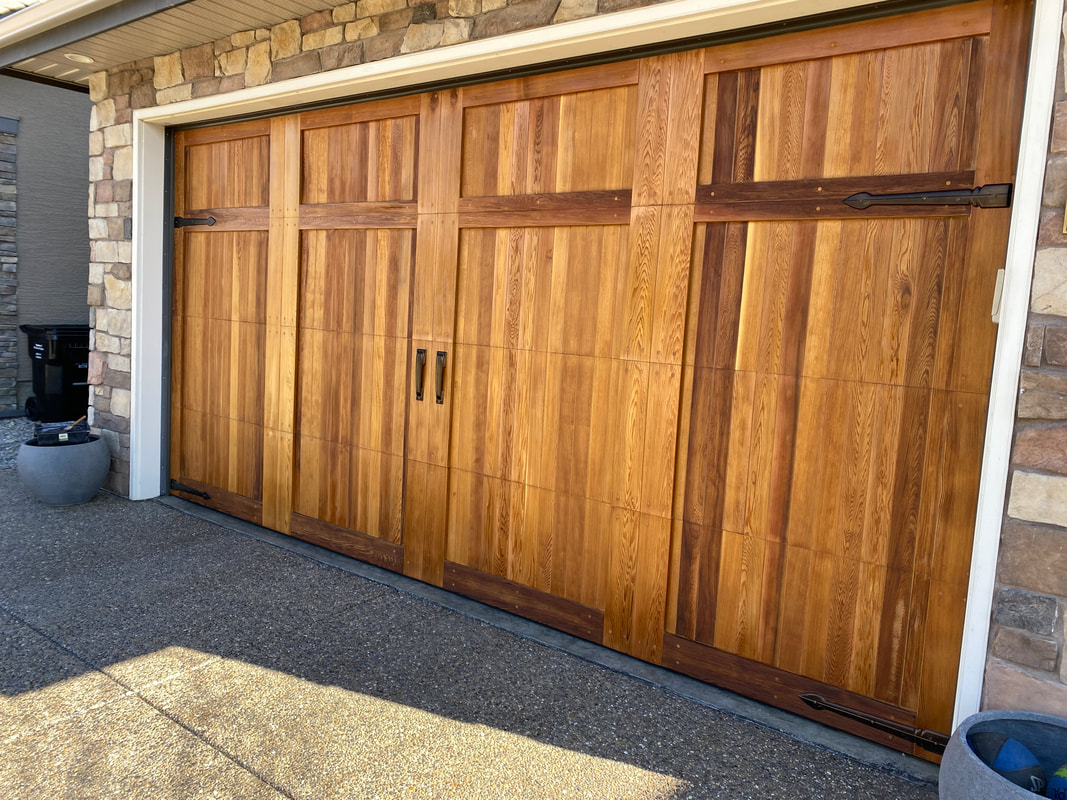
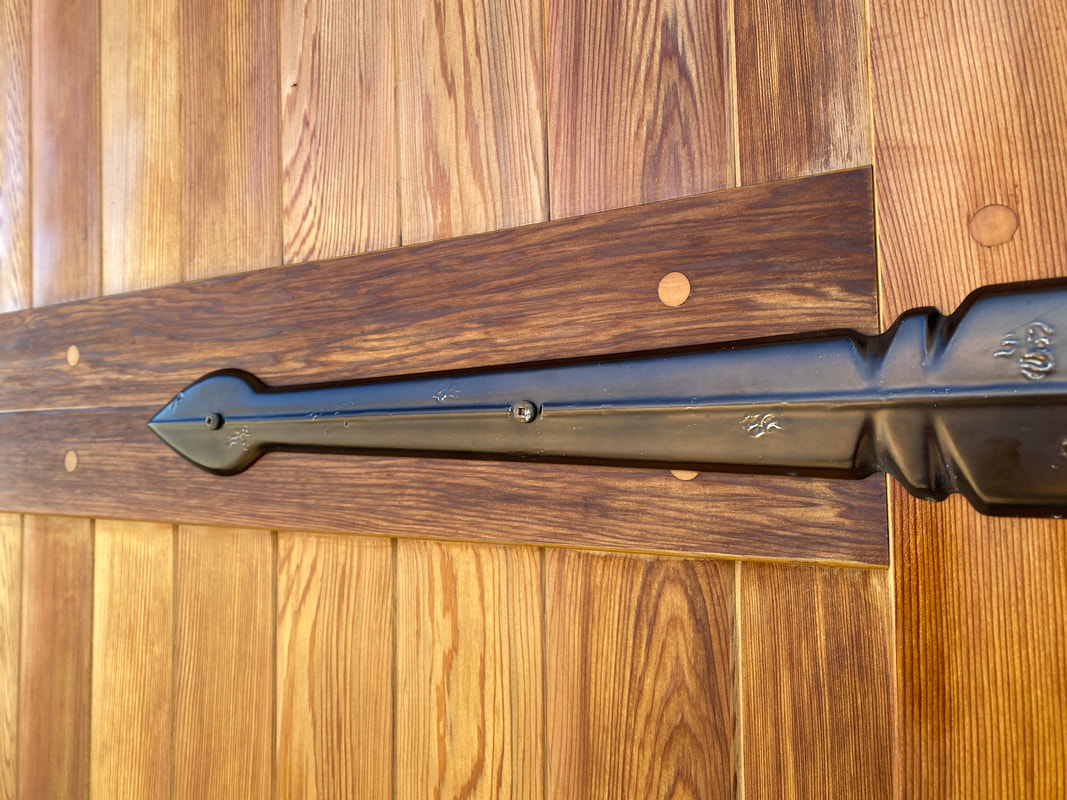
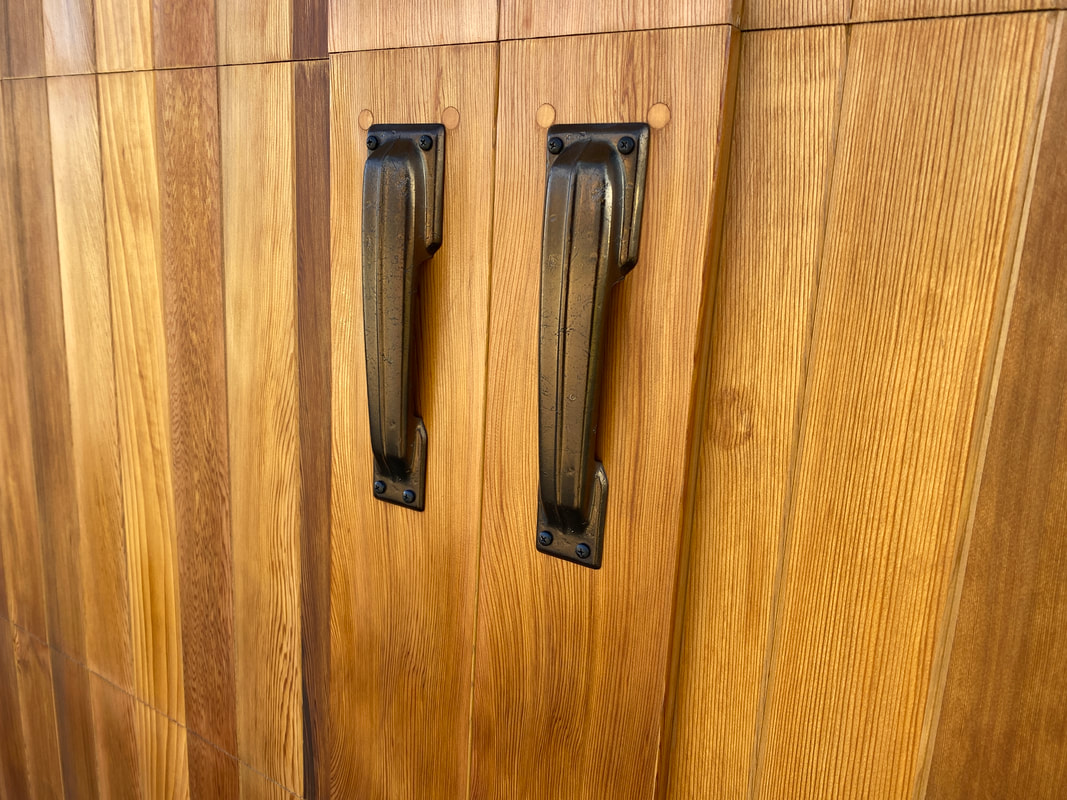
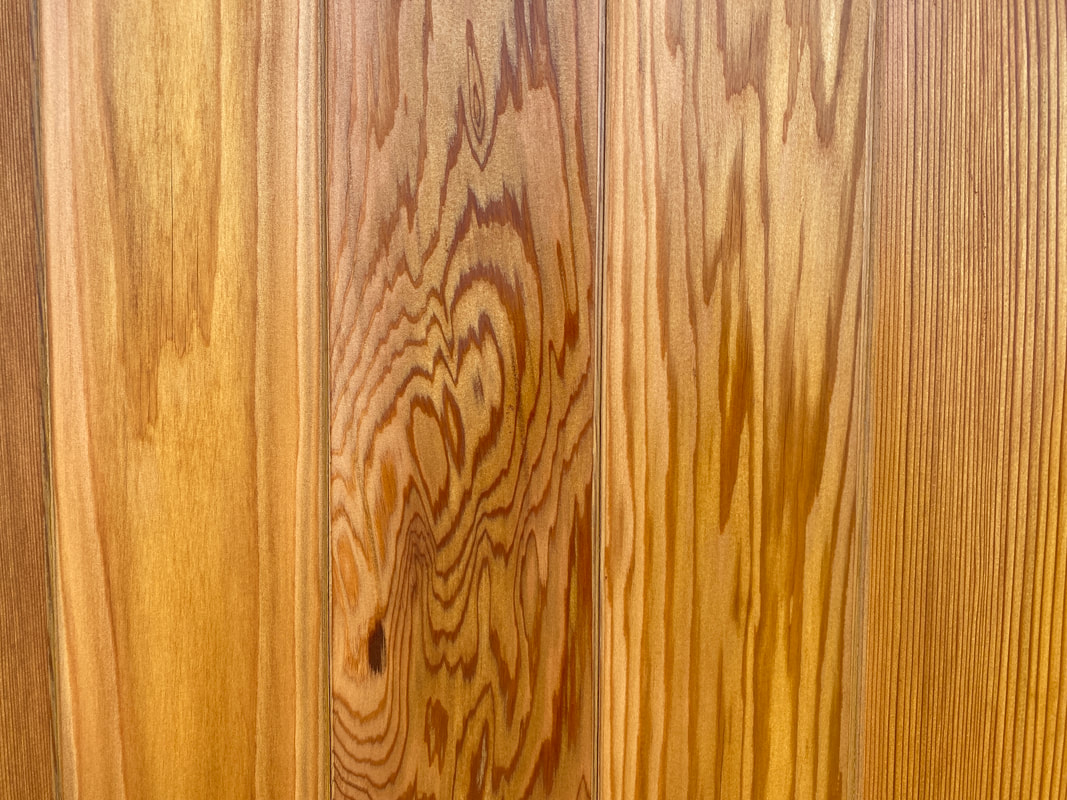
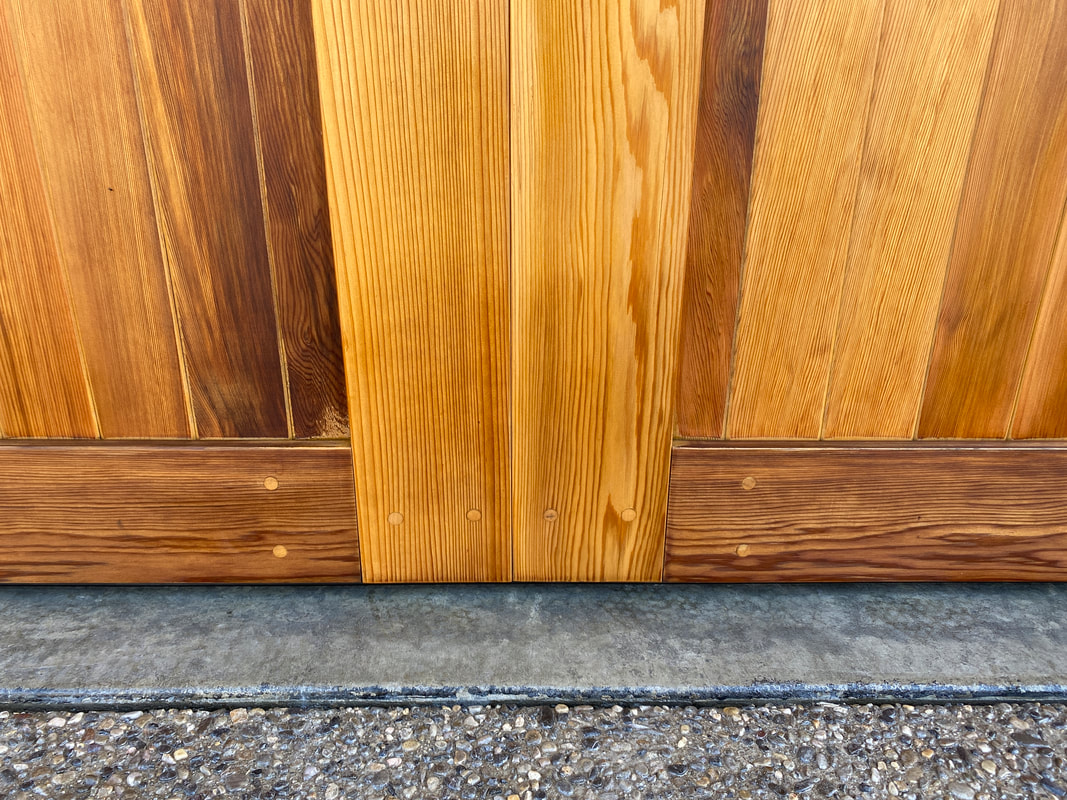
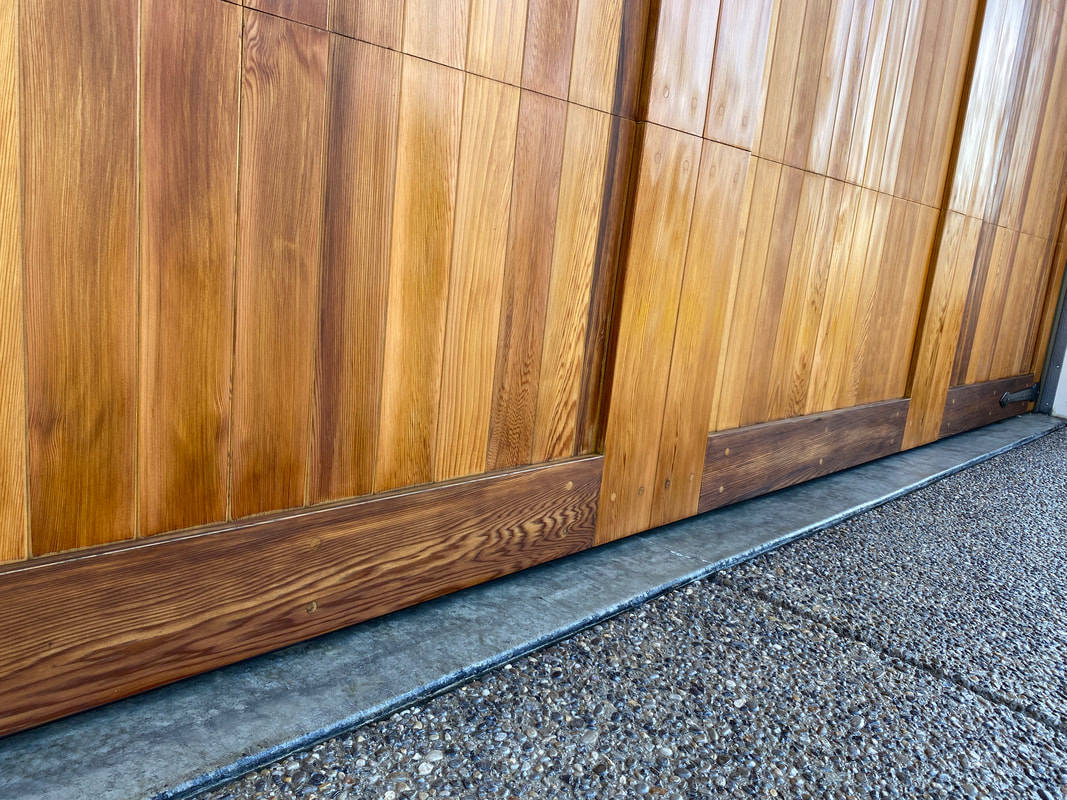
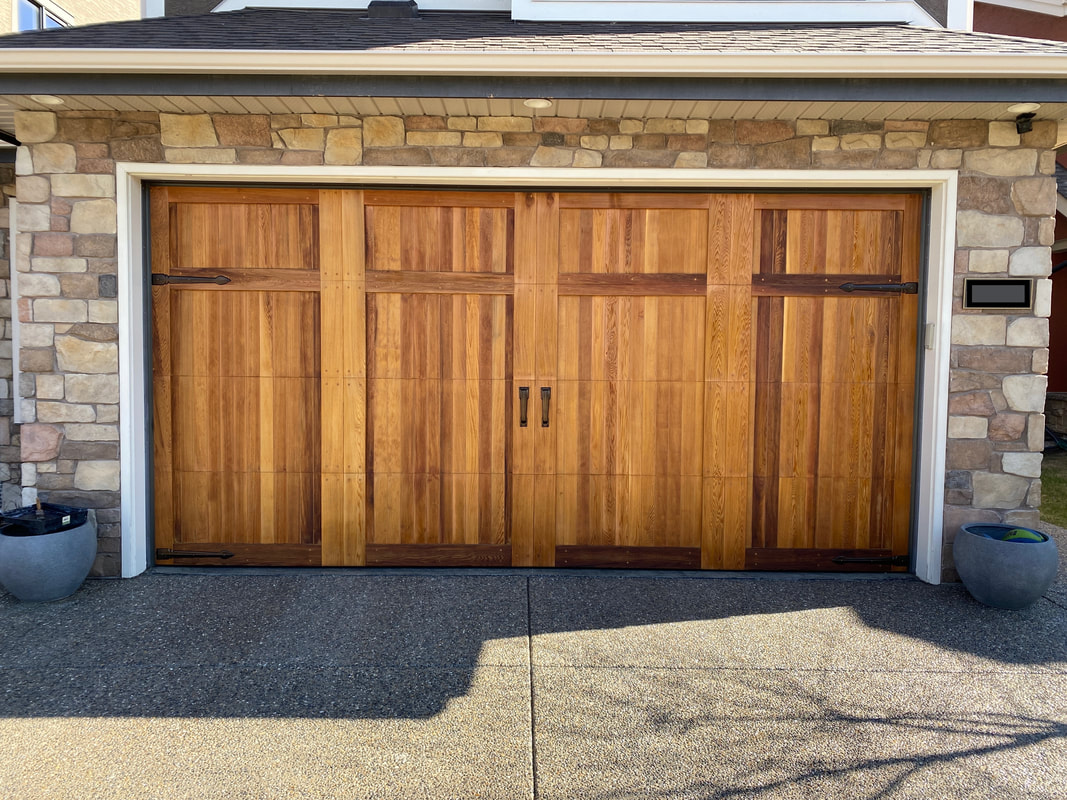
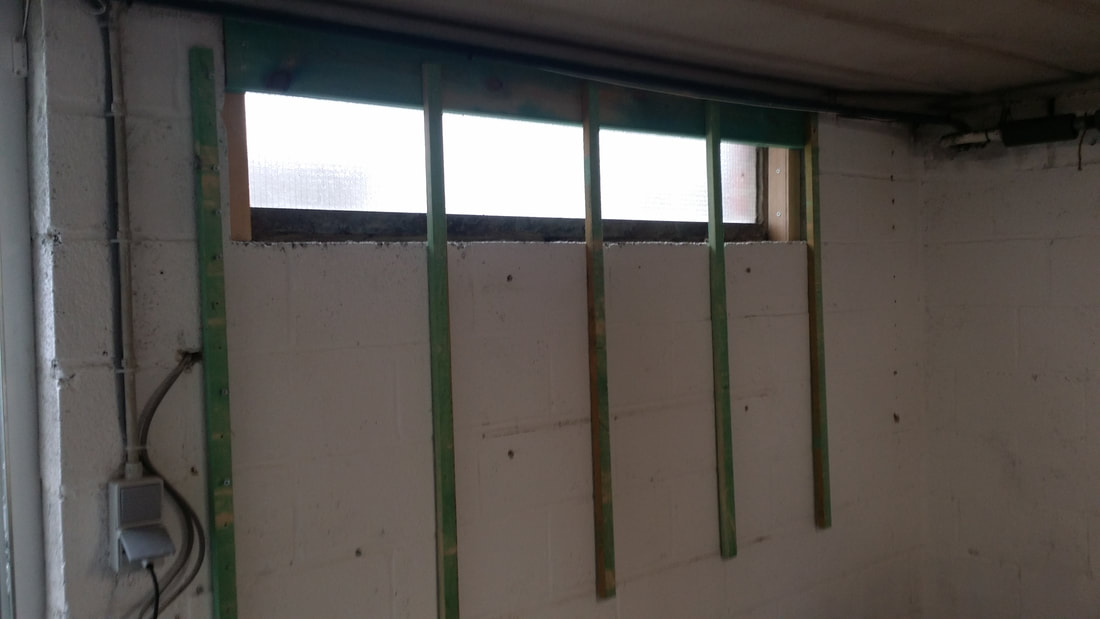
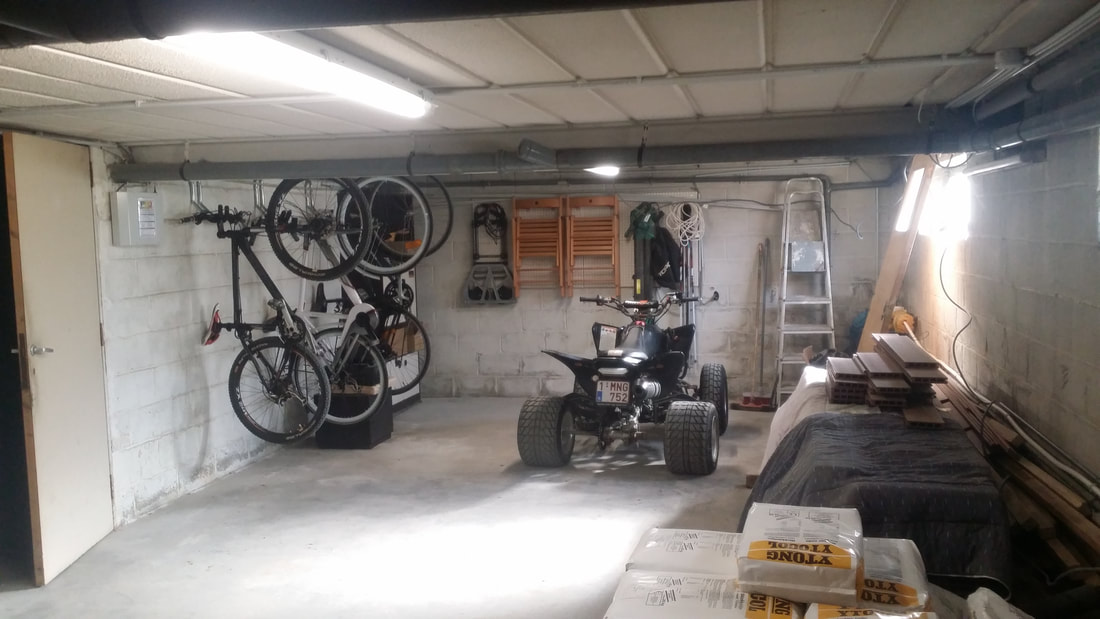
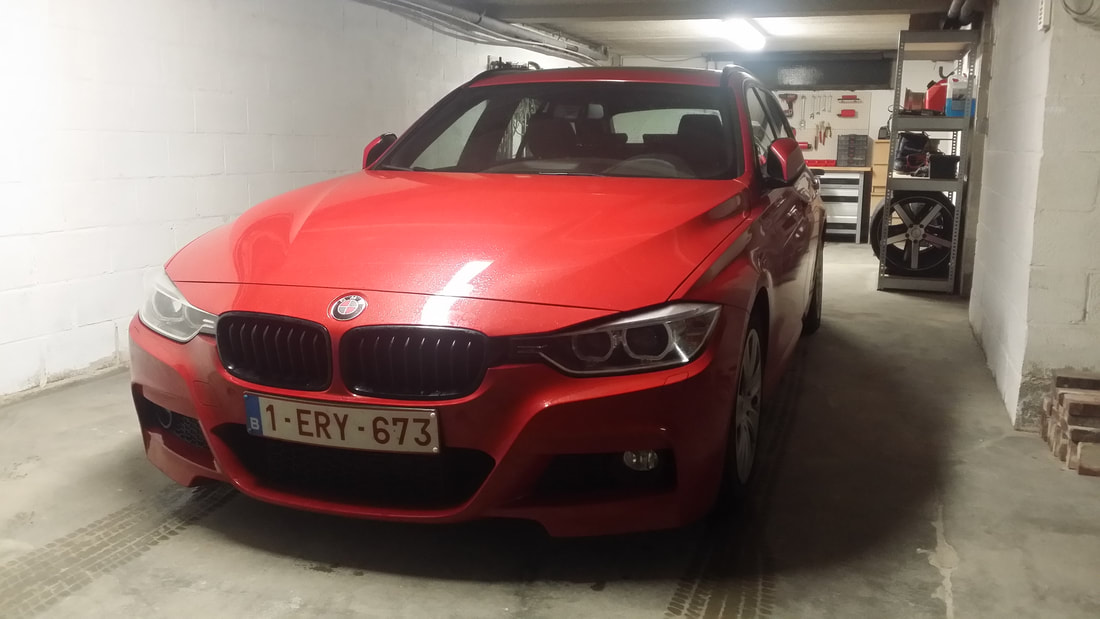
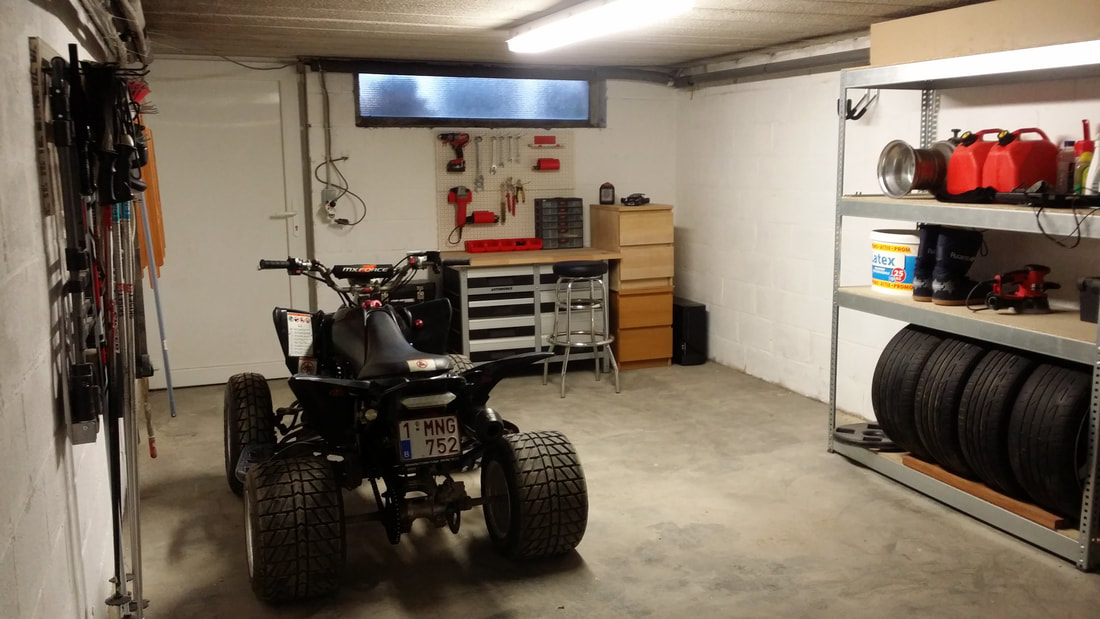
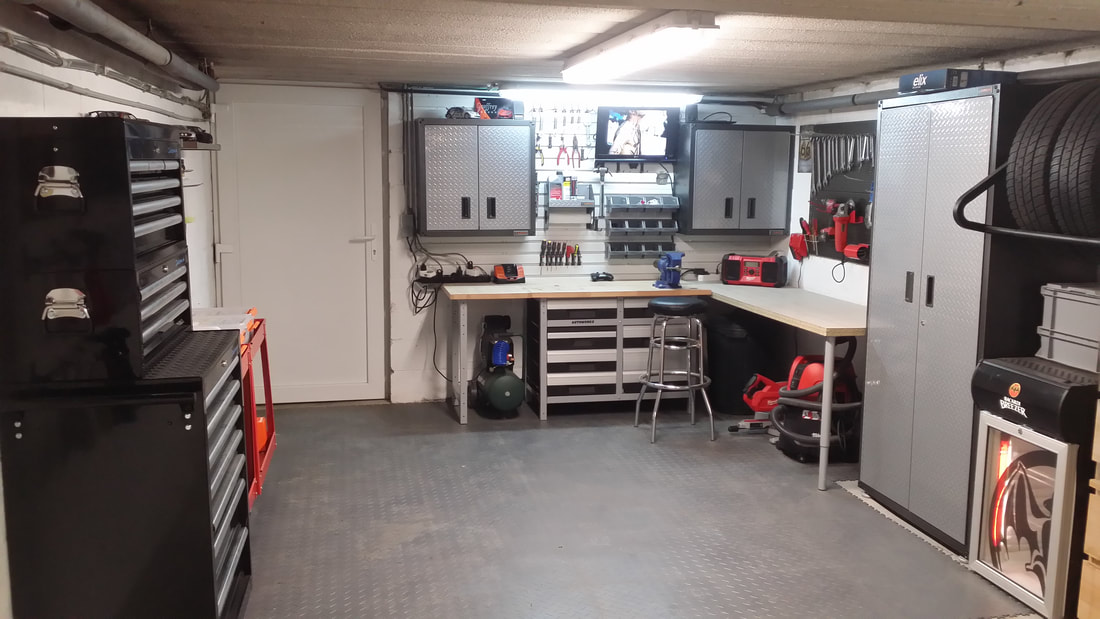
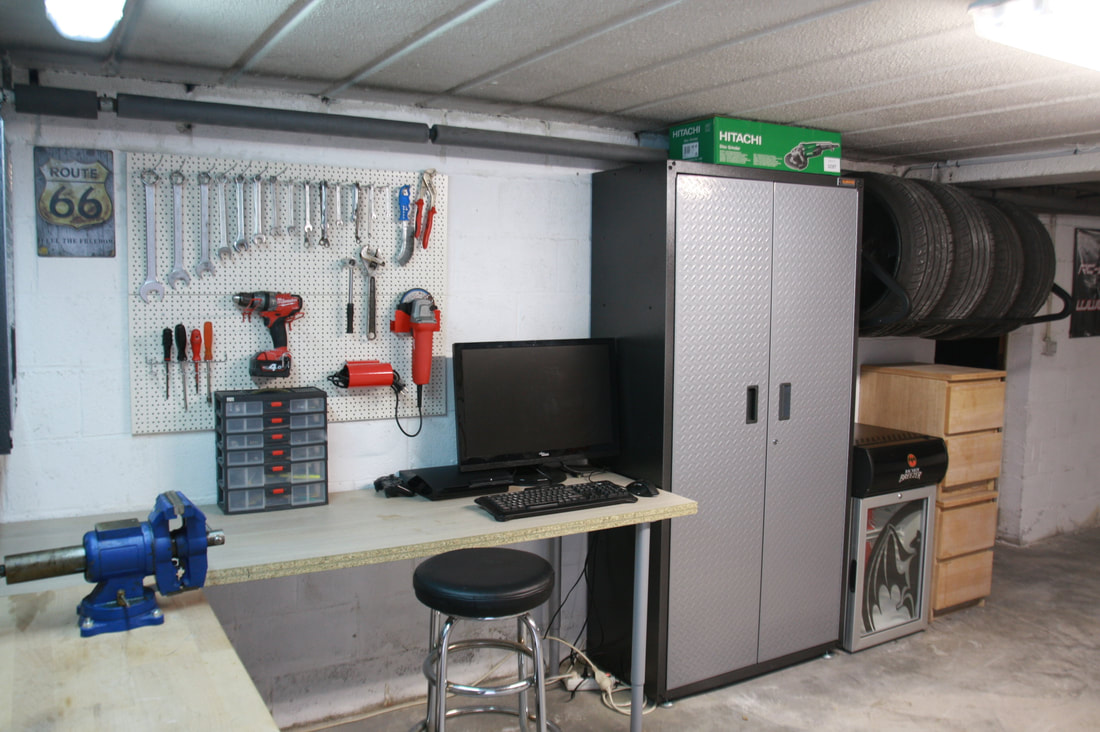
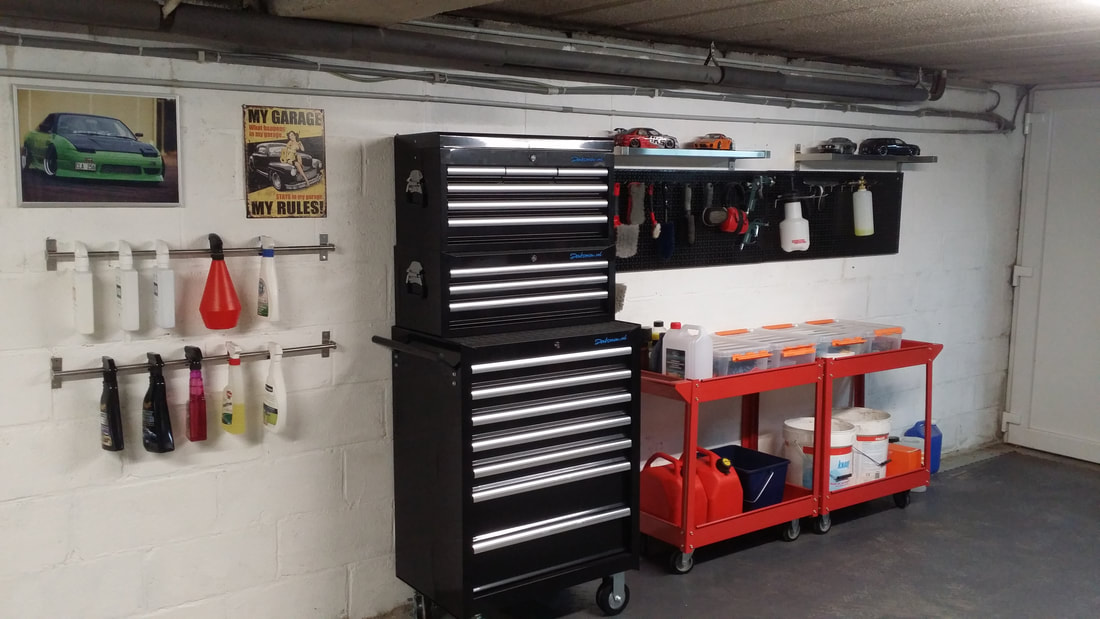
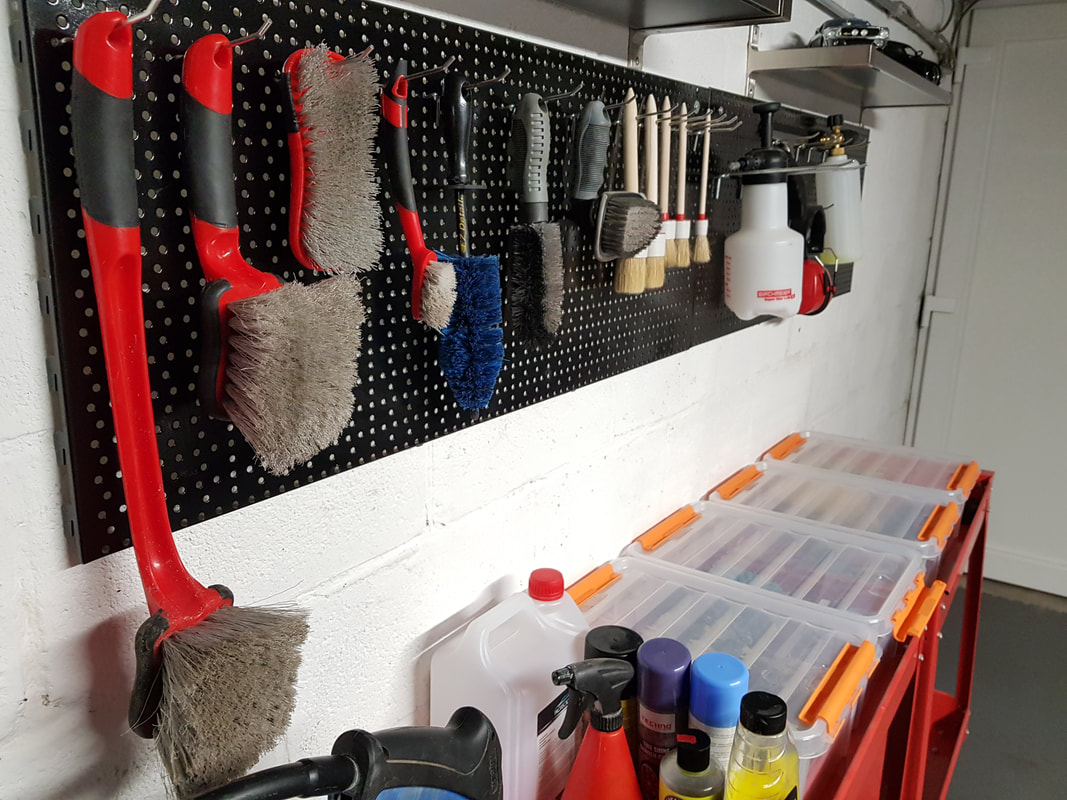
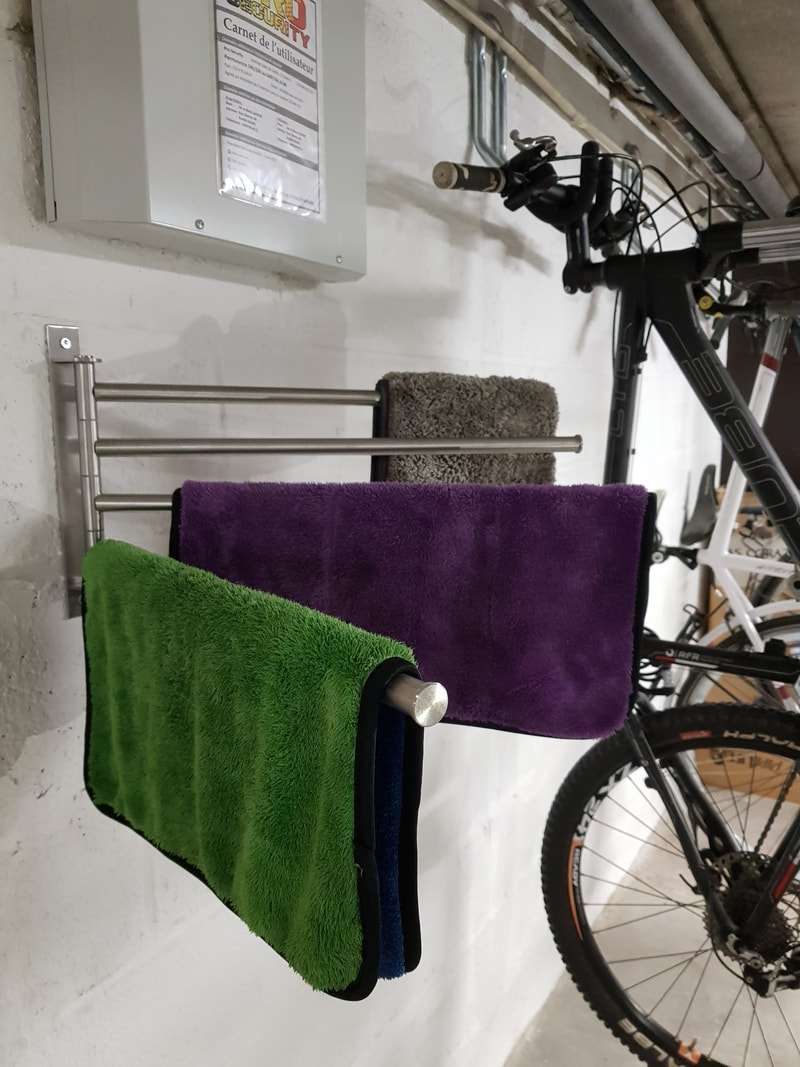
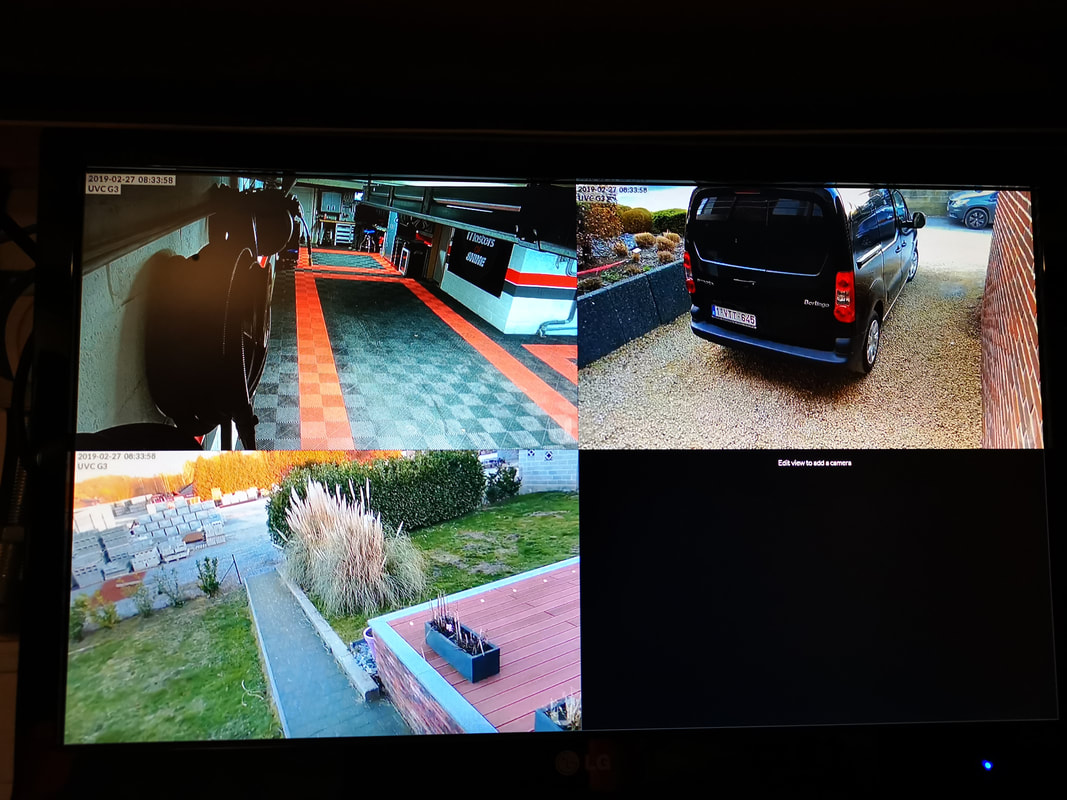
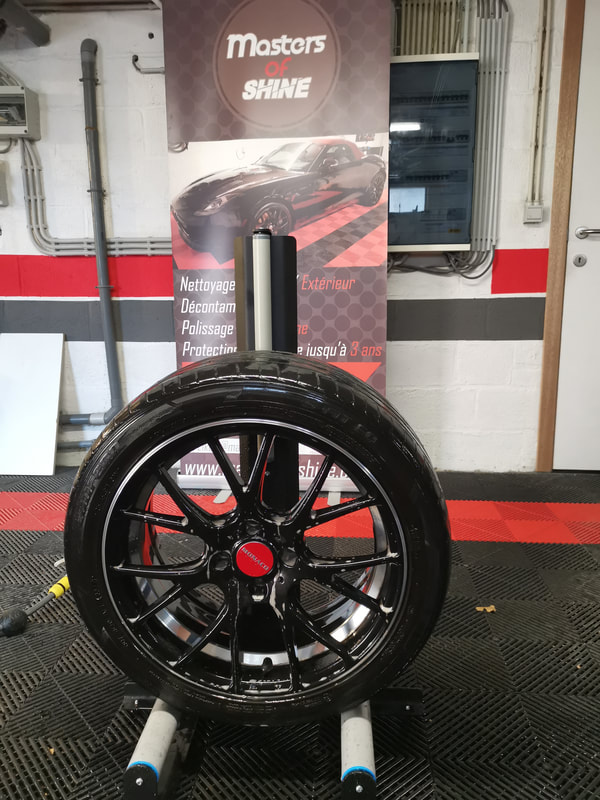
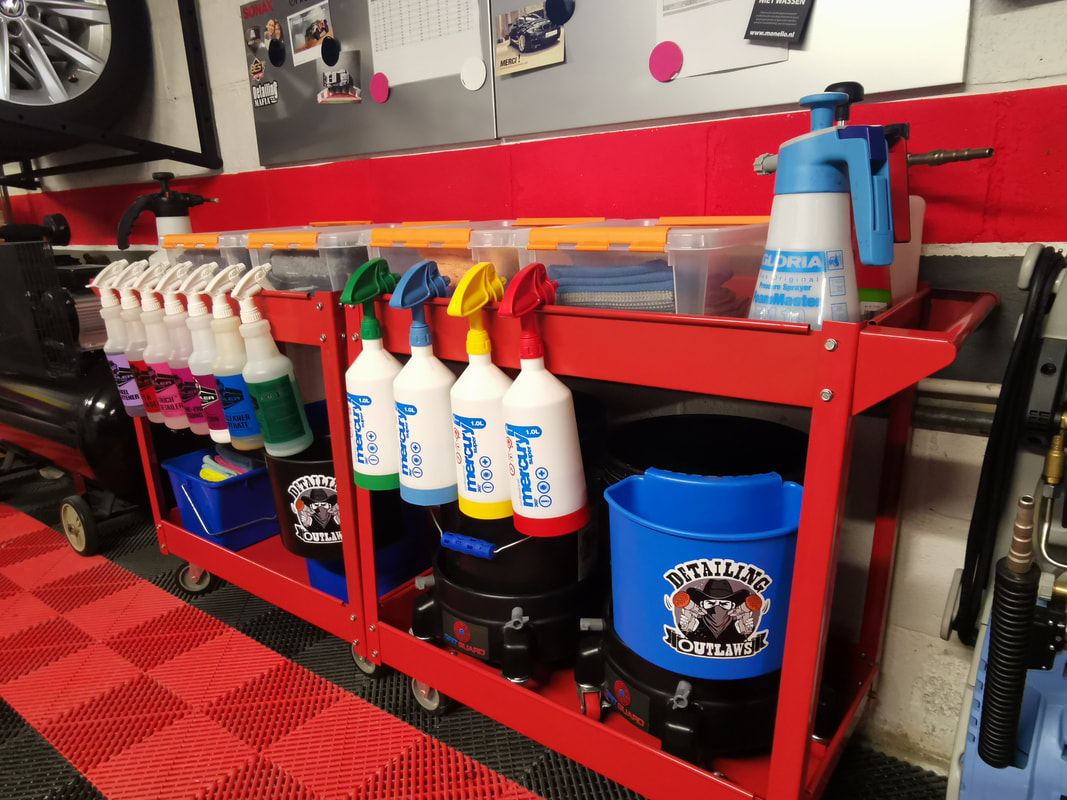
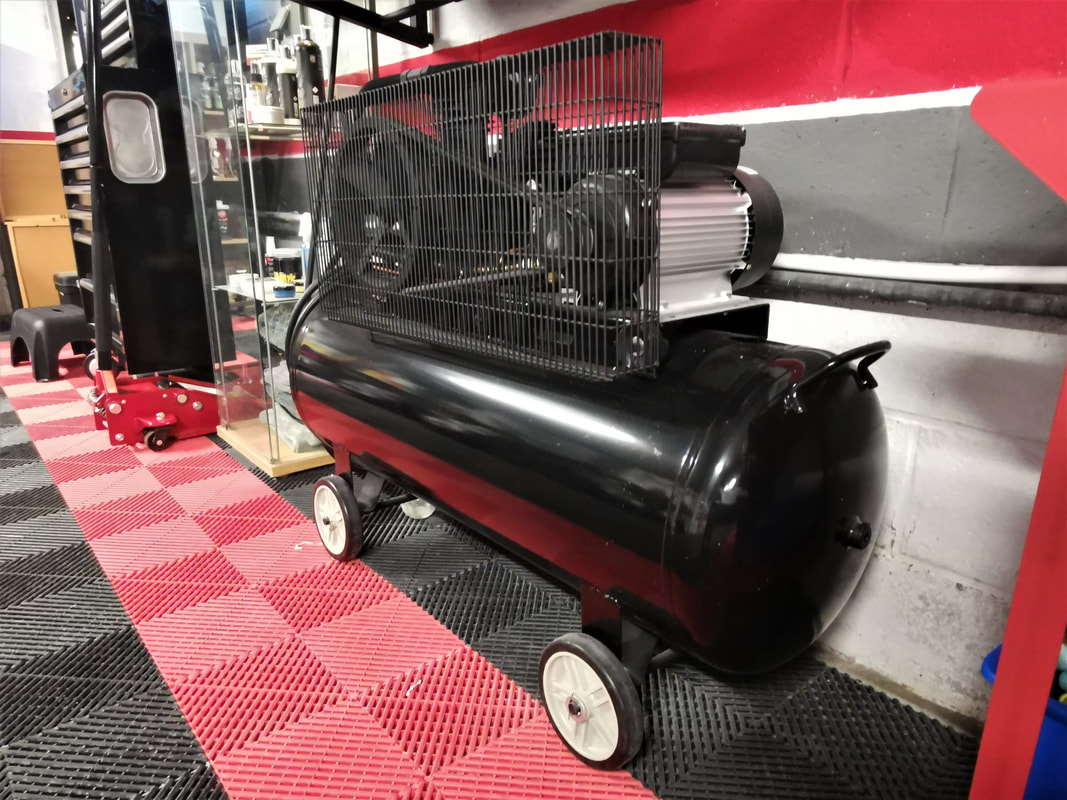
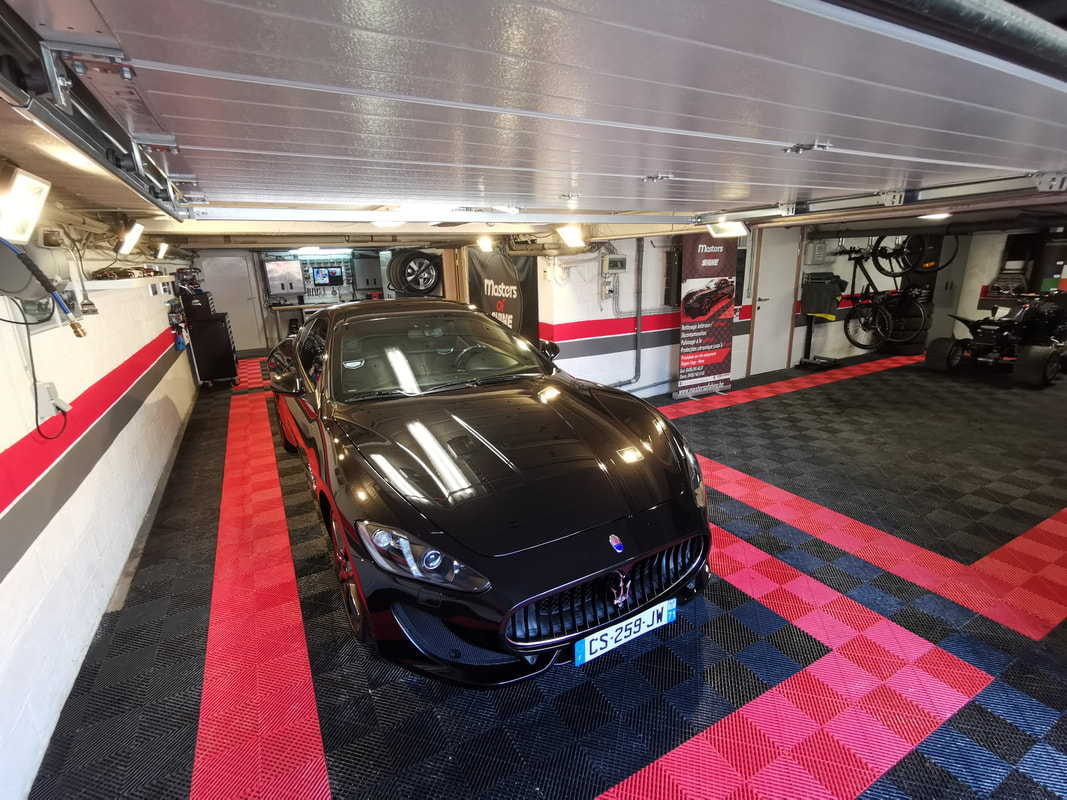
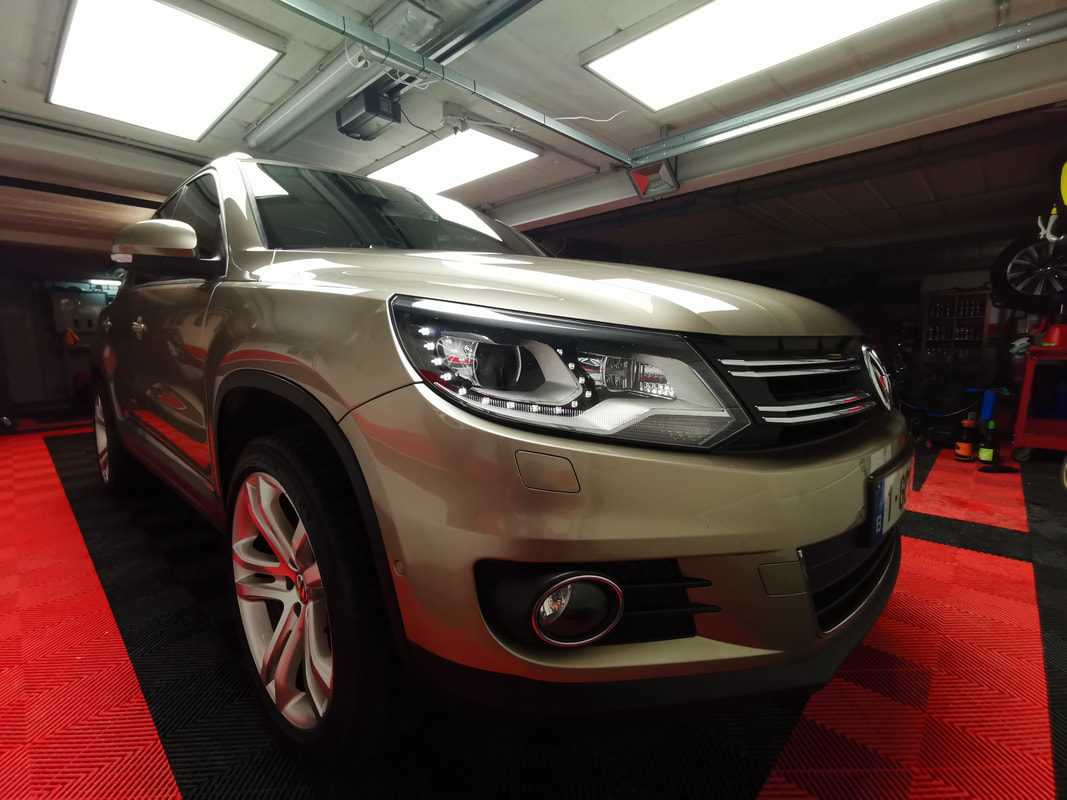
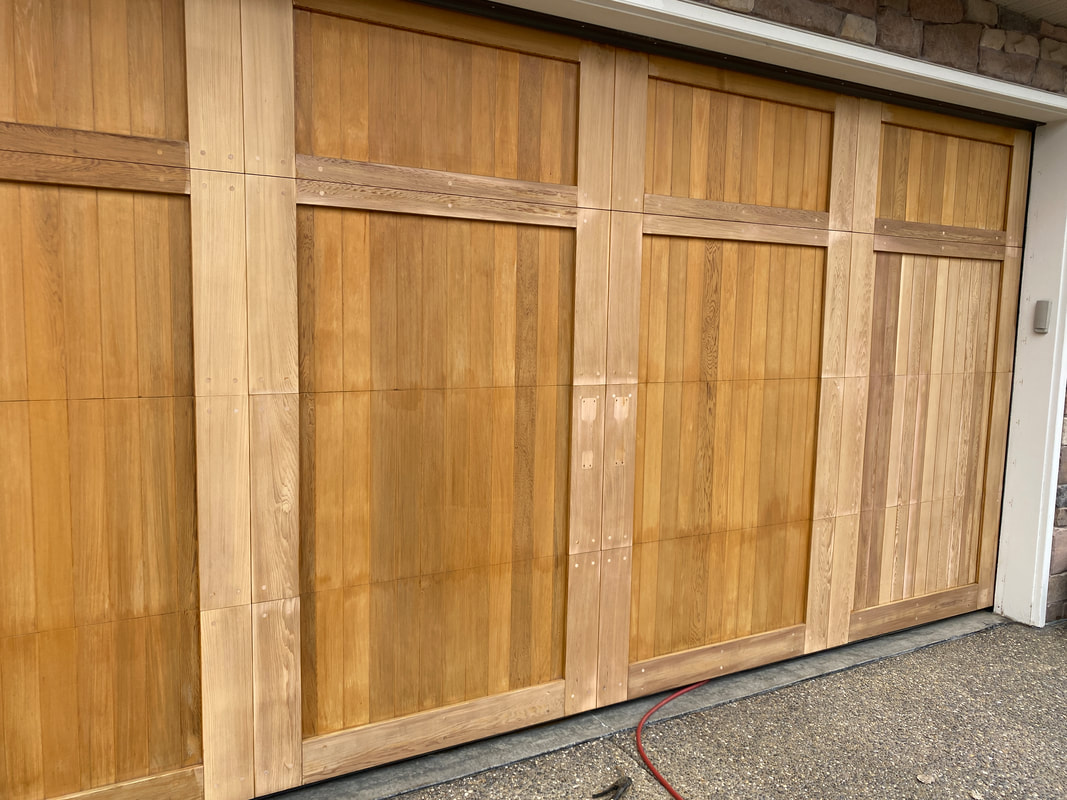
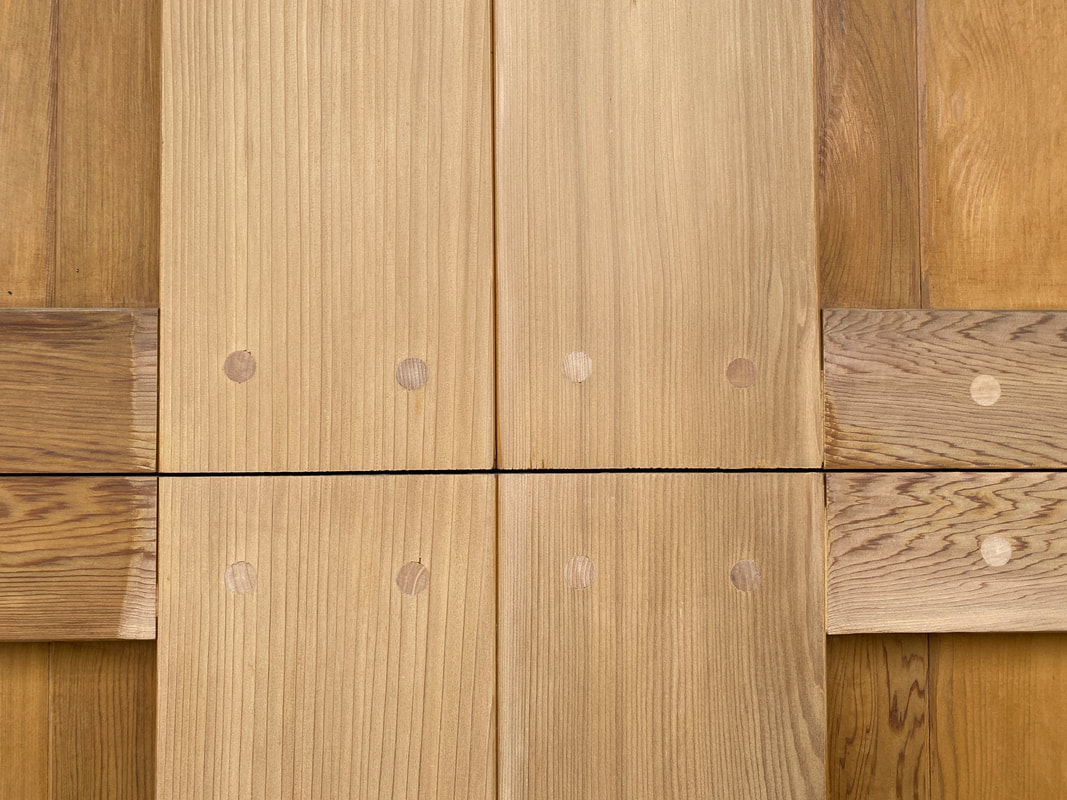
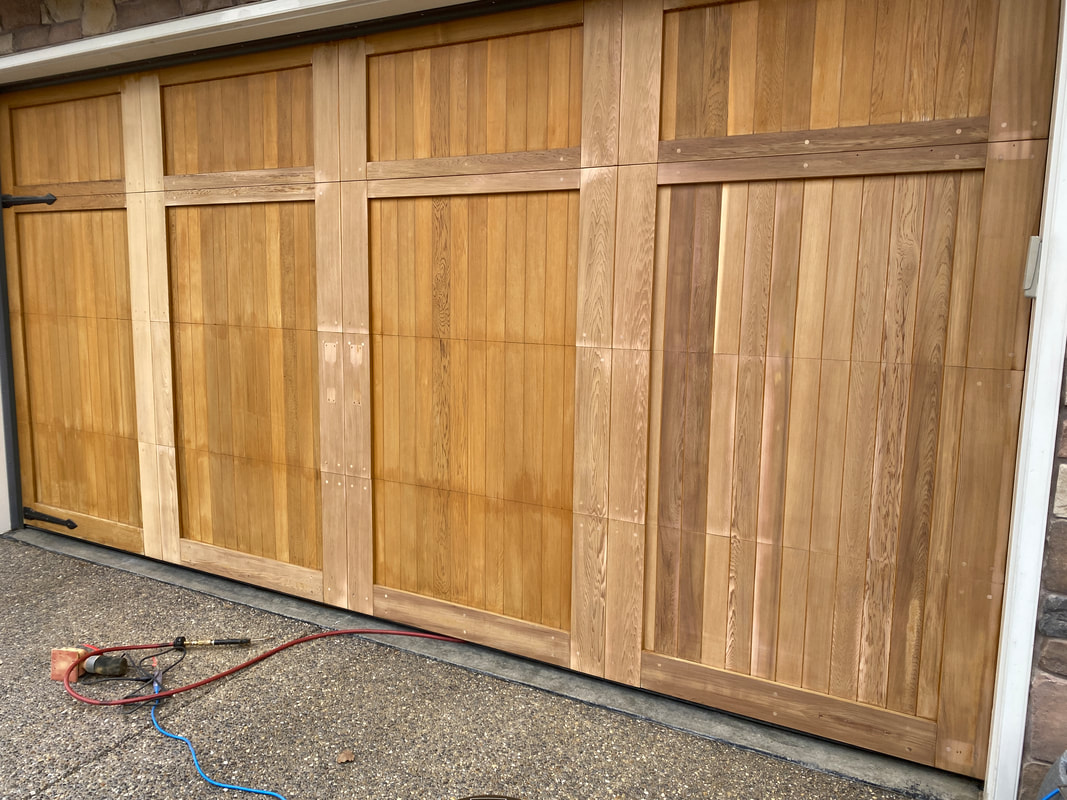
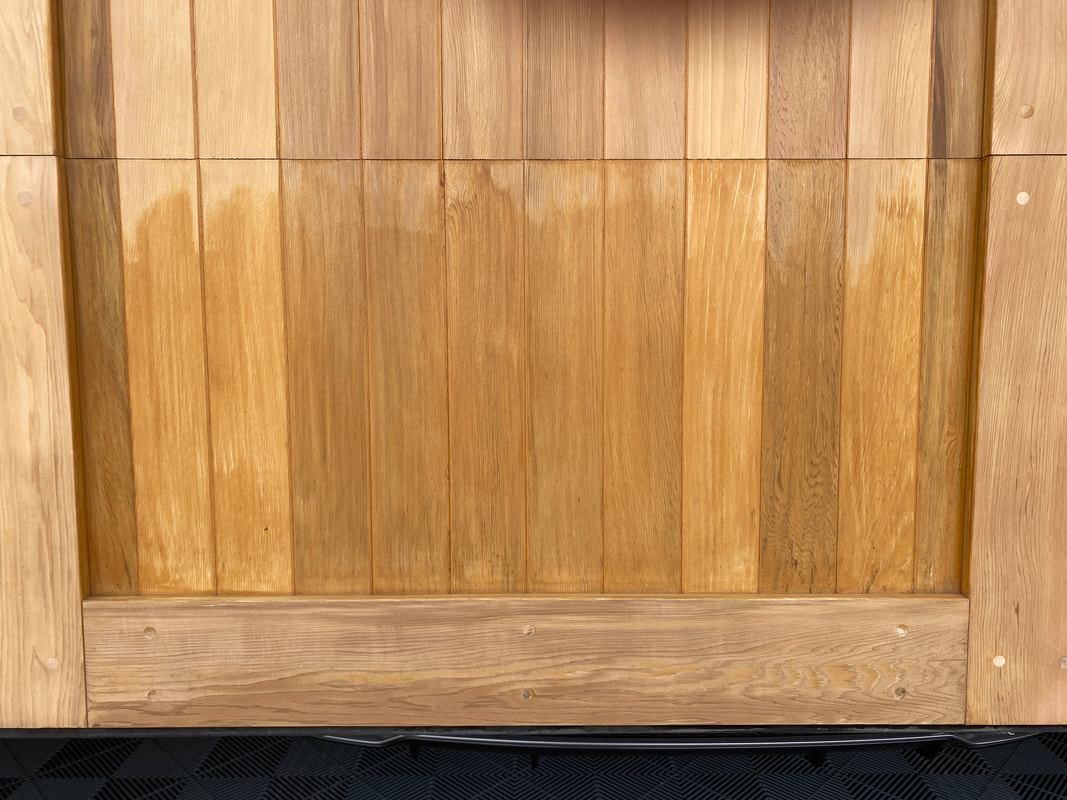
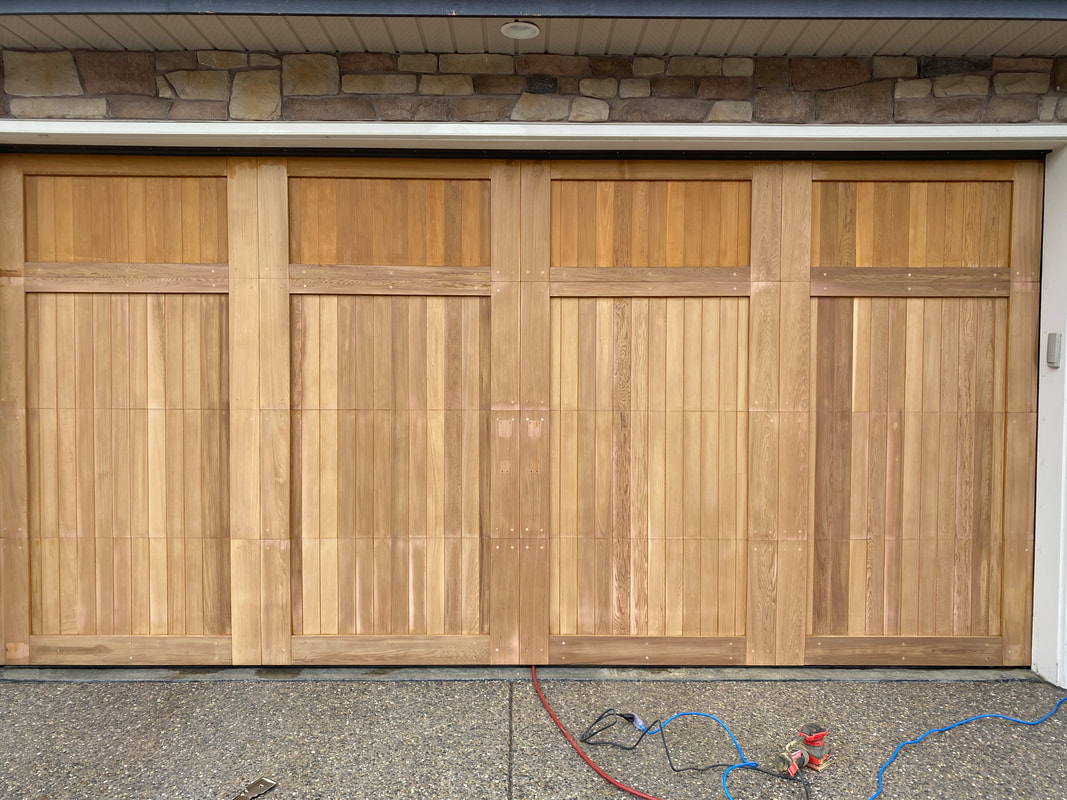
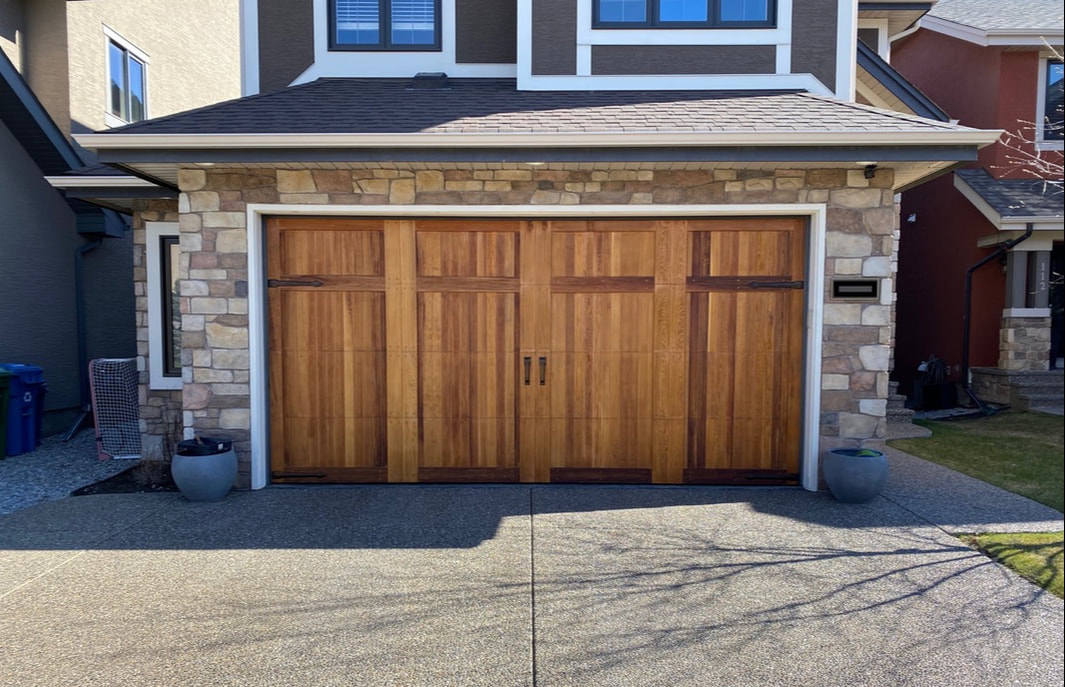 It wasn't the easiest of jobs, and I spent a few hours wiping the dust off every surface of the garage's interior, but the job is complete and I am more than pleased with the results. My initial plan was to reapply a coat of Cabot's Australian Timber Oil, but I went with Thompson's Water Seal instead. The red cedar looks absolutely decadent. I'm hoping the Thompson's lasts longer than the Timber Oil did. I only got two years out of that stuff. These photos show the progression of this rewarding project. 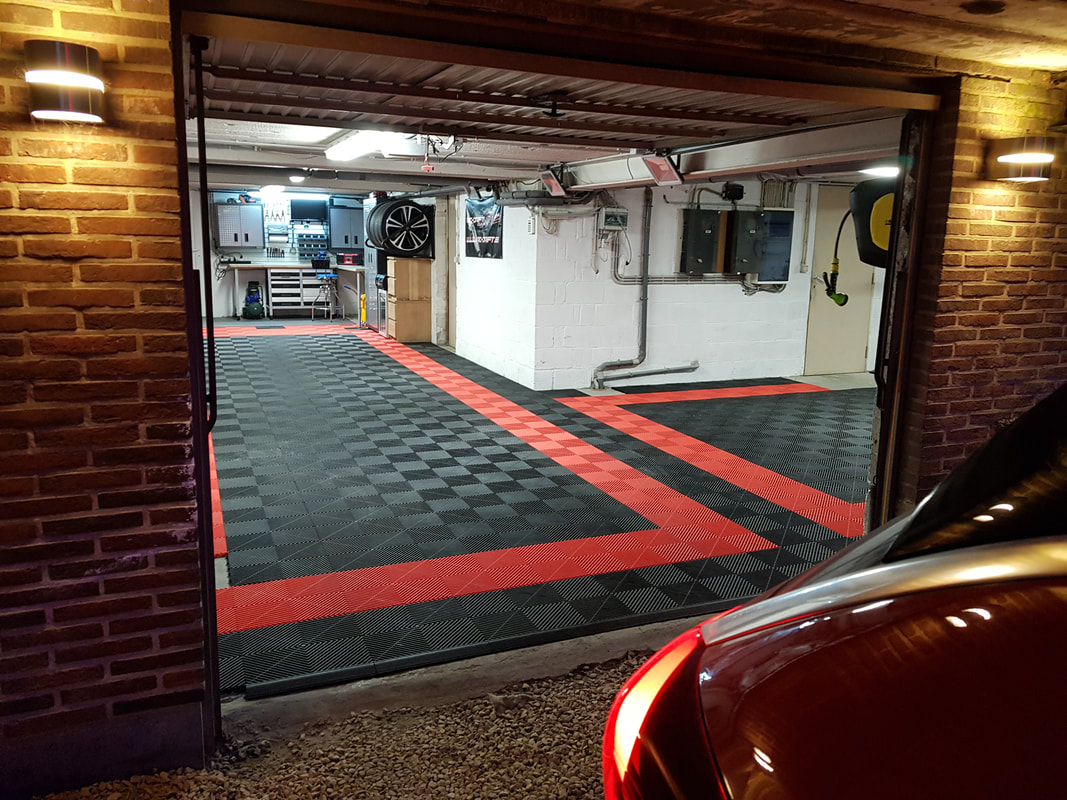 By far, the best part of this garage hobby is having the opportunity to connect with people from all over the world. I spend a lot of time responding to comments and questions on YouTube as well as carrying on behind-the-scenes conversations via Instagram and email. Recently, a viewer from Belgium reached out to me to share some photos of his garage space. Geoffrey admits many design and organizational elements of his Belgian garage were inspired by my garage and the similarities in layout, organization and style are clearly apparent. Even more humbling is the fact that Geoffrey attributes the creation of his detailing business to watching my YouTube detailing videos! Learning what I have done with my standard suburban garage in Calgary has inspired a fellow detailing enthusiast living 7000 kilometers away is just remarkable. You can check out Geoffrey's "Masters of Shine" website here. I am sure you will agree he has created a top notch site. I wish him all the best as he chases his dream and I truly appreciate him taking the time to share his story with me. I have posted a gallery of images showcasing the evolution of Geoffrey's professional detailing theatre. As you pursue the gallery, I am sure you will identify a number of common features of our two garages.
I am excited to be a part of the Obsessed Garage affiliate program. Matt extended me an invitation a few weeks ago. How the program works is, when shoppers access the OG Store using any of my links, any purchases they make in the two days following are attributed to me and I can earn credit for purchases of my own. At this time, using any links to the OG Store on my Instagram or YouTube video descriptions does not earn buyers a discount. So, if you want to chat about Swisstrax floors, pressure washers, detailing products or any other of the high quality items carried by Obsessed Garage, drop me a line here.
If you end up deciding to make a purchase, I would appreciate it if you used my affiliate link.  I didn't know how much I was looking forward to this milestone until it hit last week. I'm not saying there were tears, but I feel incredibly humbled by the support viewers have given me since I started my YT channel back in 2014. I am committed to creating as much content as my free time permits while always taking time to respond to viewer comments, questions and even the criticisms! Thanks to every one of you that ever spent time watching a RAD video! If you are in the mood to watch some videos right now, go ahead and head over to my videography page!
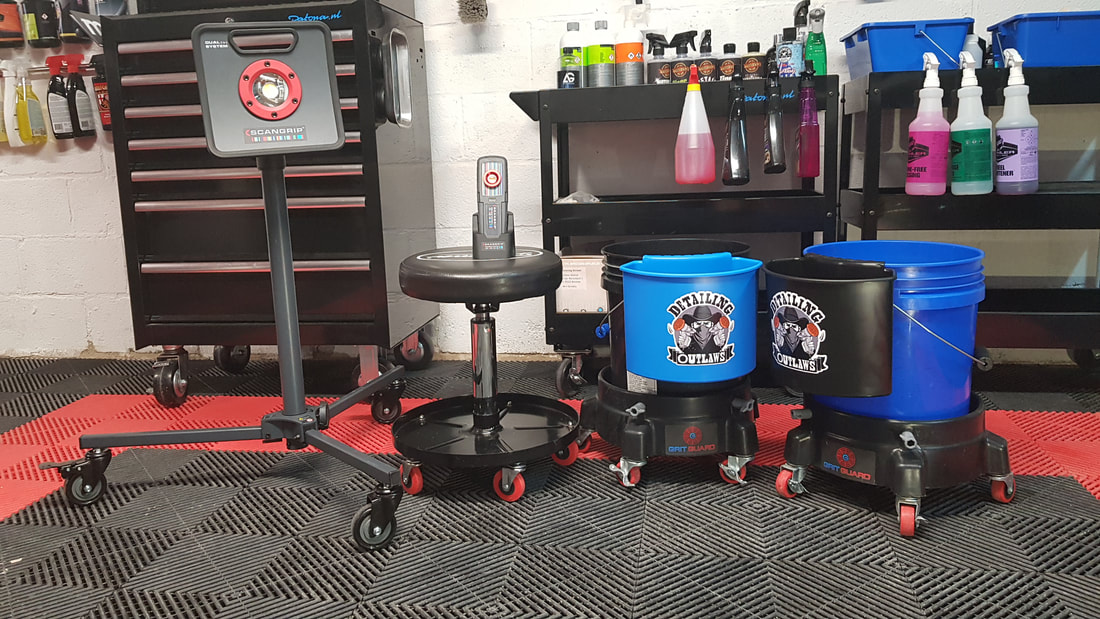
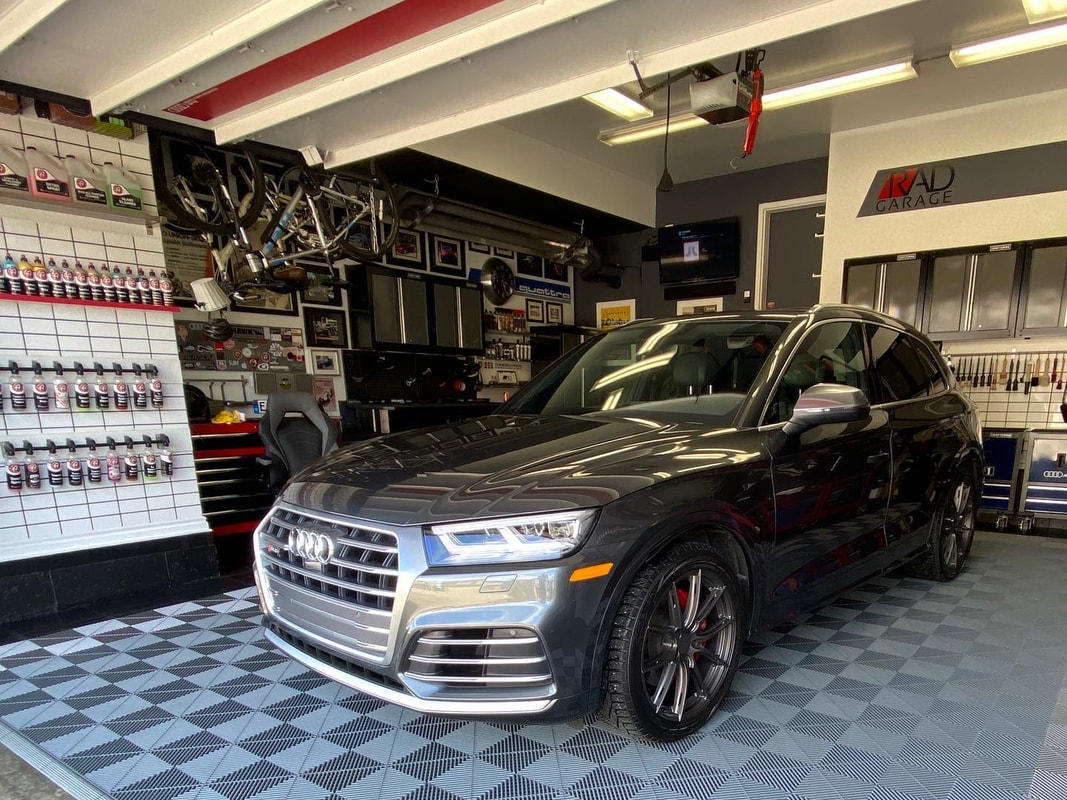
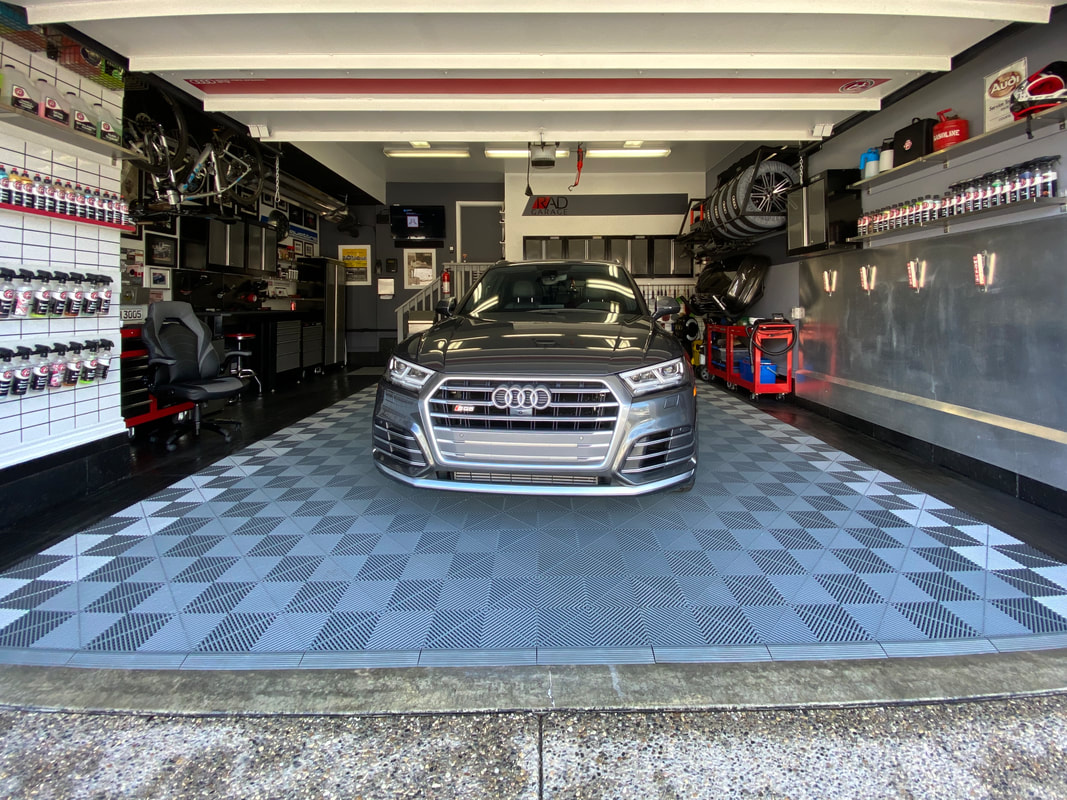
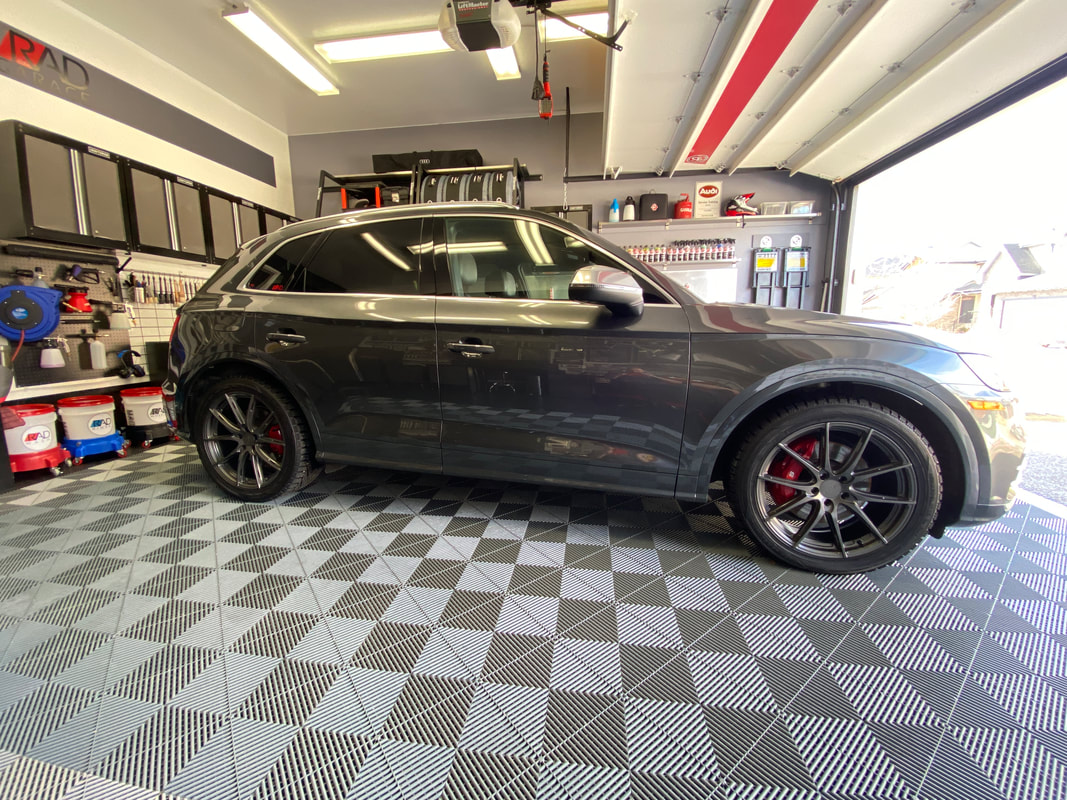
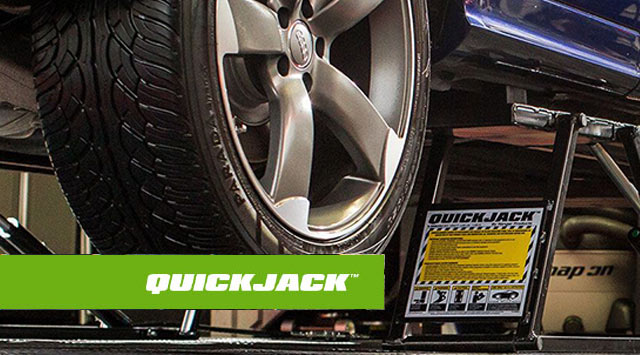
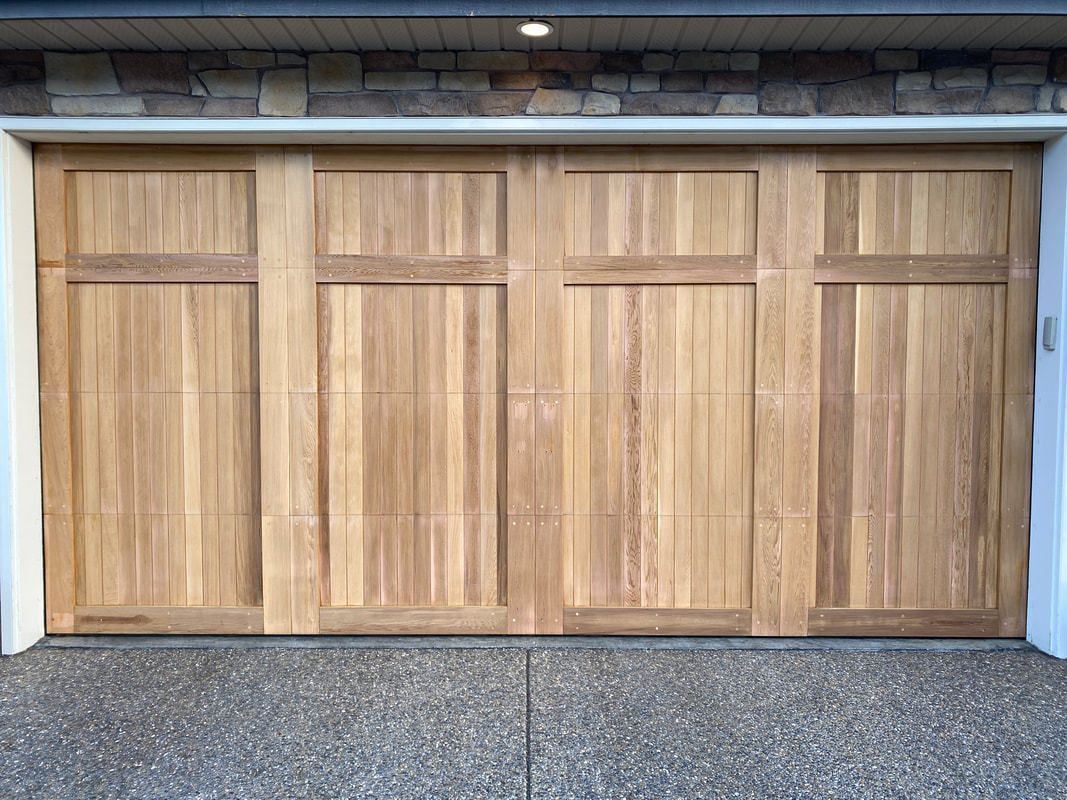 The door took eight hours to completely sand, but it looks so good in its raw finish. I will be applying a coat of Cabot's Australian Timber Oil as soon as the weather calms down. I like to sand and re-stain the garage door every couple of years. Sanding this 16x8 foot red cedar door is not an easy task. I bought a new Craftsman palm sander but it does a terrible job of capturing the copious amounts of dust. I had planned on doing a video to capture the process but it the dust is so bad that I didn't want to risk bringing harm to any of my video equipment. The sanding took me approximately eight hours, but I'm now ready for staining. The weather has turned a bit nasty so it may have to wait a few days, though. You just can't win! I'm not weird, you're weird. I love my driveway and applying an acrylic sealer to it every couple of years is something that gives me immense pleasure. Here's my attempt to capture the beauty of the process through cinematic videography. I think you will agree that my exposed aggregate driveway is the envy of the neighborhood. Be sure to stick around to the very end of the video to see the driveway glisten in the evening sun! I performed an undercarriage detail of my SQ5 last weekend and the floor paid a heavy price. The floor under the Swisstrax was absolutely caked in mud and filth from the wheel arches and undercarriage. I performed a very deep cleanse of the floor using some of my new tools. The process was cathartic and the video illustrates each one of the steps I followed to restore the garage floor to pristine cleanliness. Here's the video: 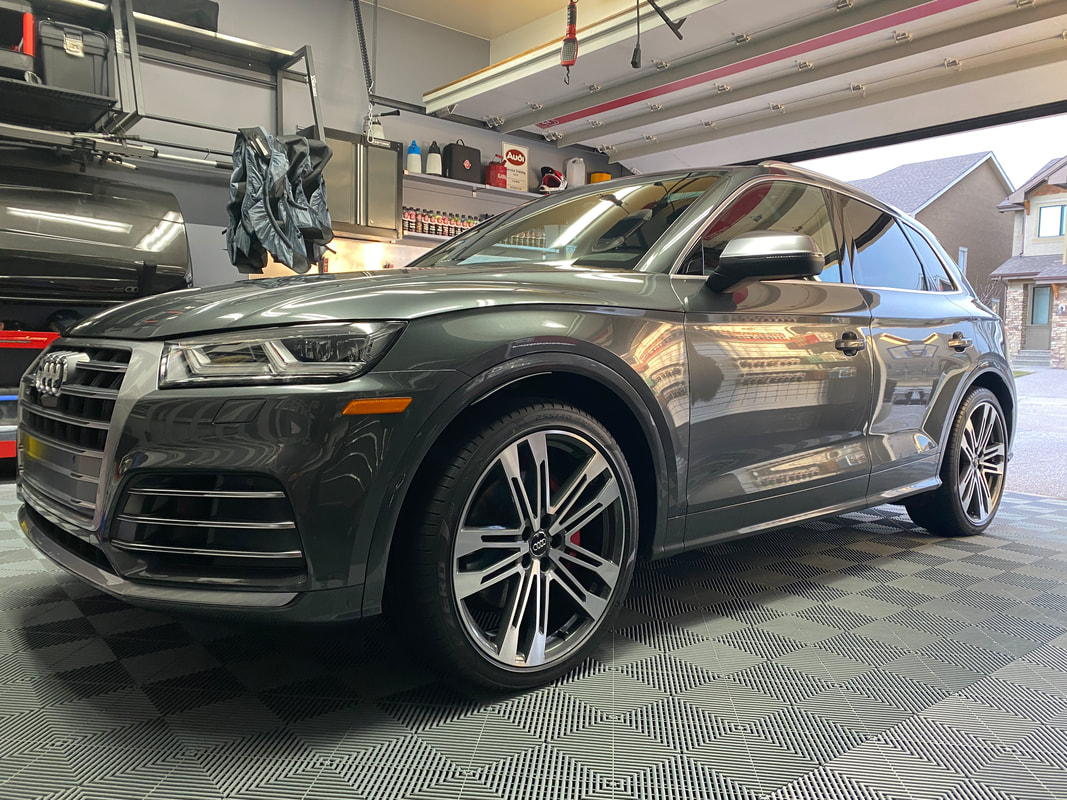 I am so glad the weather has turned Spring-like. Not because I want to tiptoe through the tulips, but because I want to finally give my SQ5 the spring cleaning it so richly deserves. The outside and inside are immaculate, but the undercarriage and wheel wells are still coated with a thick layer of winter muck. I spent the better part of two days giving the neglected regions of my car some attention. With the QuickJack, I was able to pull the wheels off and perform over twelve hours of care to the car with it safely perched in the air. This makes getting to the undercarriage and wheel wells incredibly easy and satisfying. I put a lot of work into capturing the art of this process and I hope you will find the video as satisfying as I do. I will include links to most of the products and tools I used for this project below. Happy spring everyone! A D A M ' S P O L I S H E S P R O D U C T L I S T
Mega Foam Shampoo Strip Wash All Purpose Cleaner Iron Remover Glass Cleaner Rubber Mat and Liner Cleaner Ceramic Boost Ceramic Paint Coating E Q U I P M E N T L I S T Quickjack BL-5000 SLX Portable Lift Ryobi Water Broom MTM PF22 Foam Cannon Gloves CarPro Merino Wool Wash Mitt MetroVac Master Blaster Car Dryer Detail POPO "Ocean" Microfiber Towel Adam's Polishes Detailing Stool IK Continuous Sprayer 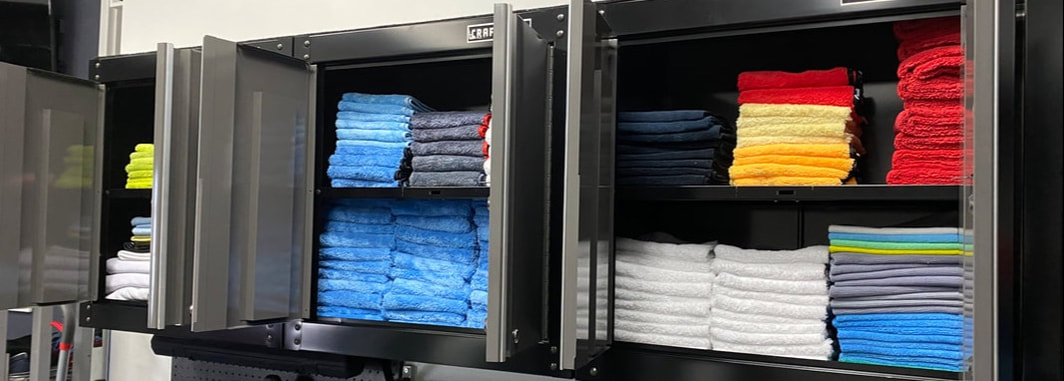 I have a lot of microfiber towels. Too many to be honest. So, today I tackled the big job of paring my collection down. I did this to streamline and bring consistency to my collection, but also to make room for almost 80 new towels. I made a big purchase of Detail POPO towels from Carzilla on the recommendation of someone who I respect. I think these new towels will breath life into my towel collection and come in very handy as summer approaches. Here's a video of the process along with a list of the specific towels I picked up. If you are a Canadian detailing pro or enthusiast like me, and you're looking to expand your detailing product or equipment arsenal, be sure to apply my "RADGARAGE" discount code to your CARZILLA.CA order to receive a 5% discount! 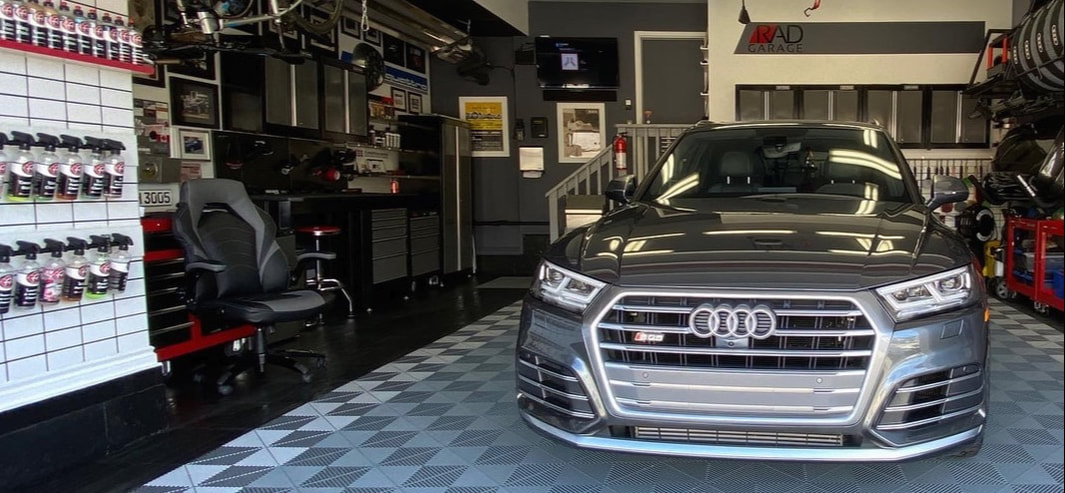 With the isolation comes the need to tidy. Here's a look at the tidiest garage in Western Canada. |

RAD GARAGE is my personal detailing theatre. I am a teacher who finds immense pleasure in completing deeply therapeutic, thorough and highly satisfying detailing projects in my residential garage. I have converted my suburban double car garage into a world class detailing environment and I enjoy caring for my own car and select cars belonging to others. The garage and the work I complete in it have allowed me to connect with other detailing enthusiasts from around the world.

I have teamed up with Teespring to offer viewers an opportunity to grab some RAD gear! Click here to see the current inventory of RAD merchandise available at my Teespring store!
Use "RAD10" to save yourself 10% until the end of March, 2021.

Carzilla is a local detailing store that caters to the North American community of professional and enthusiast detailers. I have been a longtime customer and I am fortunate to call the owner a friend. Besides stocking a vast quantity of top quality detailing products, the owner has supported various garage and detailing projects of mine over the years.
5% discount code
|


 RSS Feed