|
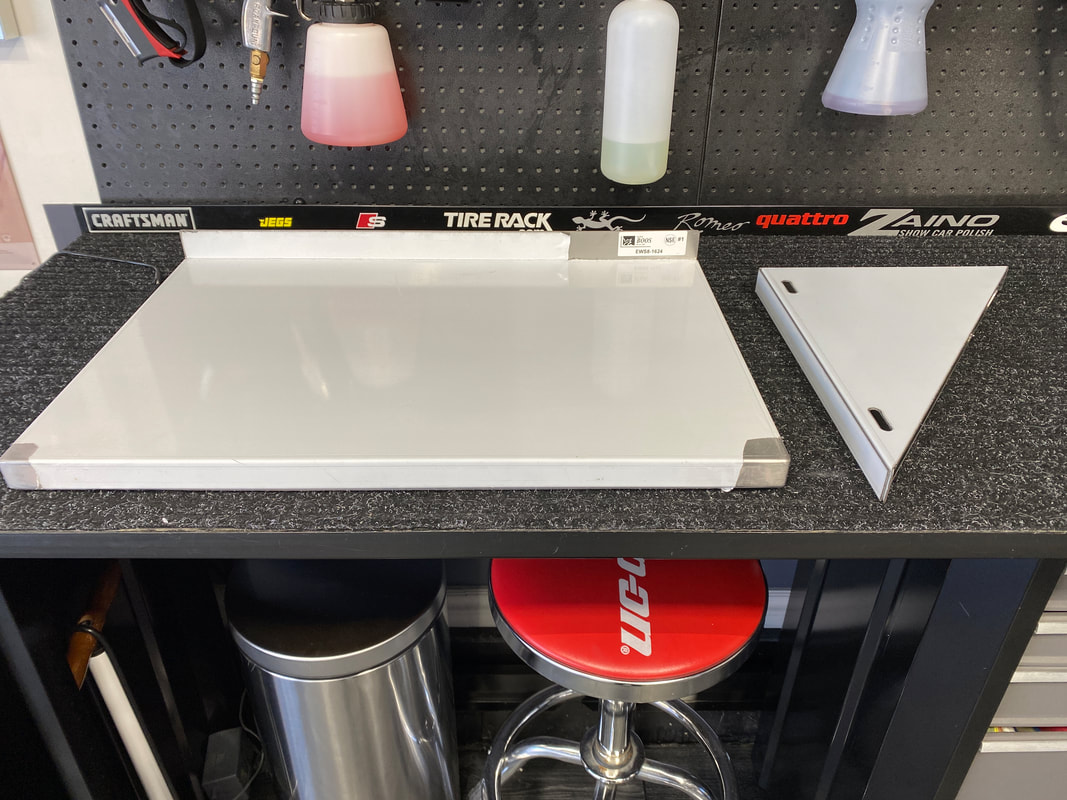
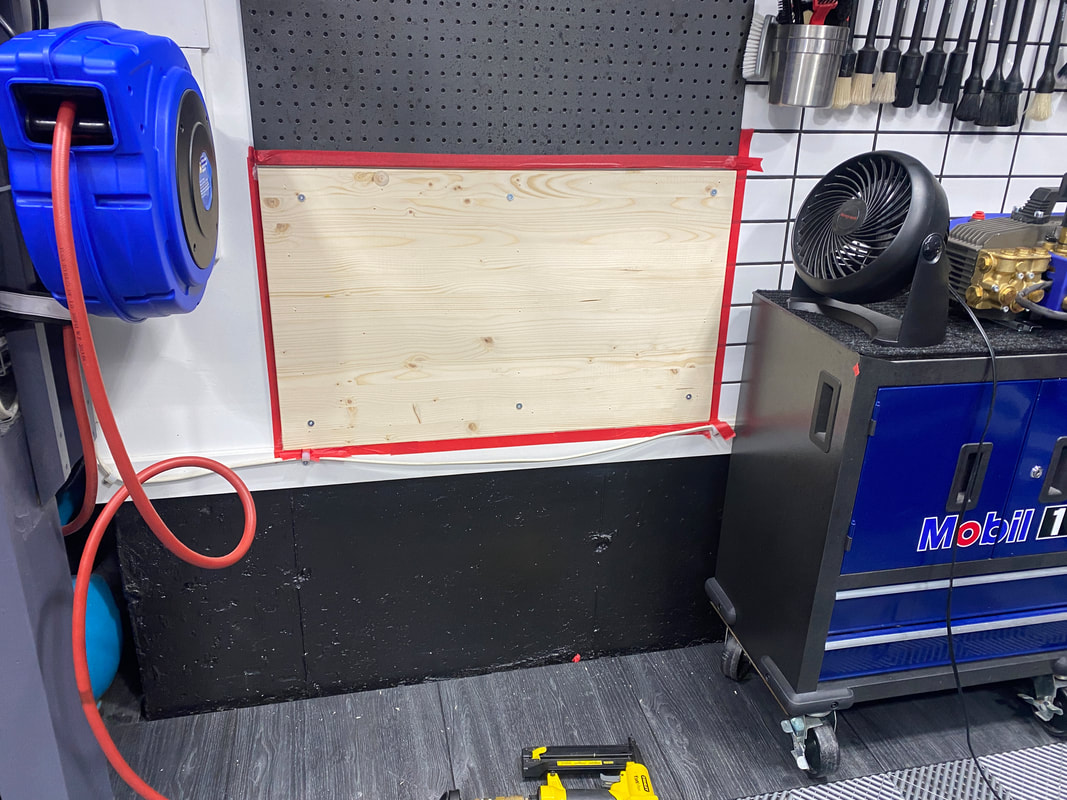
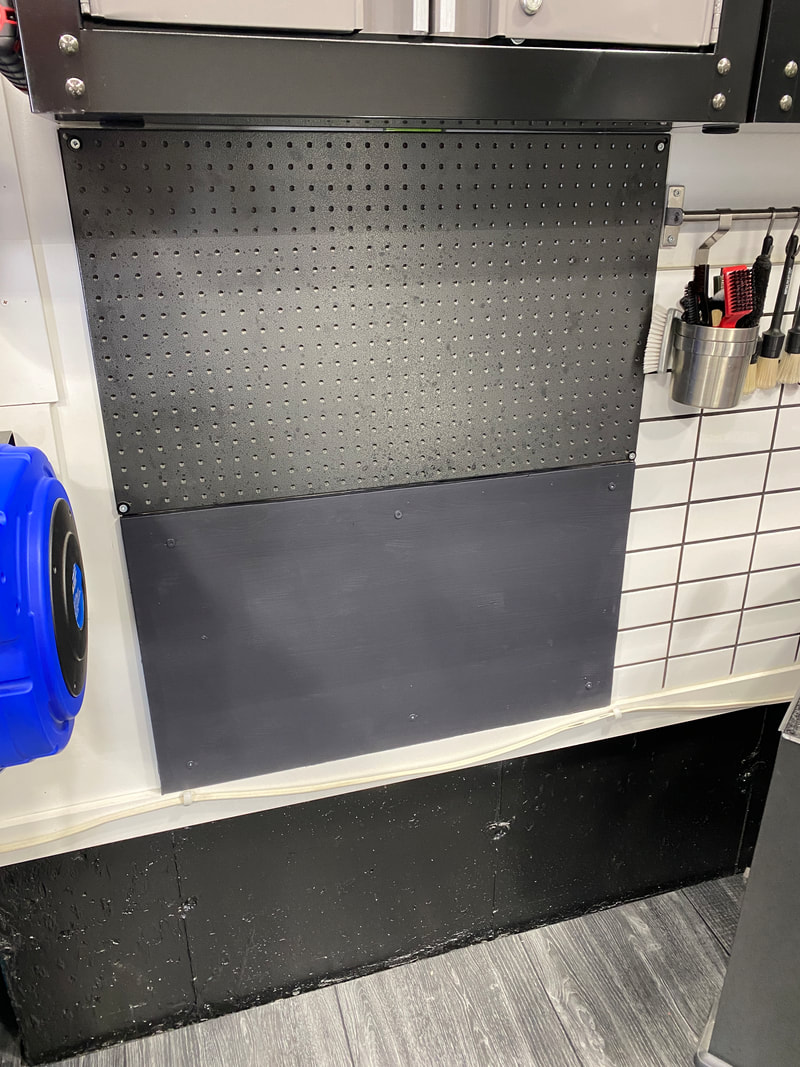
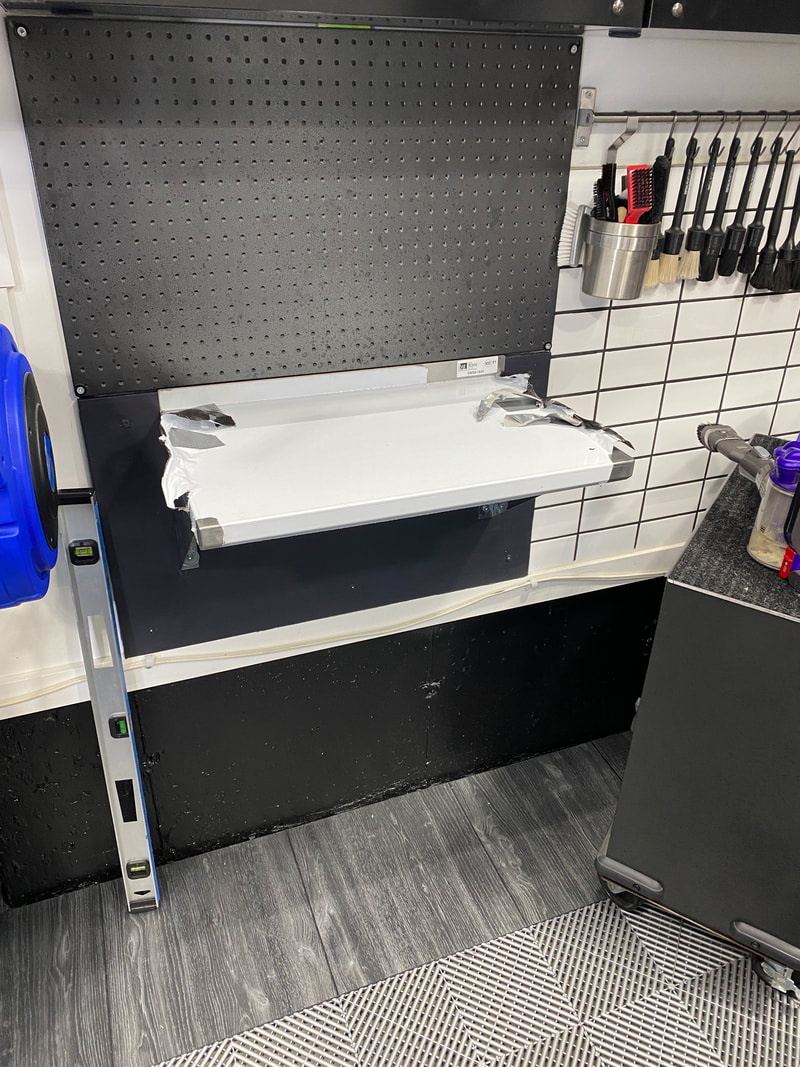
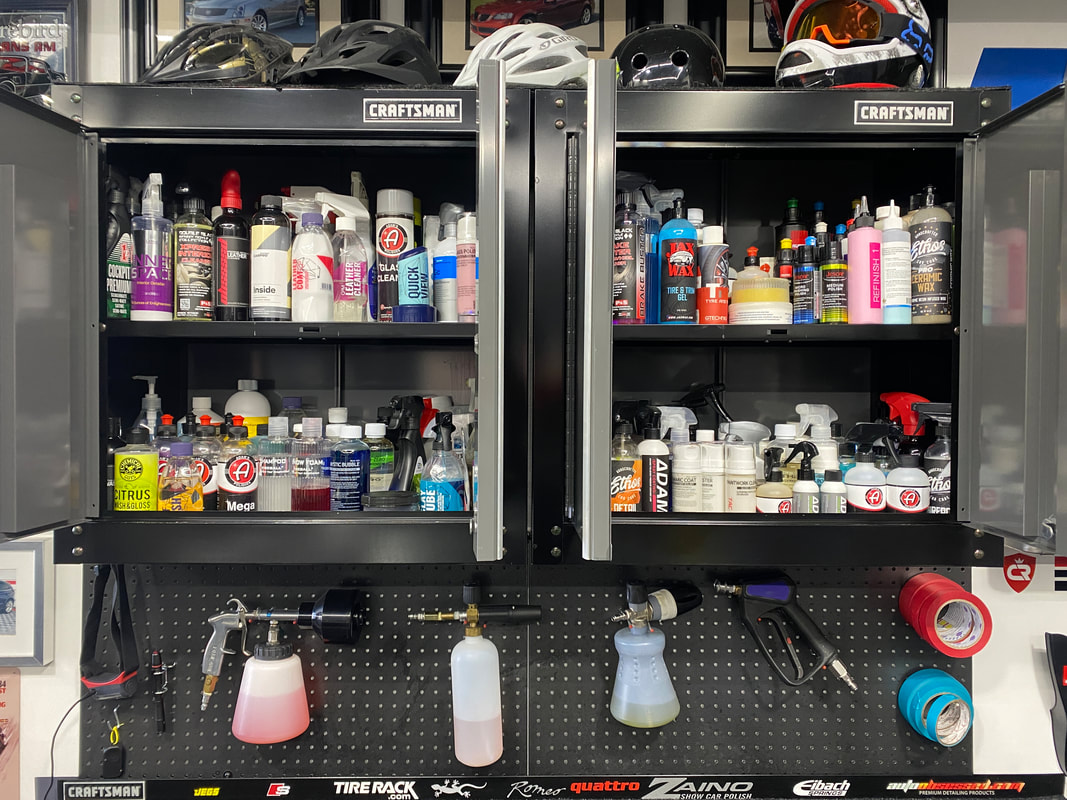
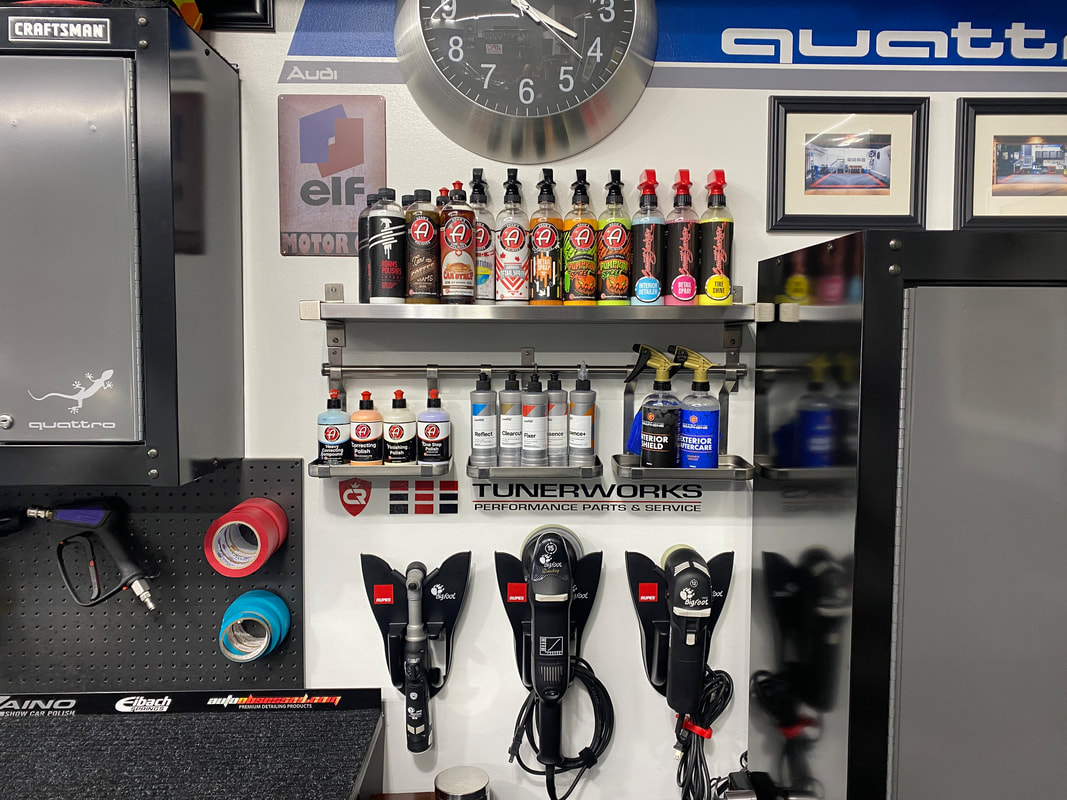
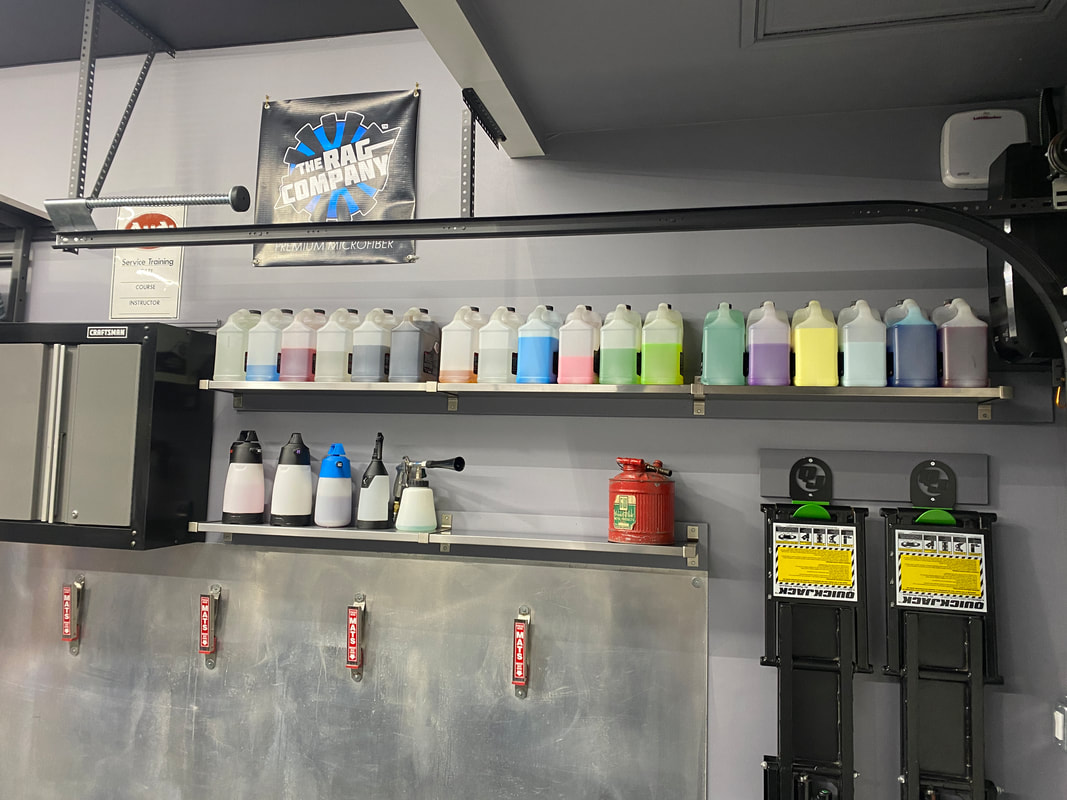
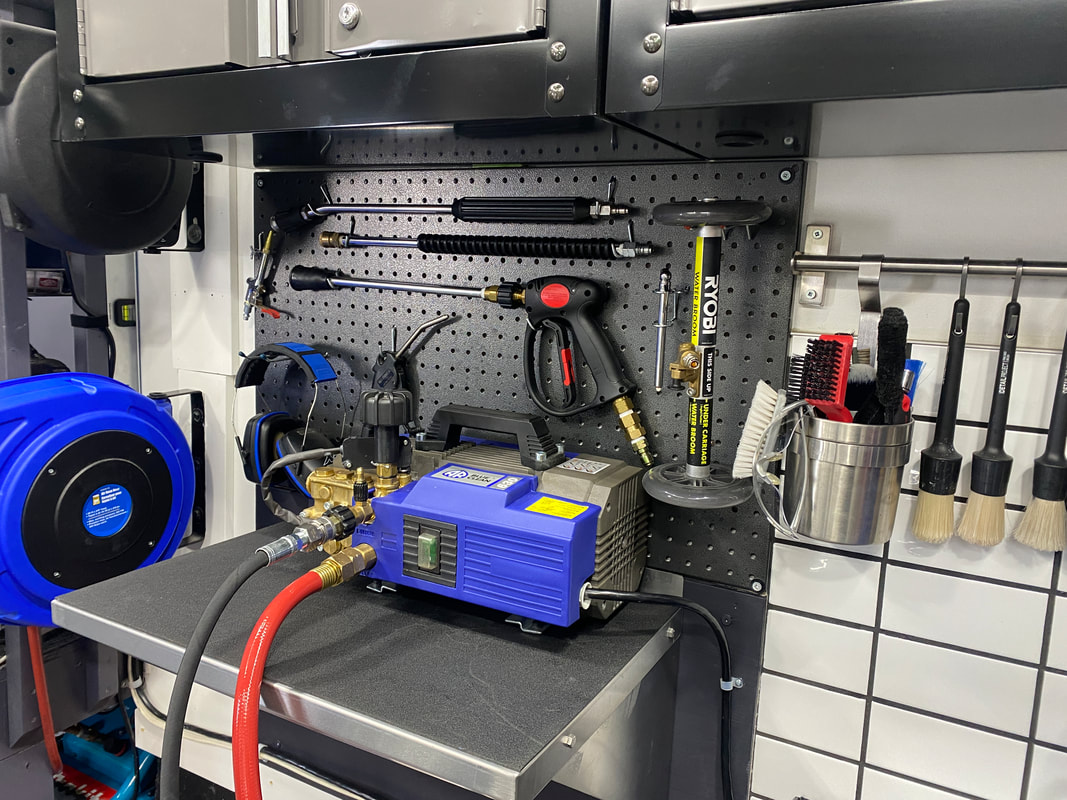
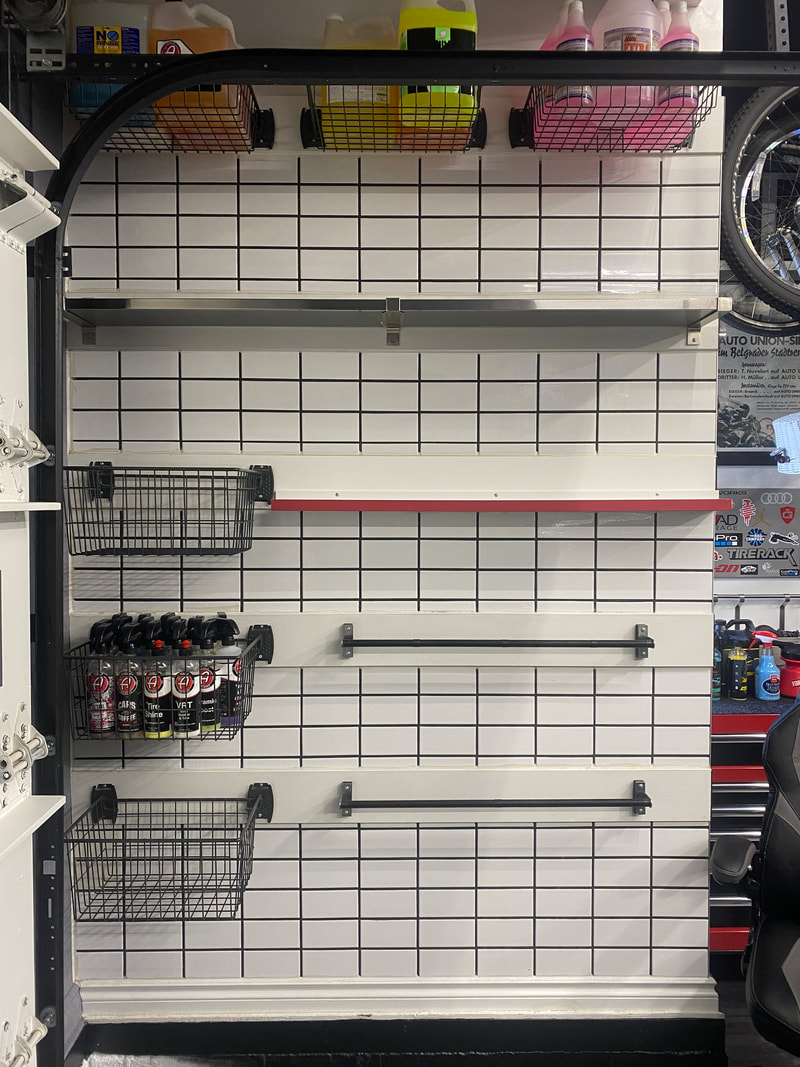
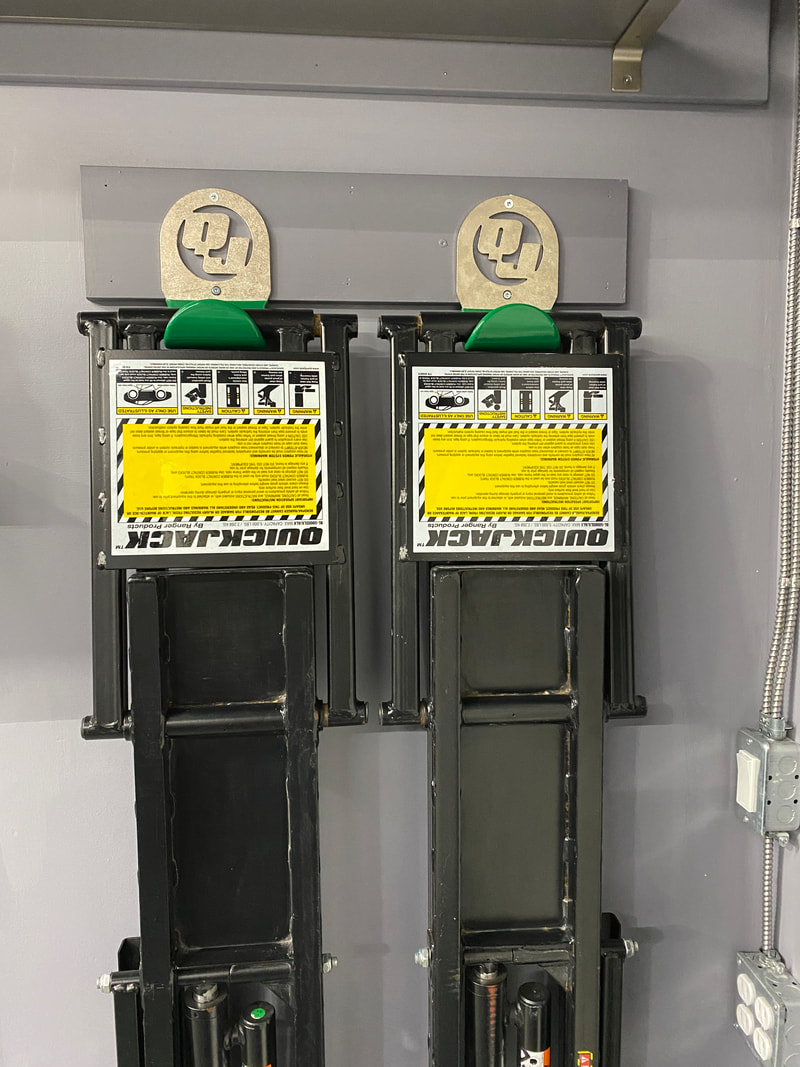
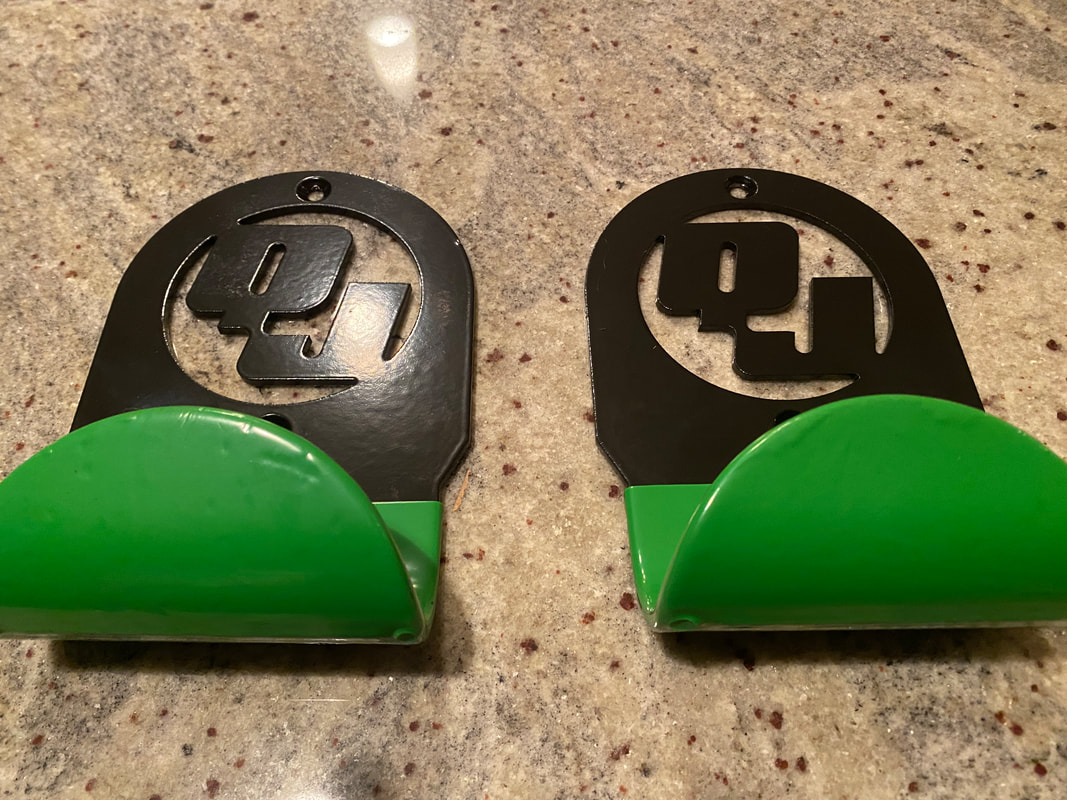
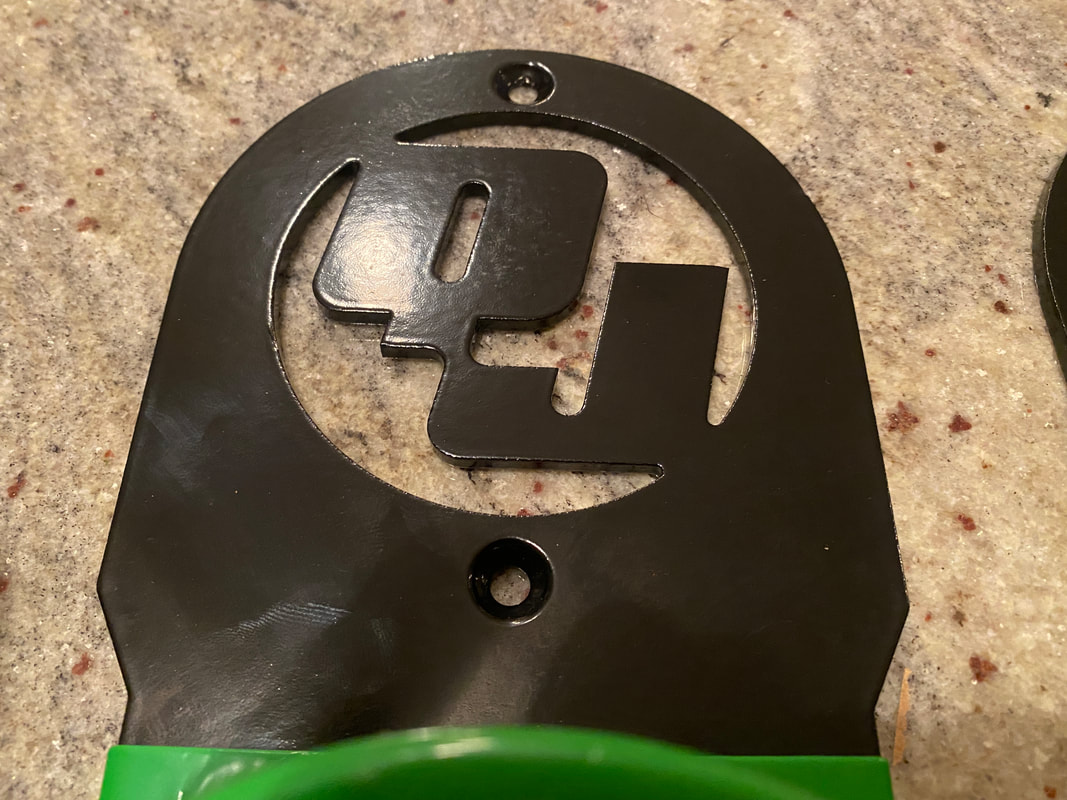
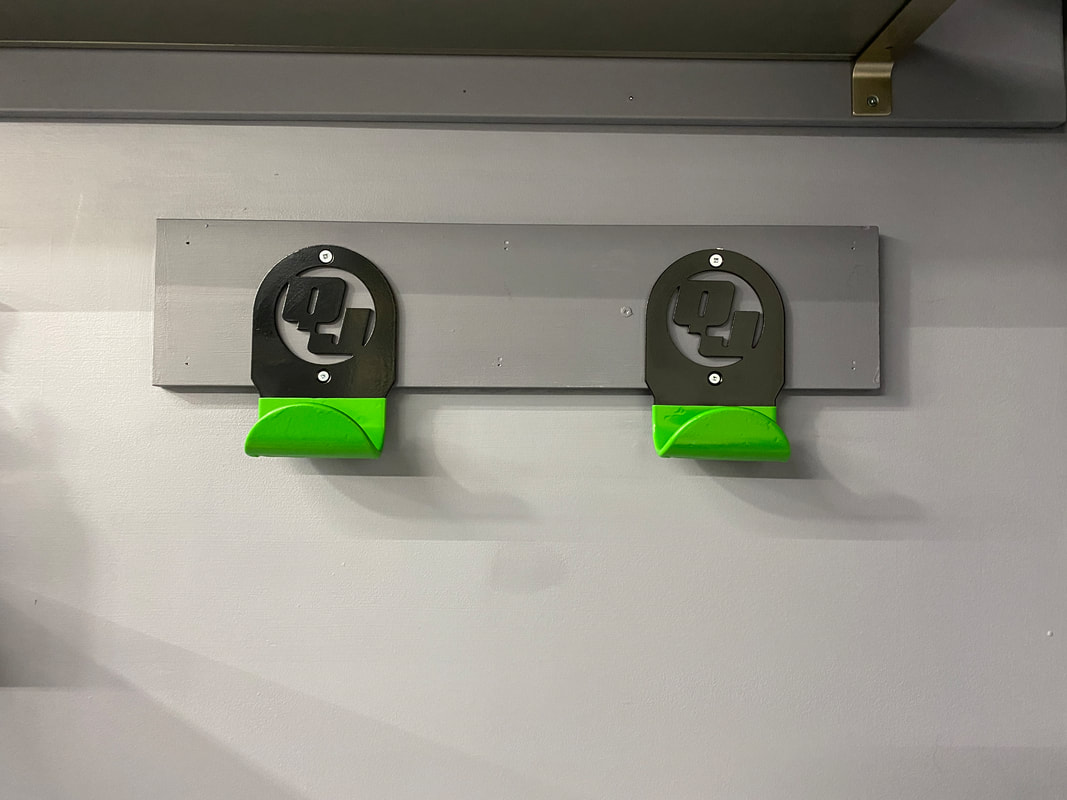
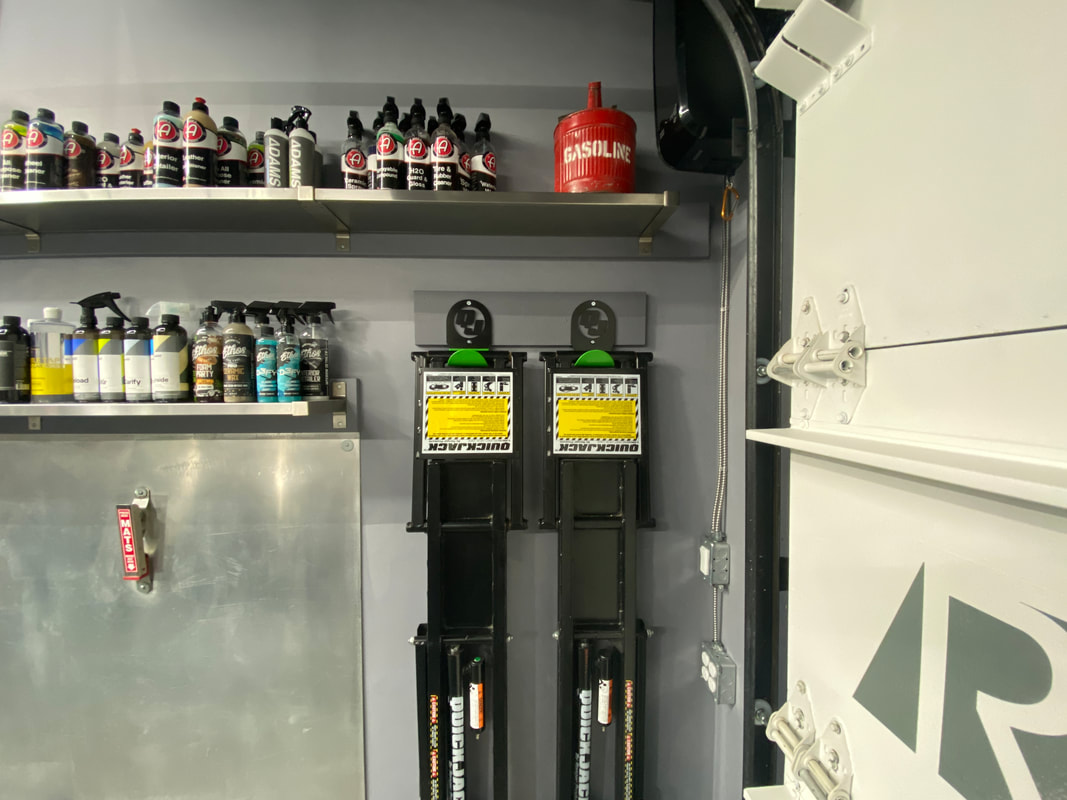
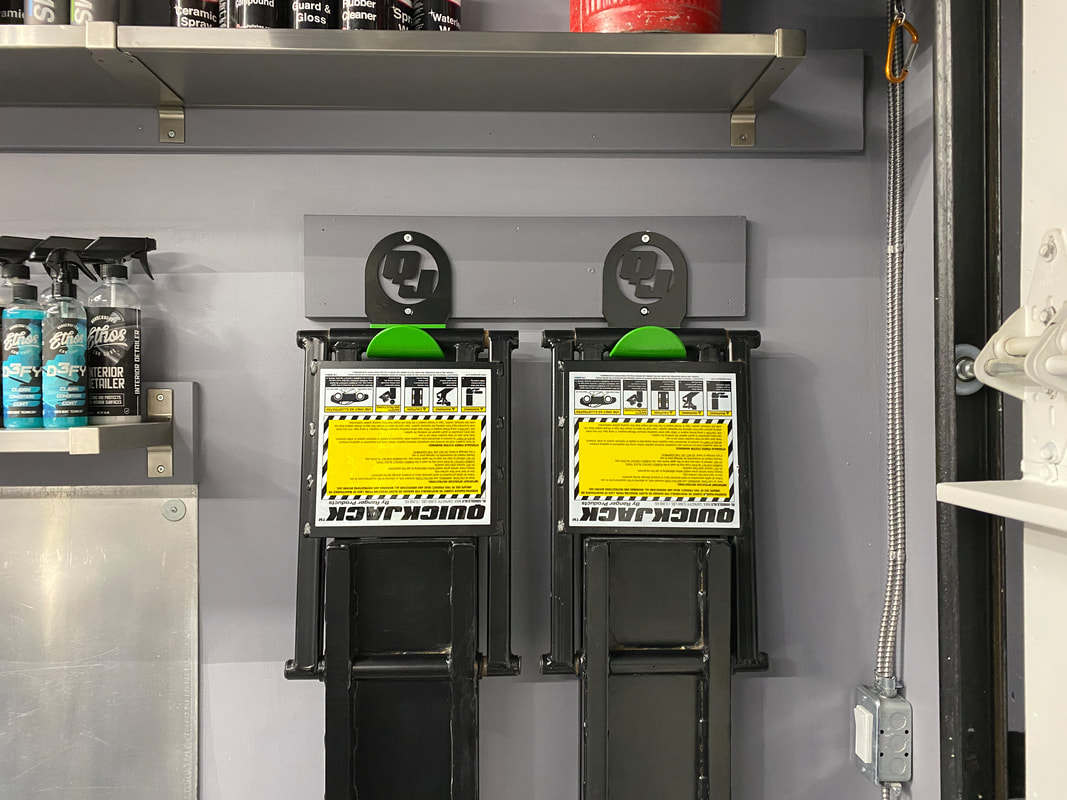
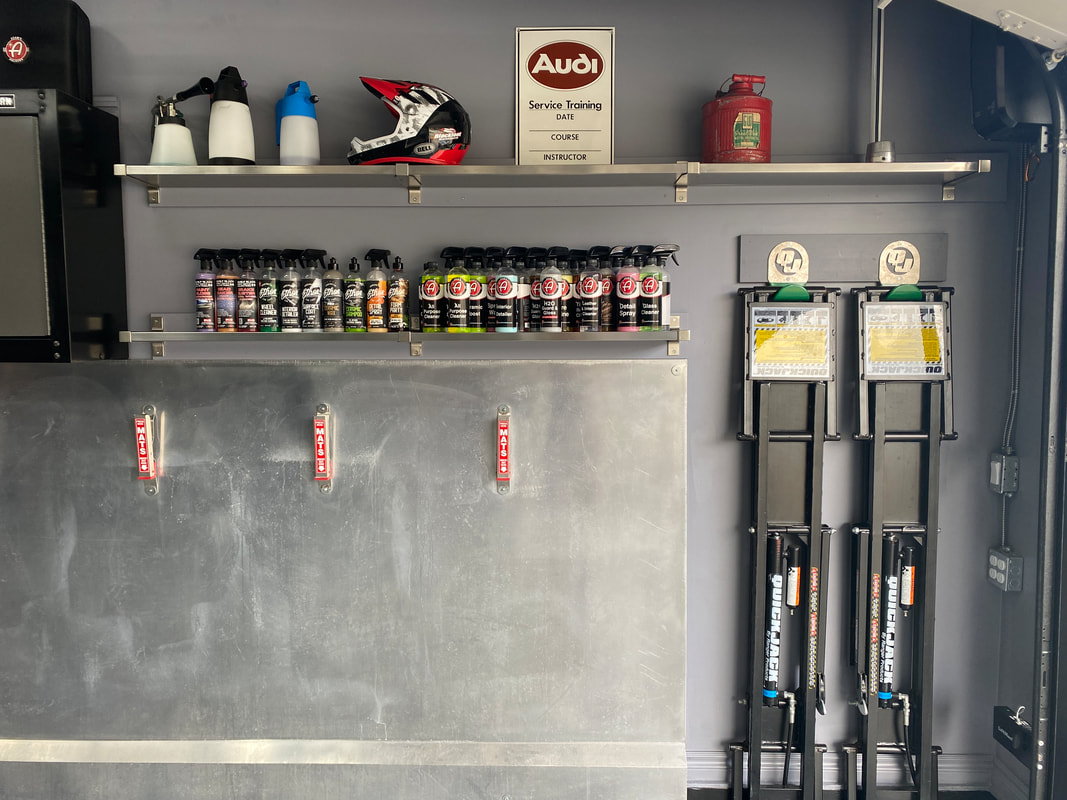
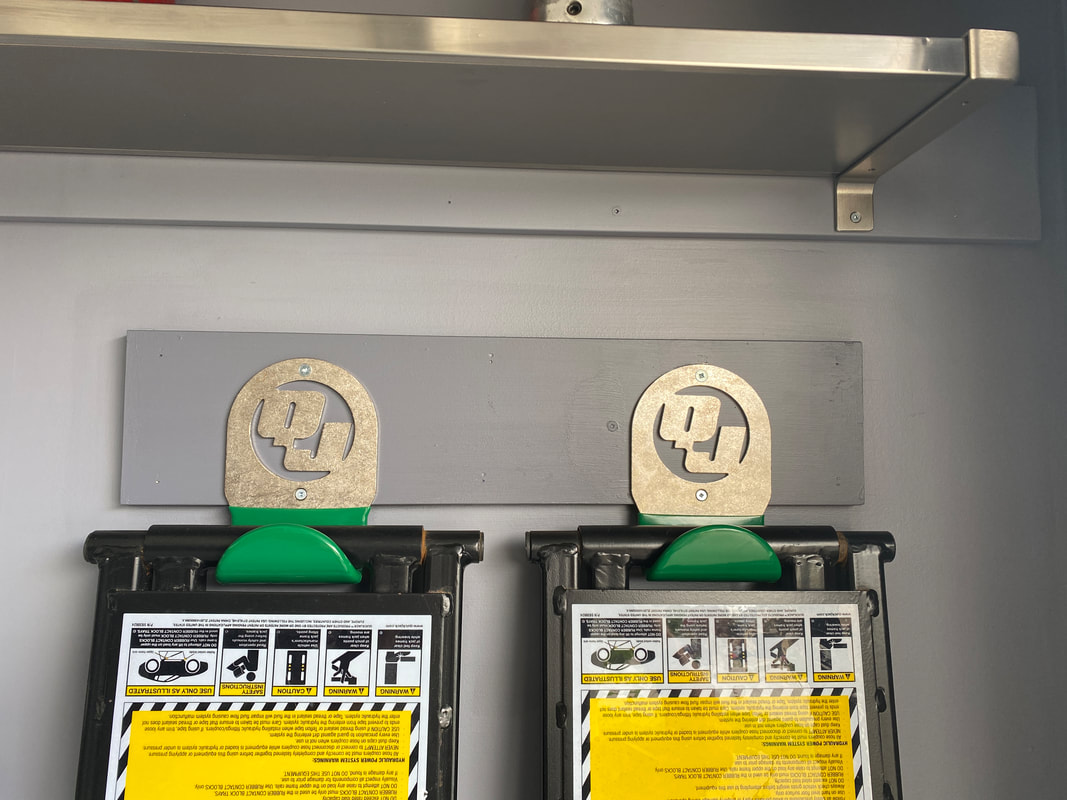
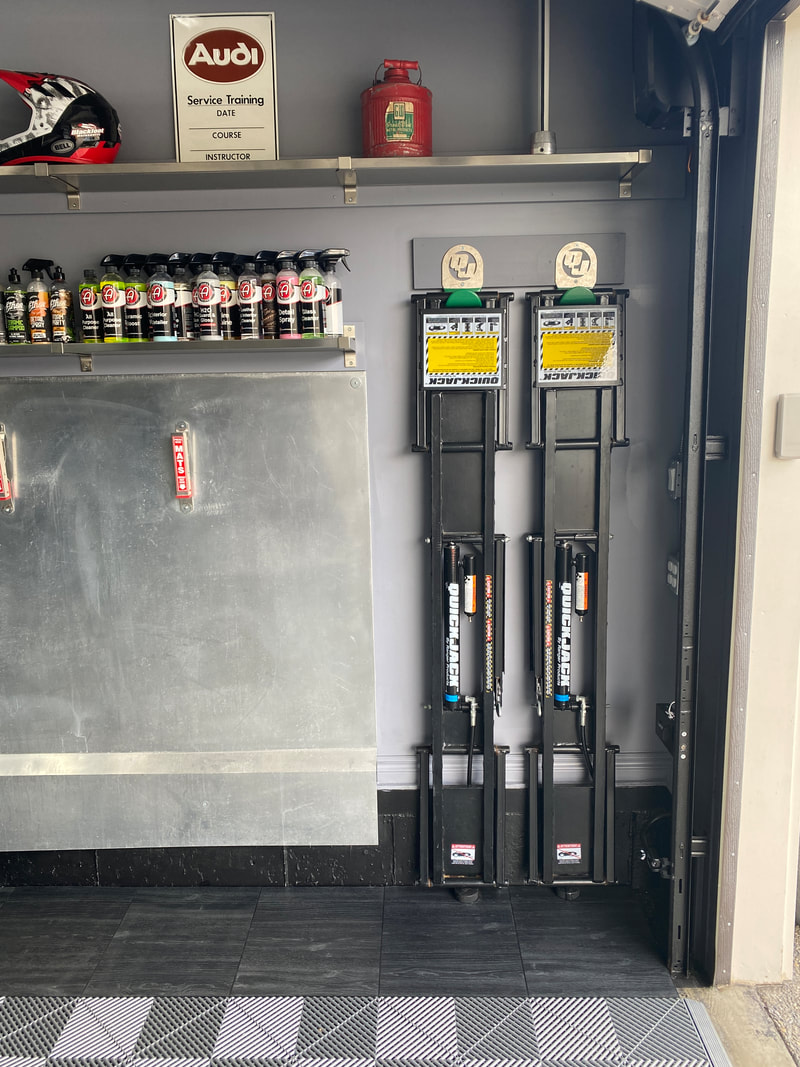
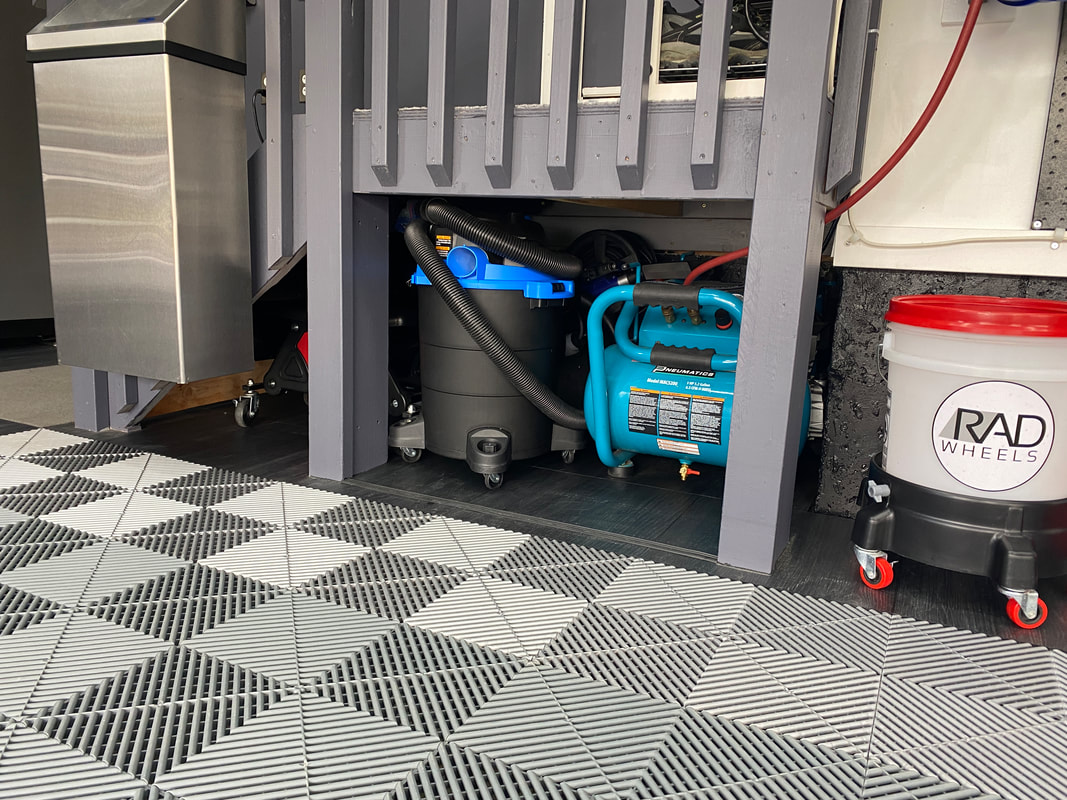
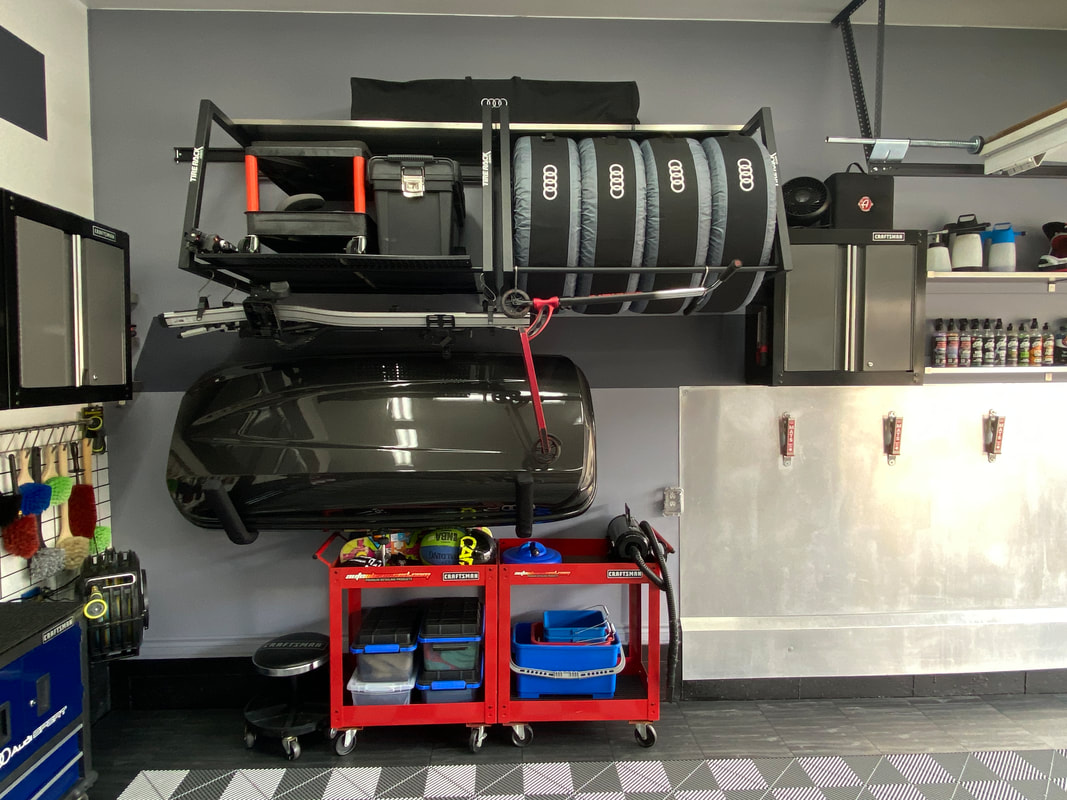
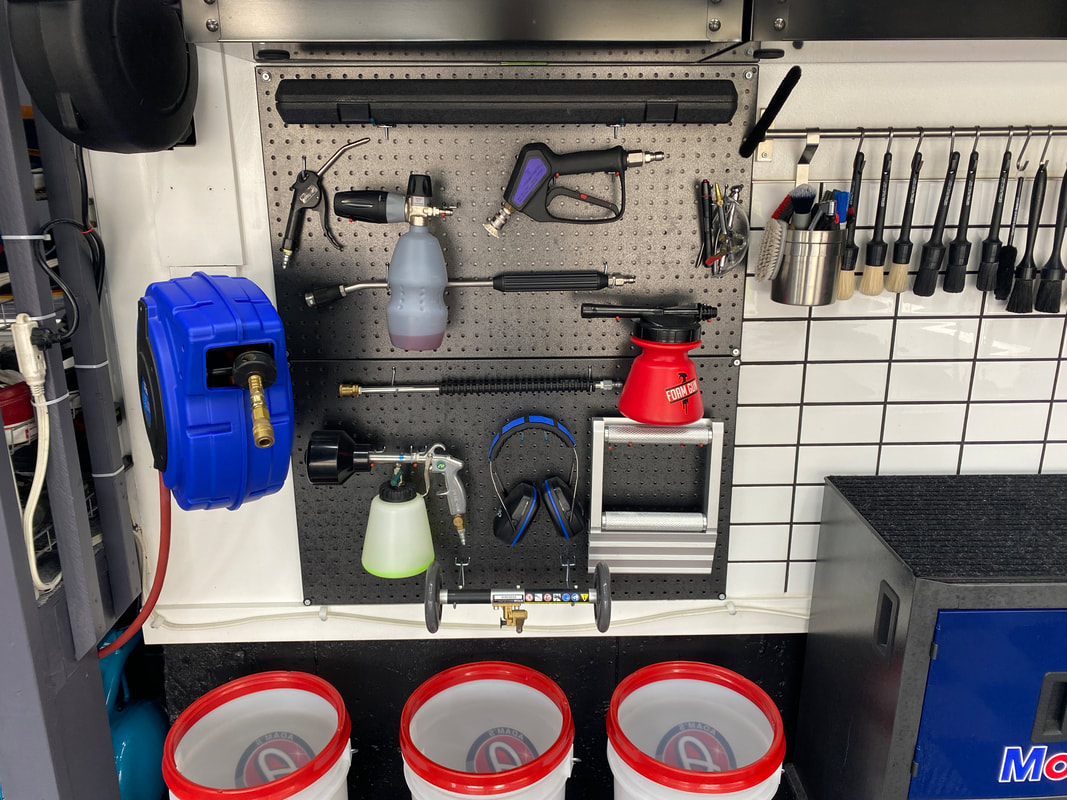
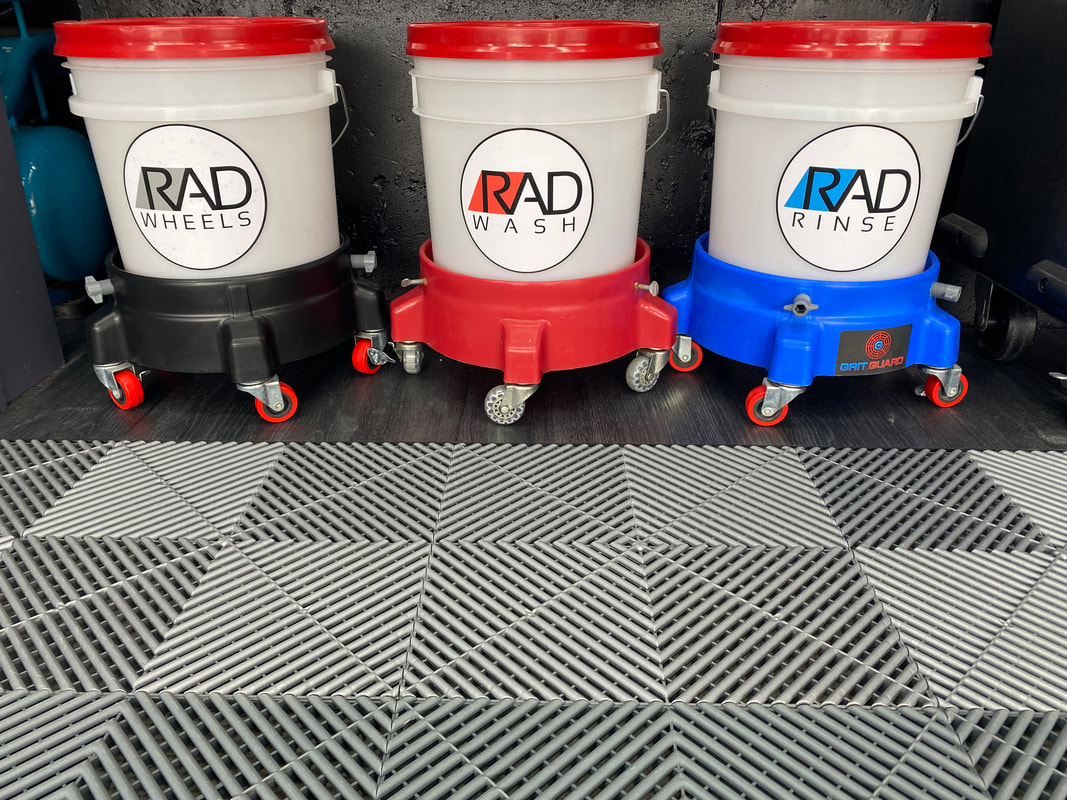
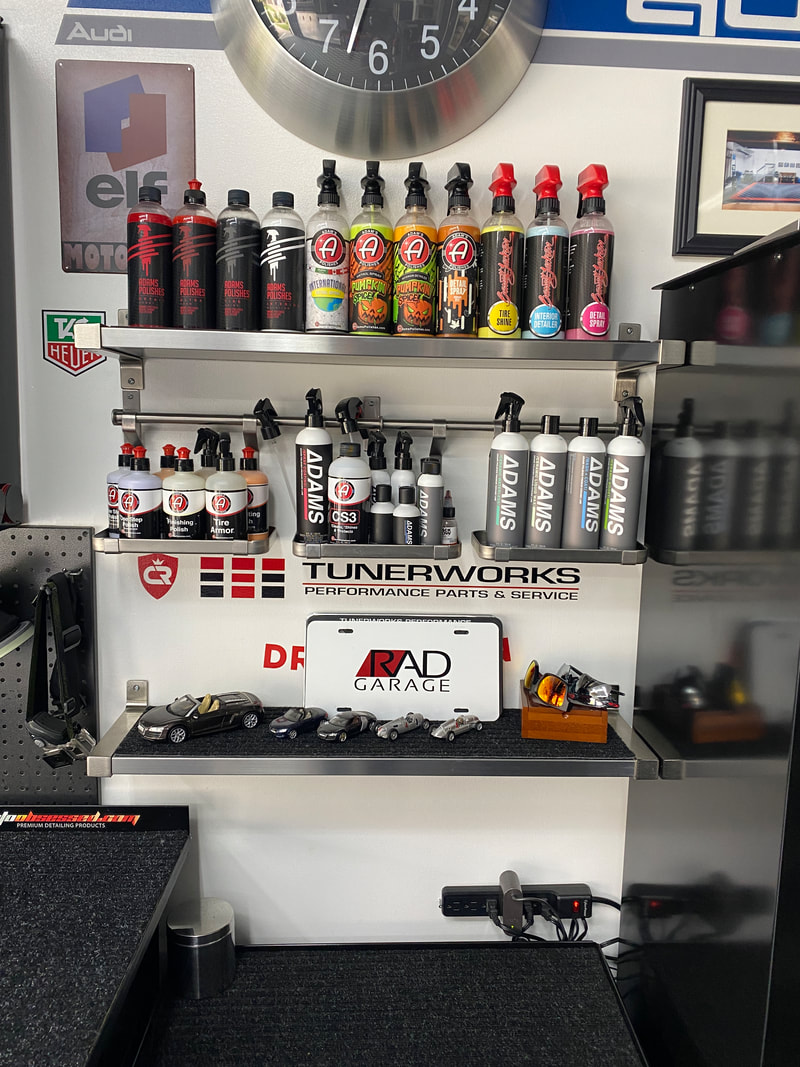
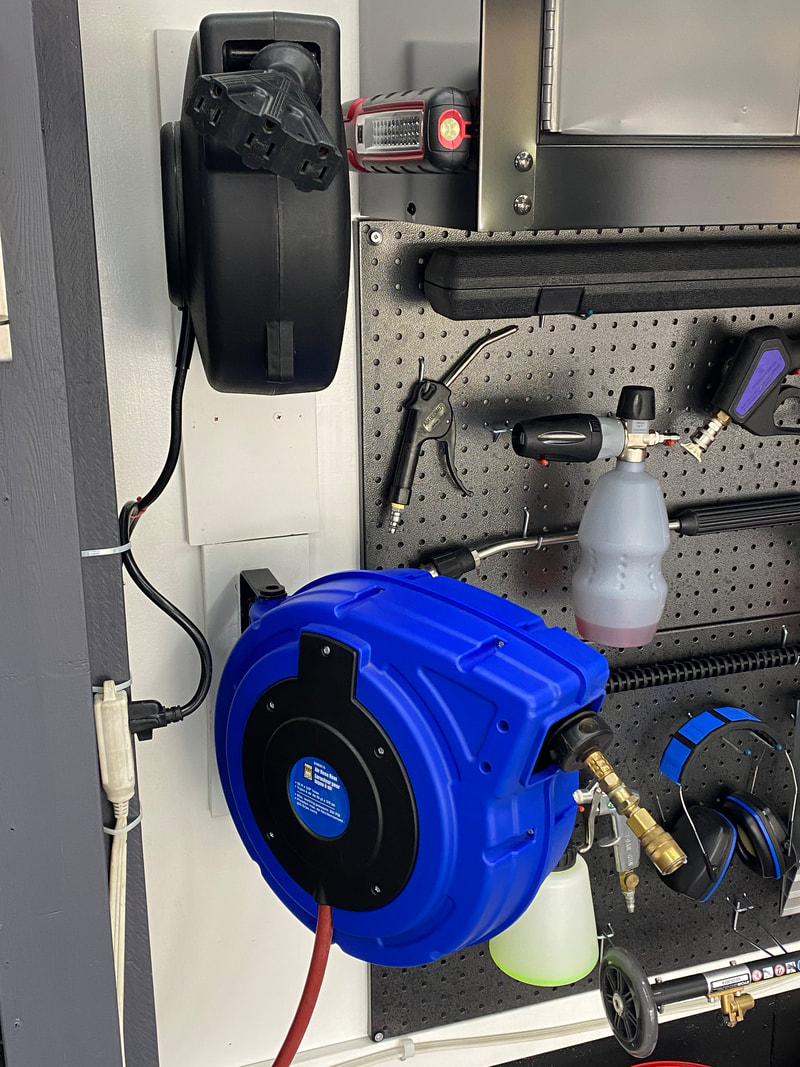
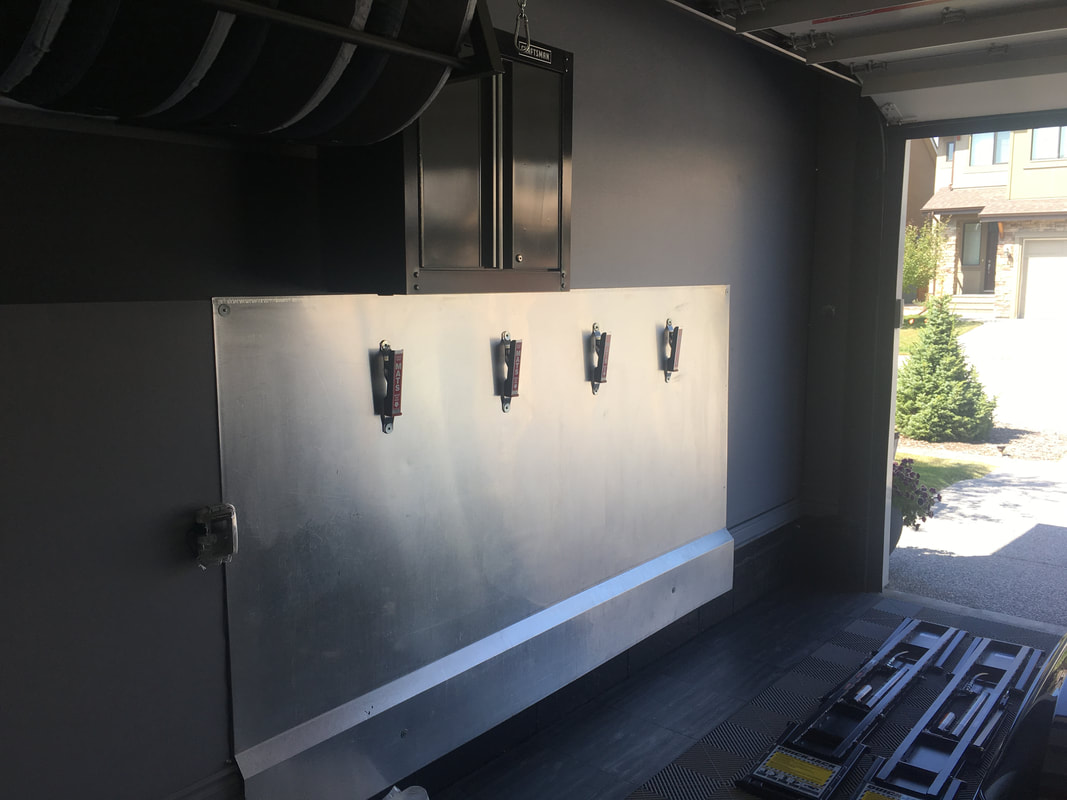
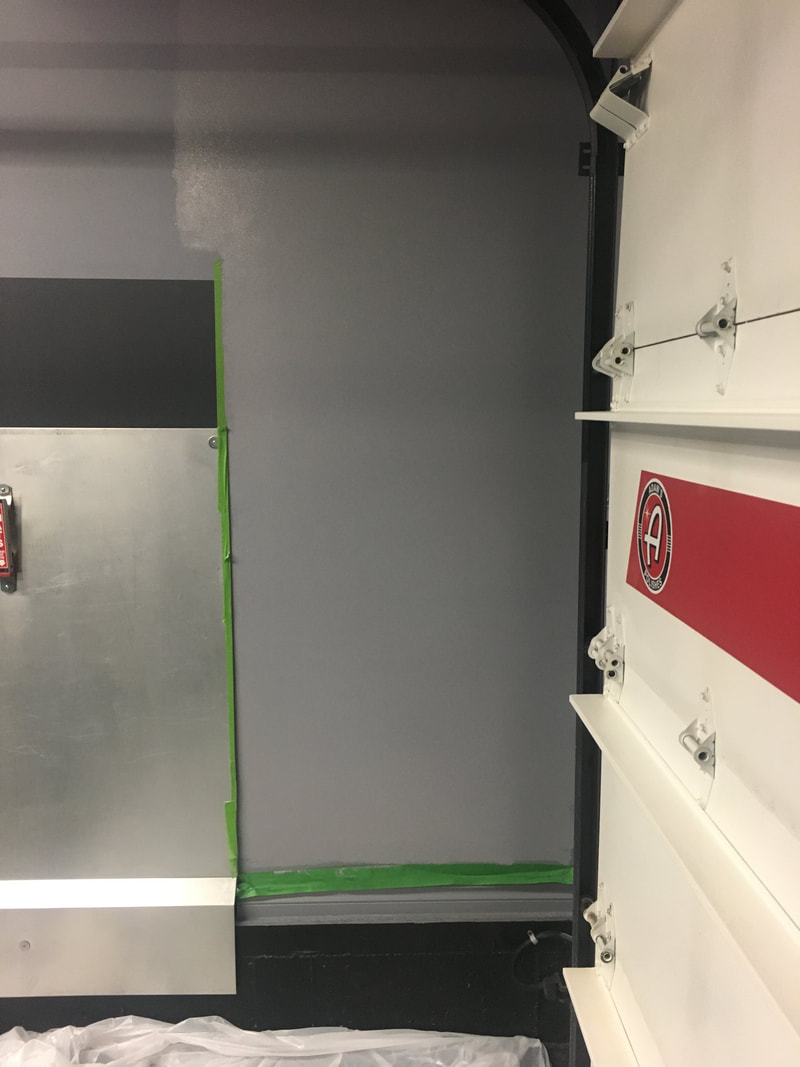
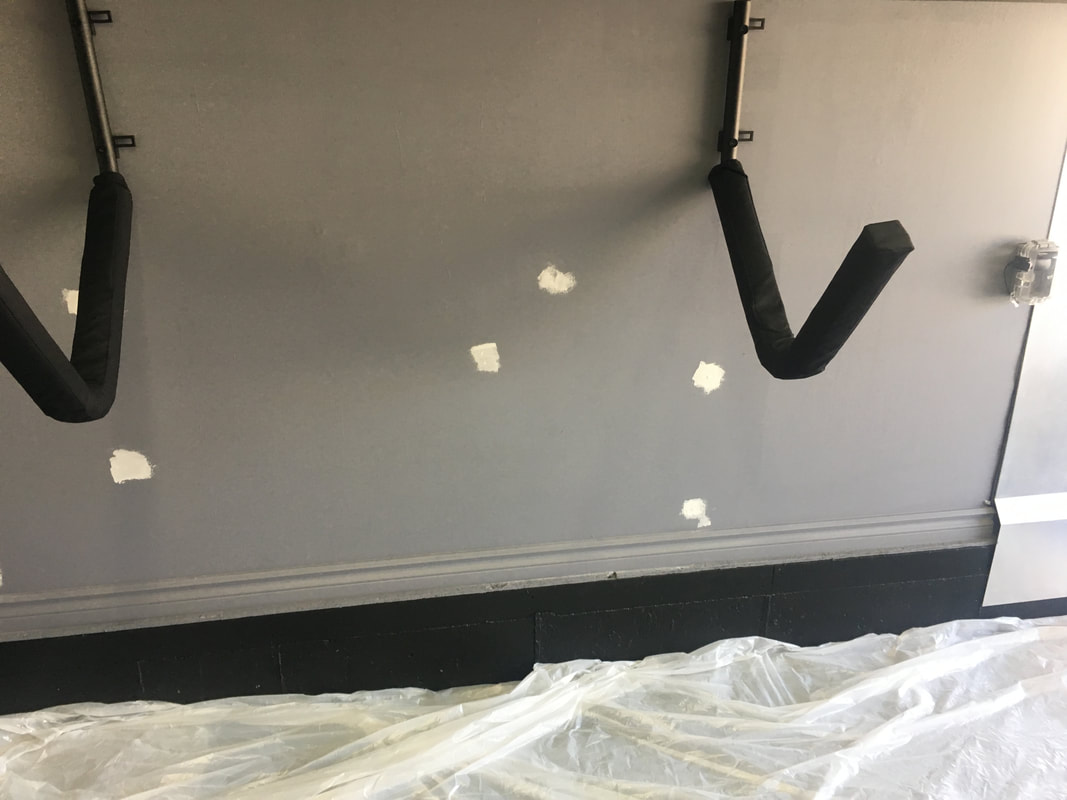
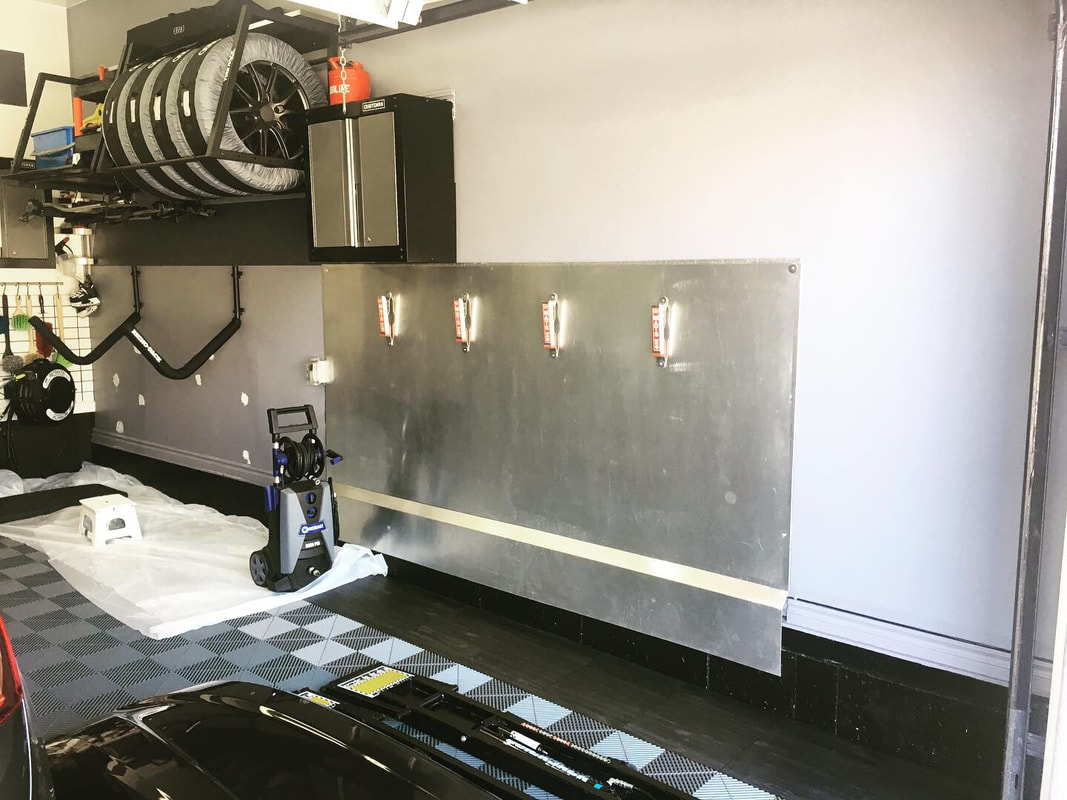
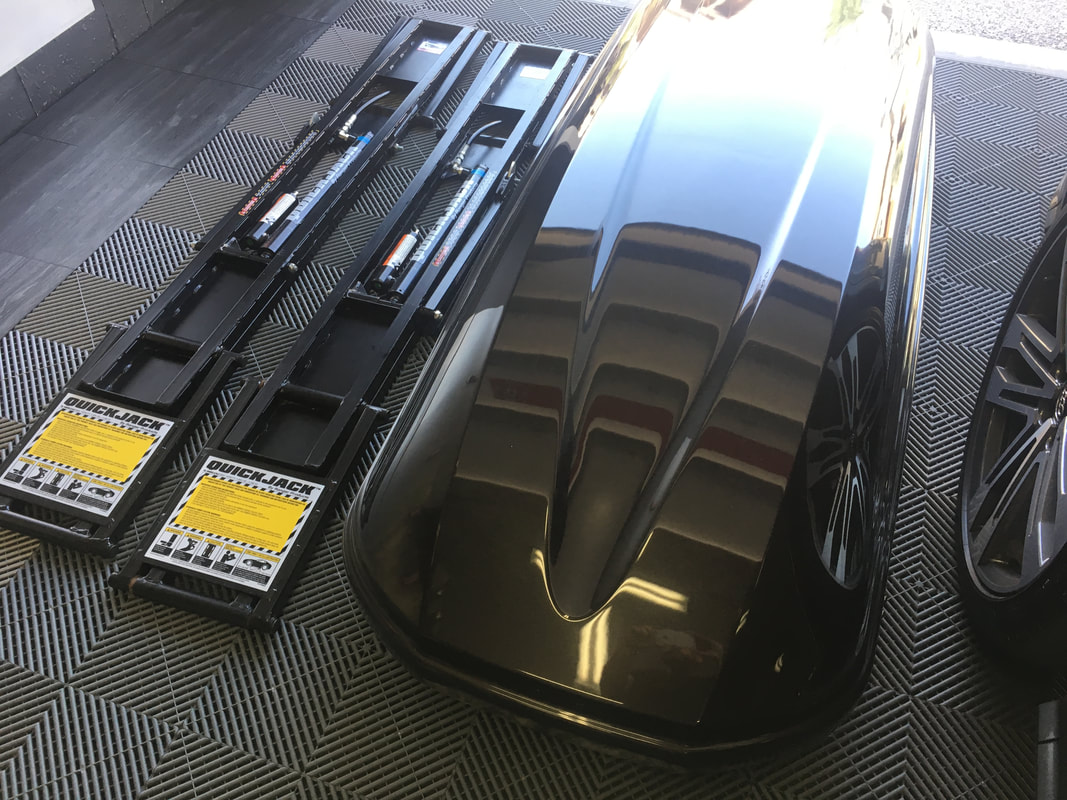
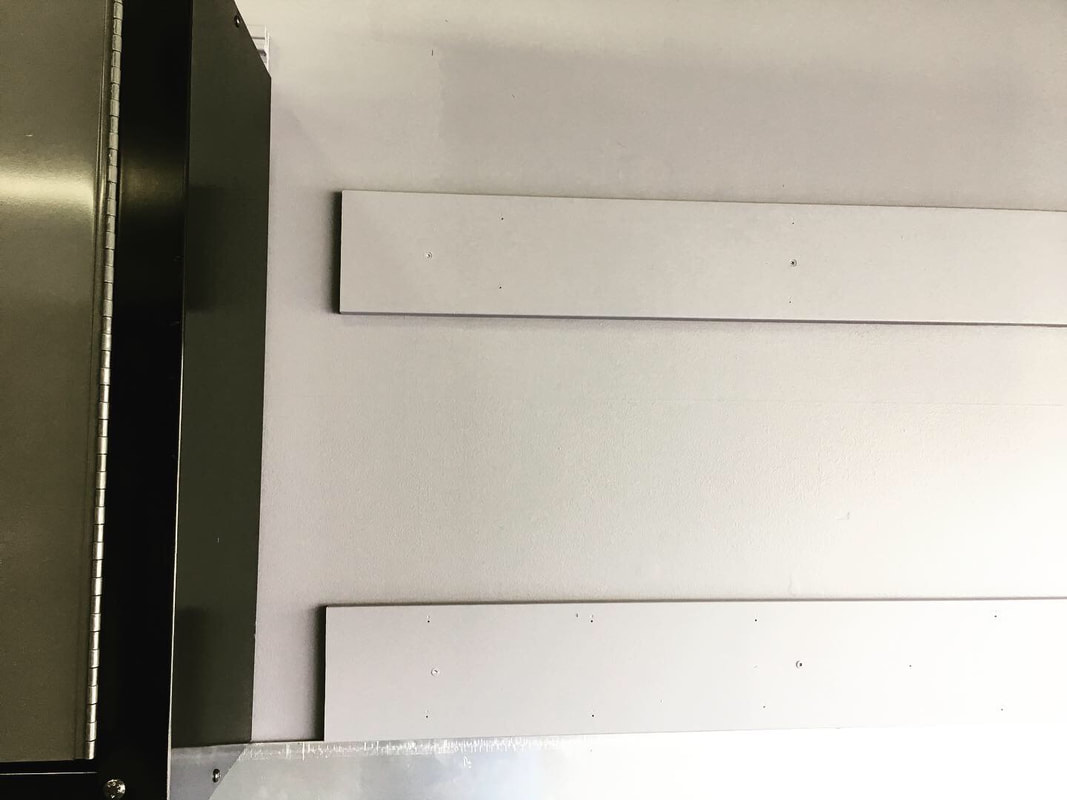
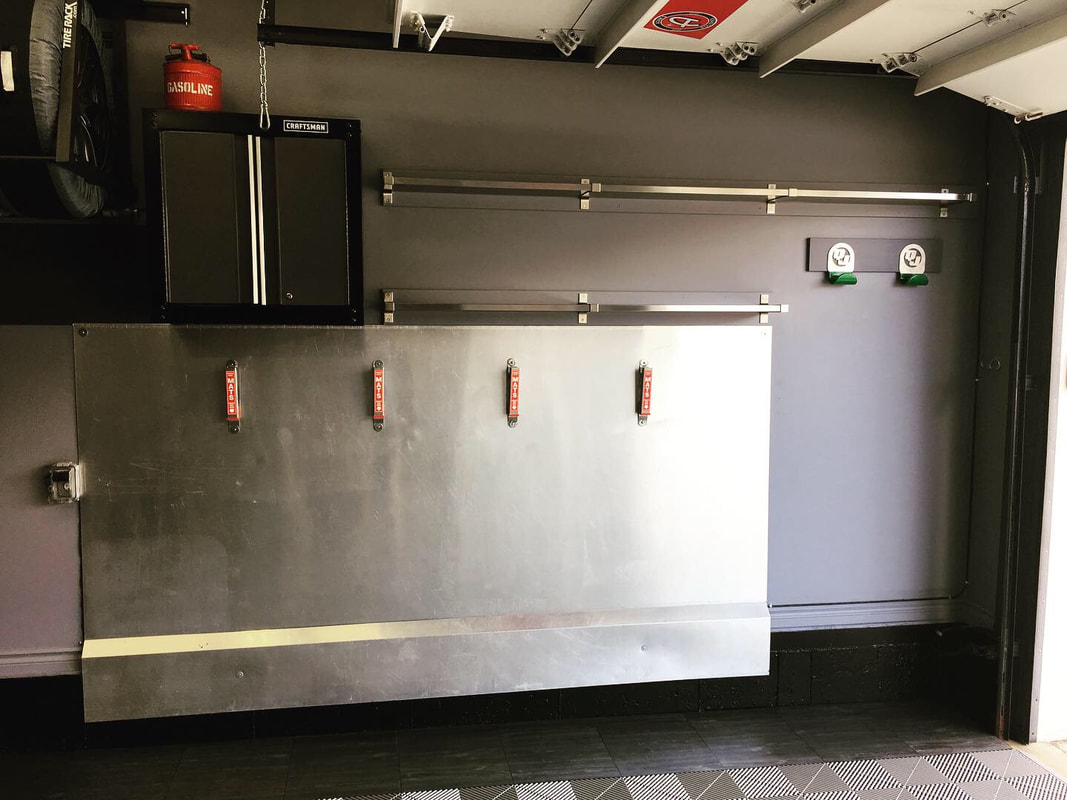
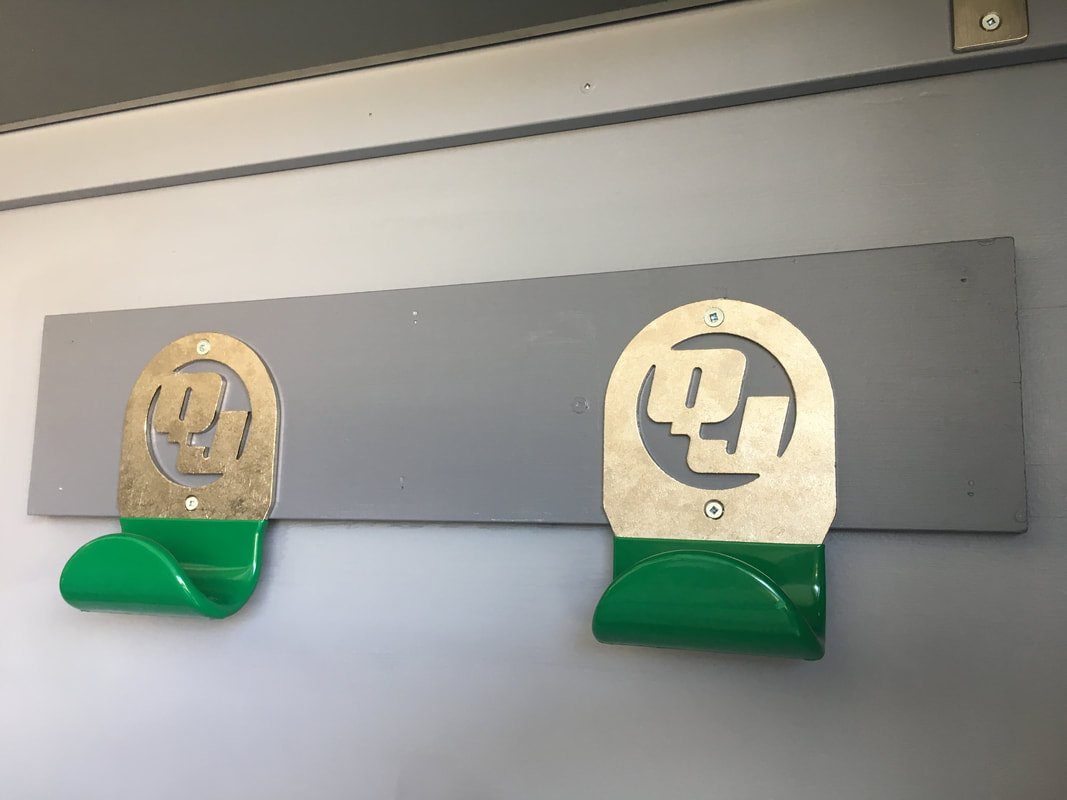
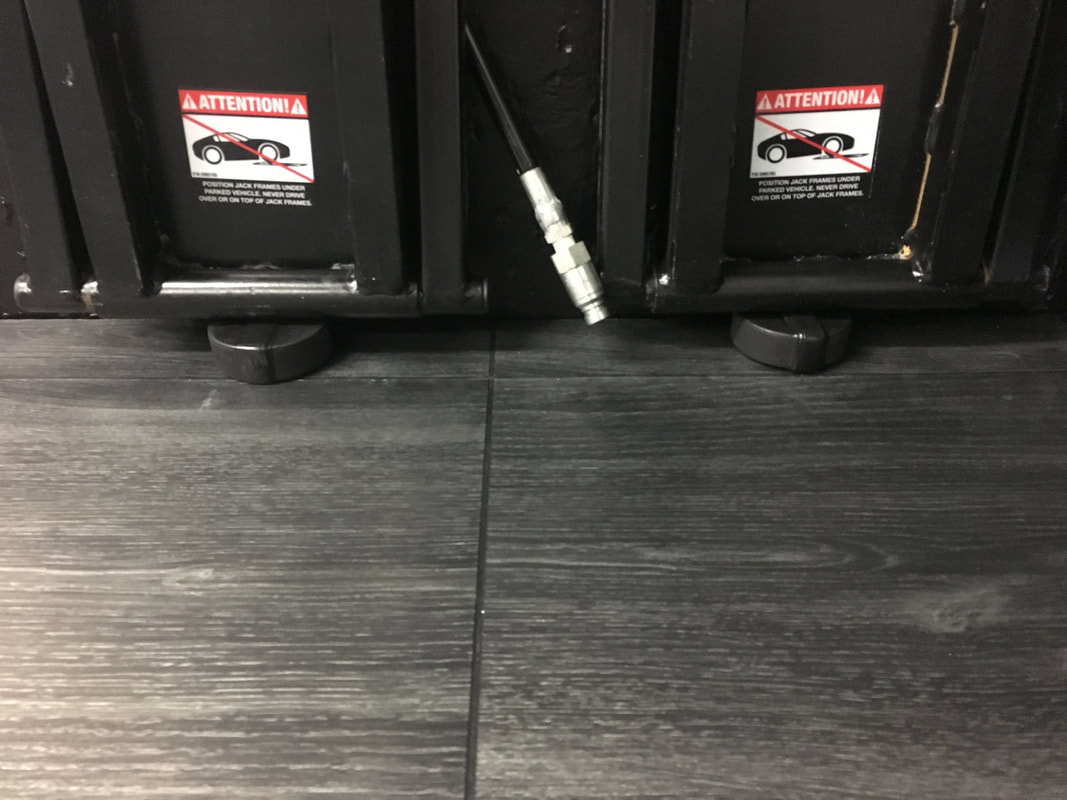
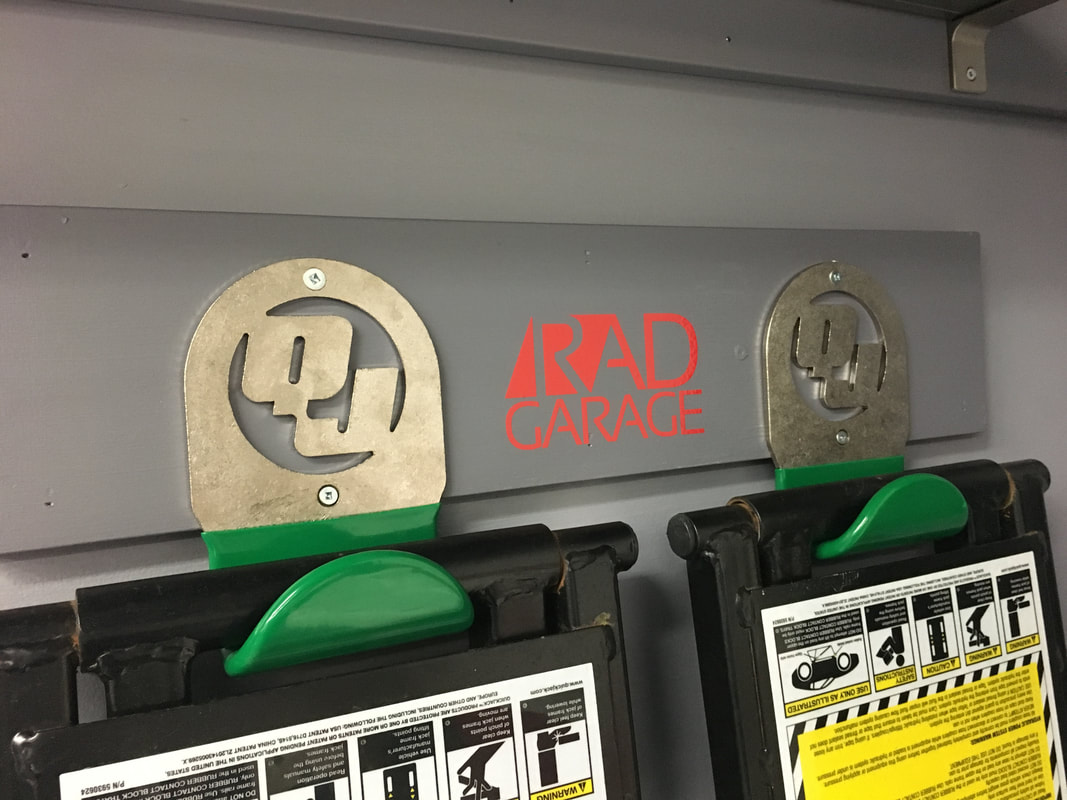
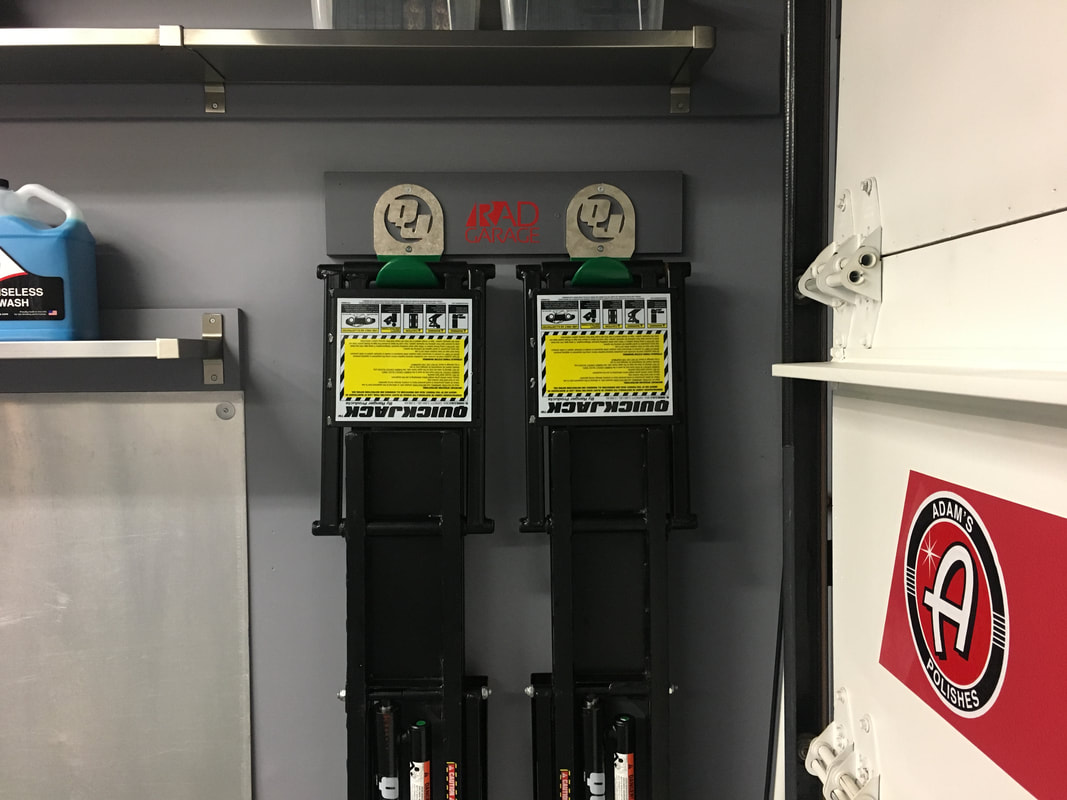
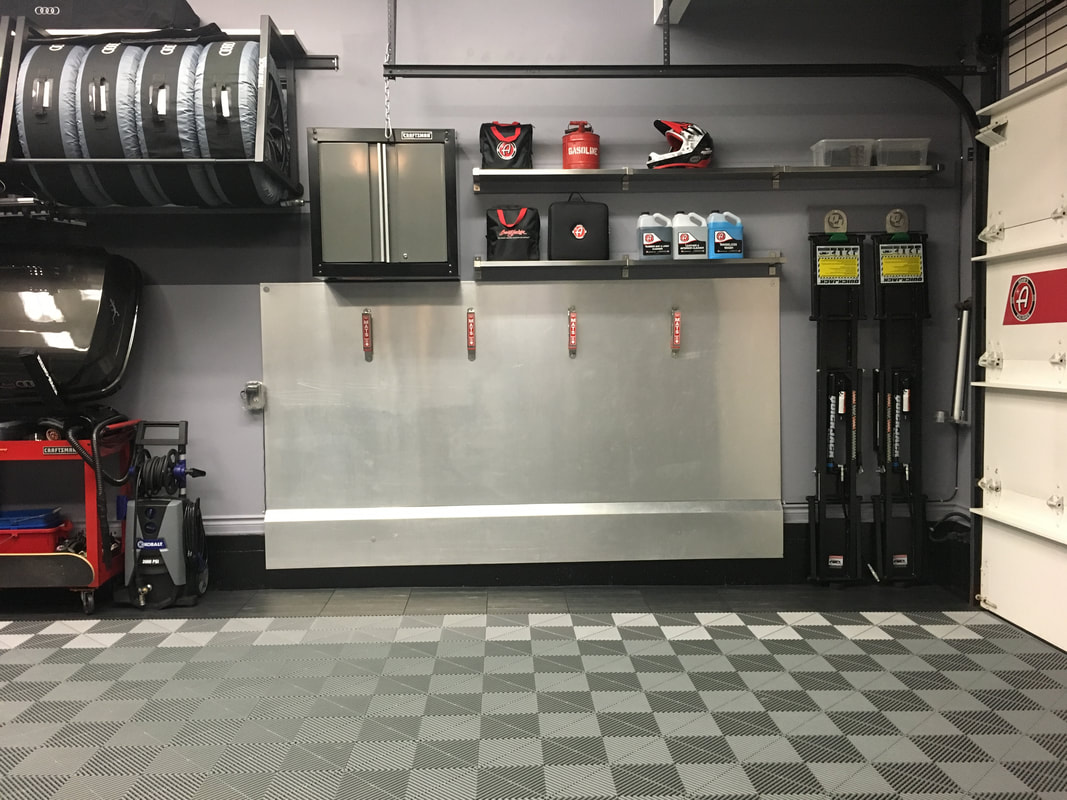
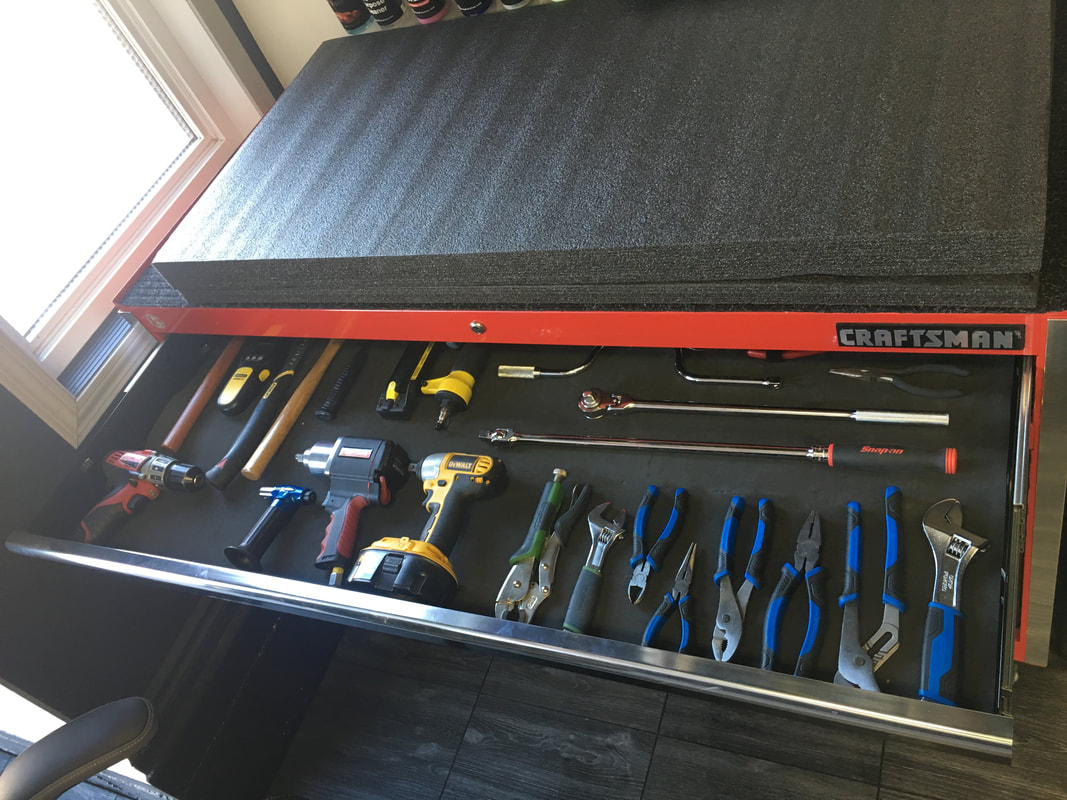
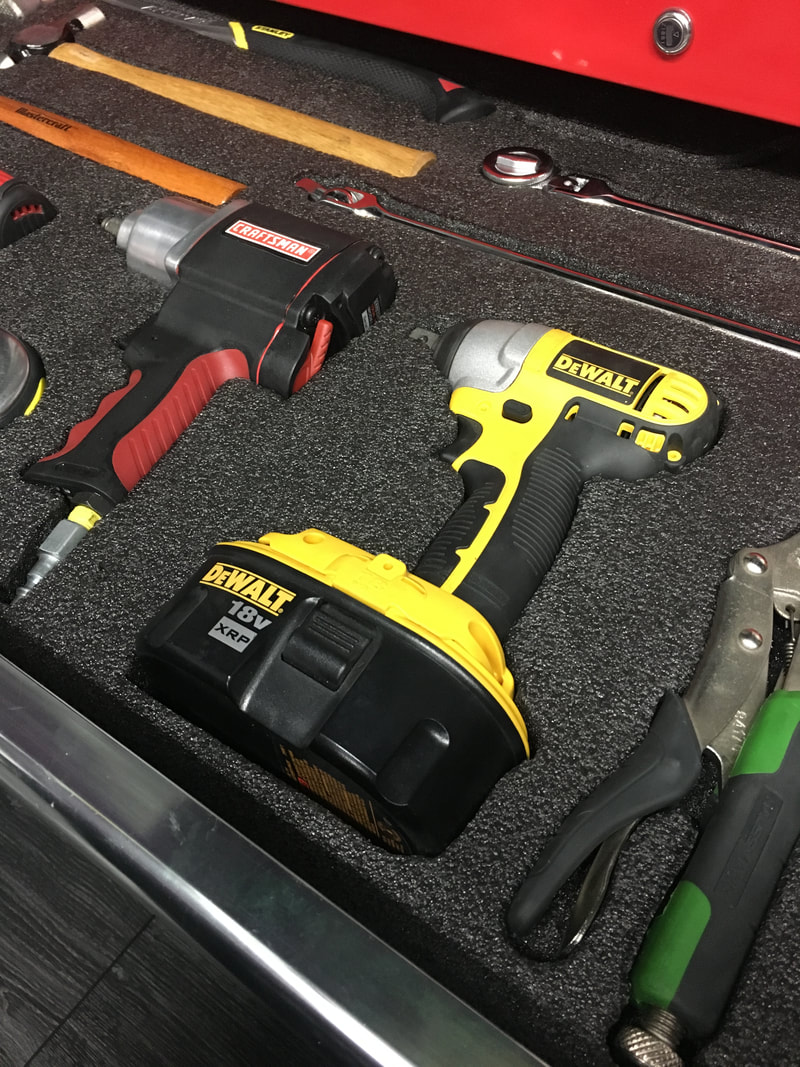
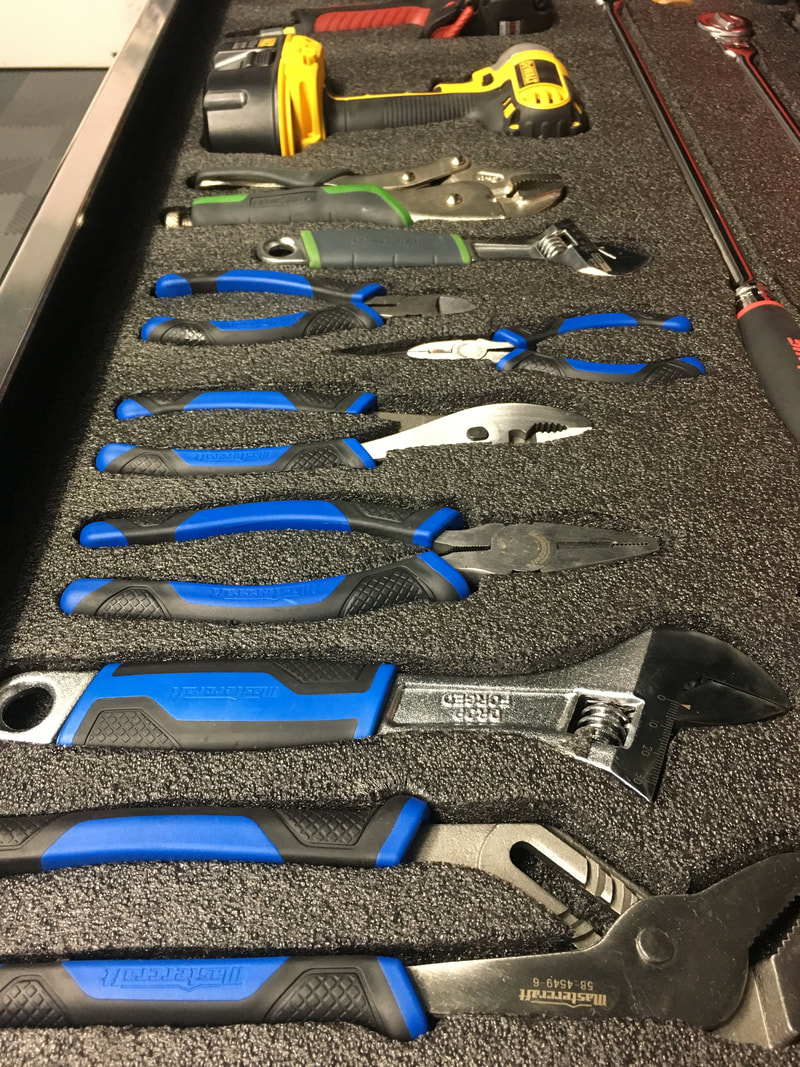
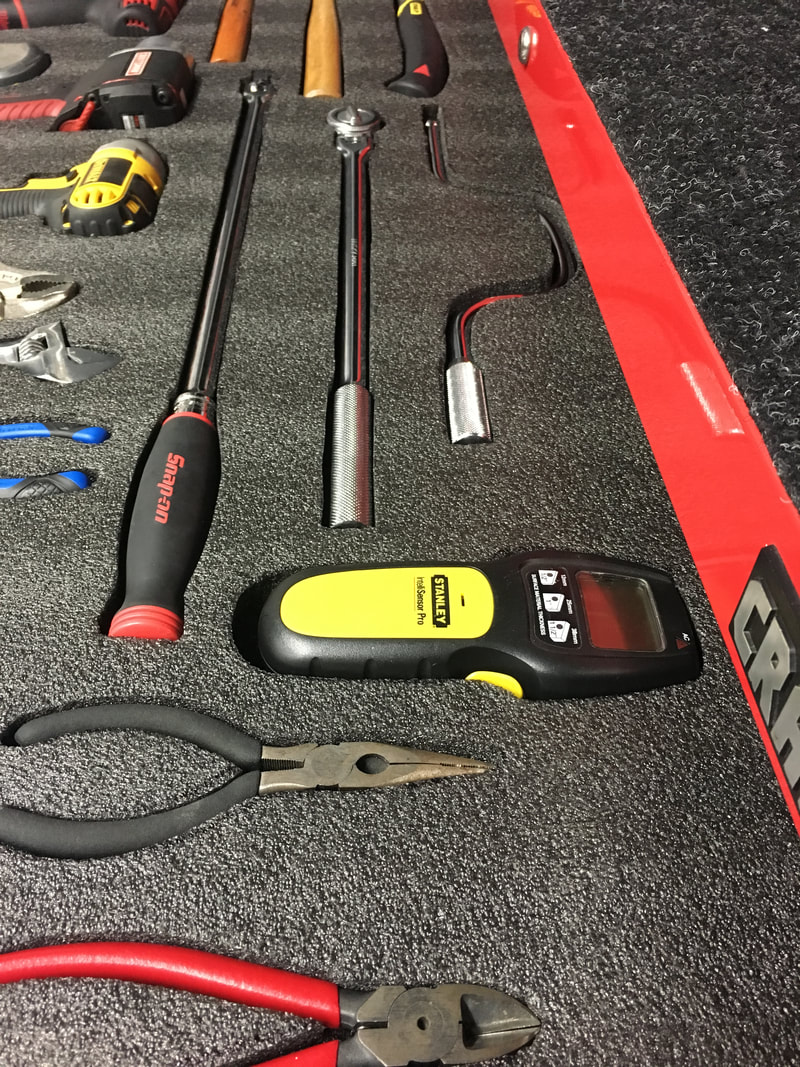
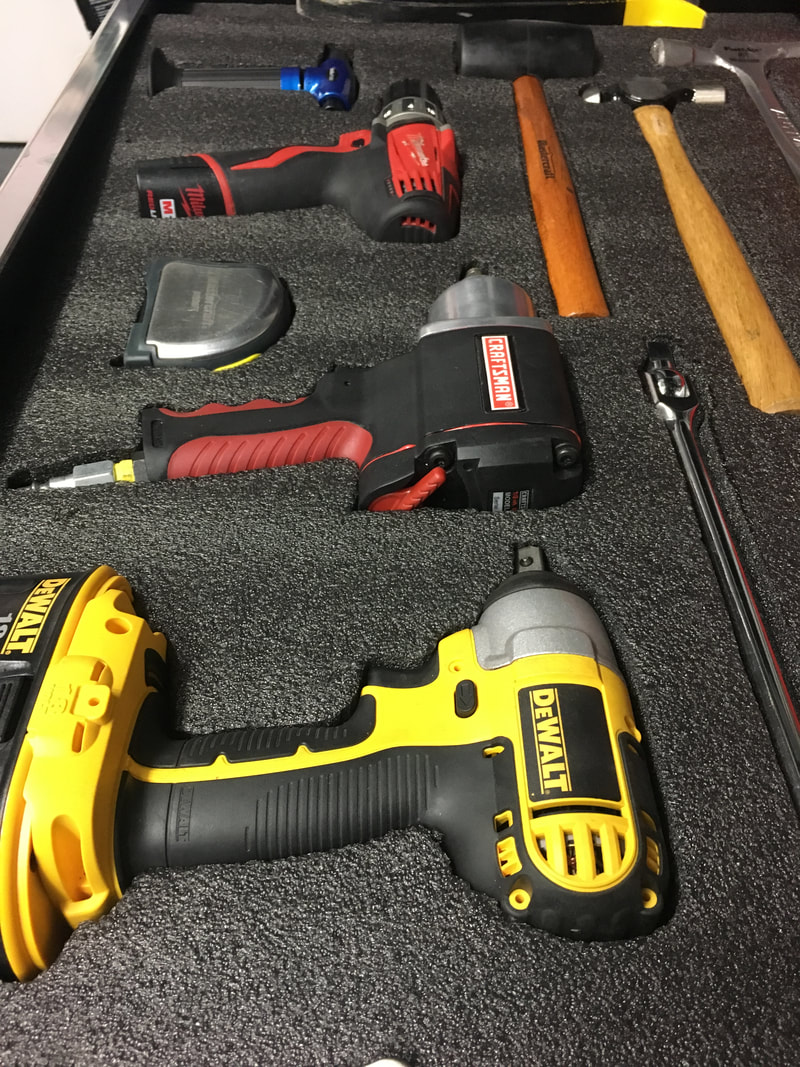
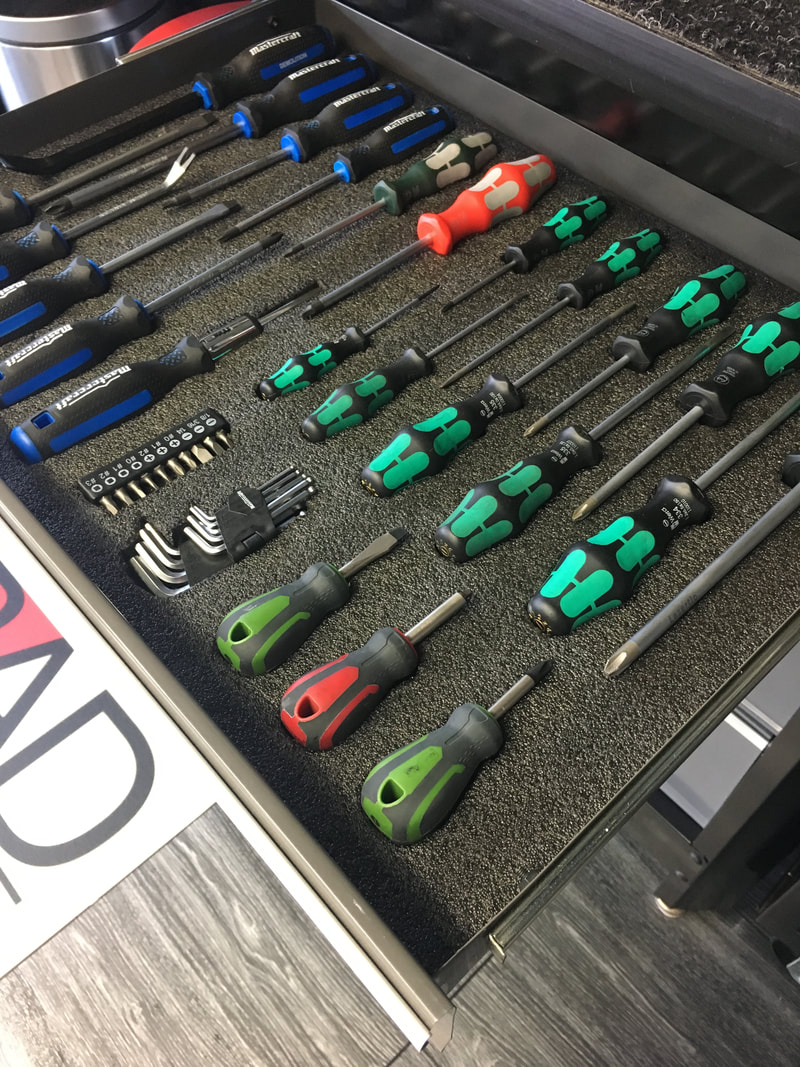
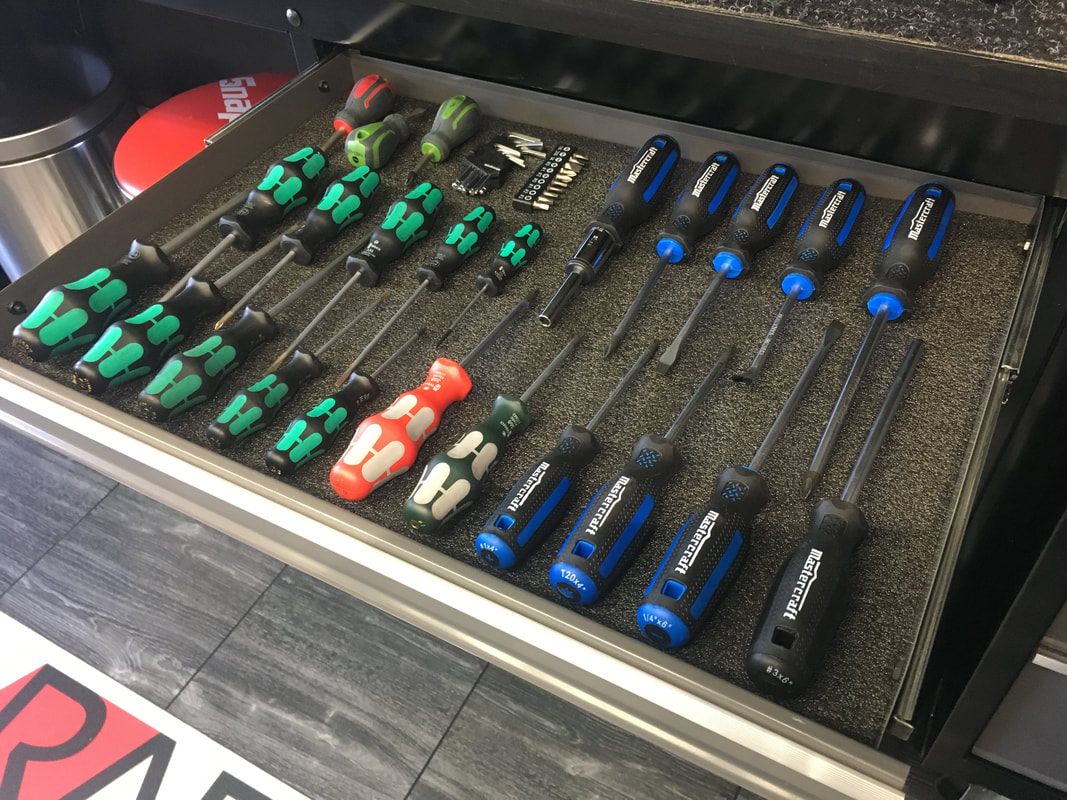
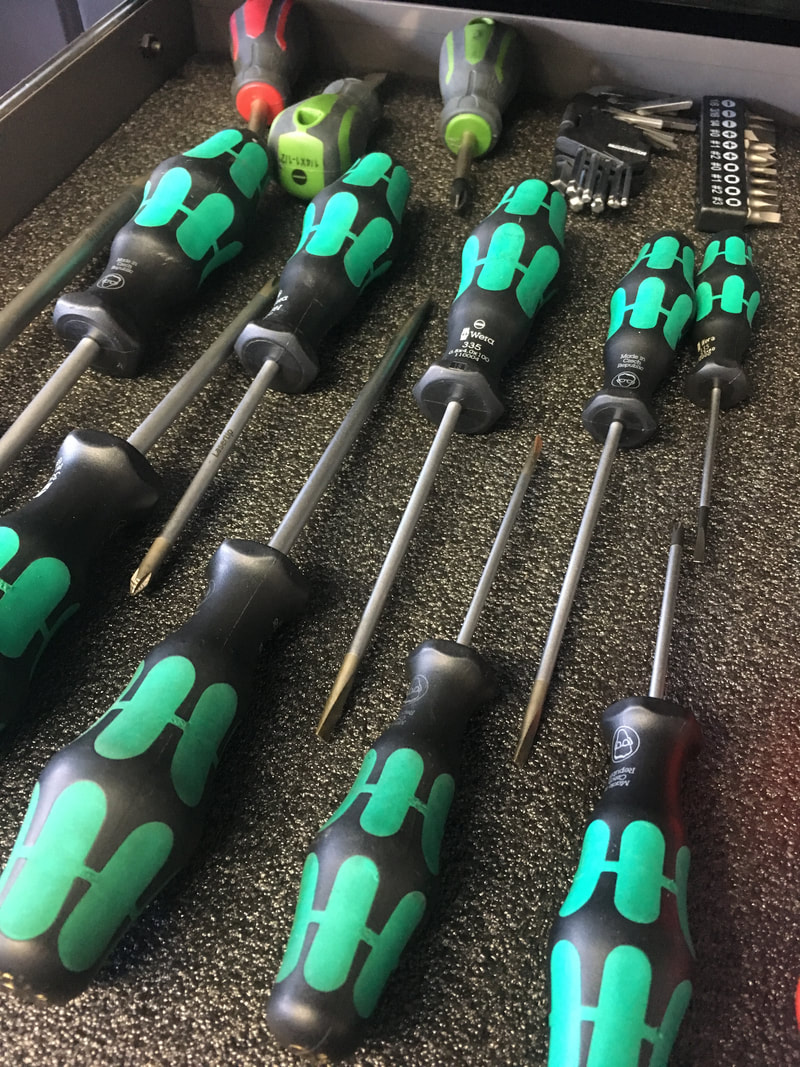
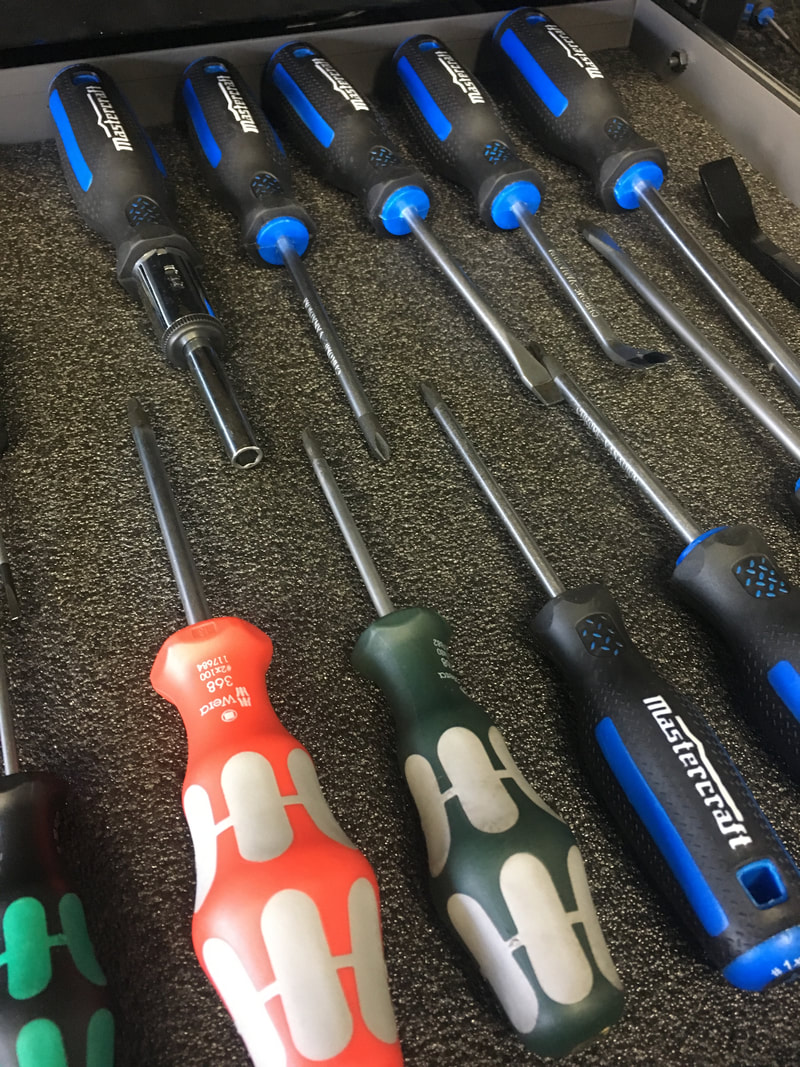
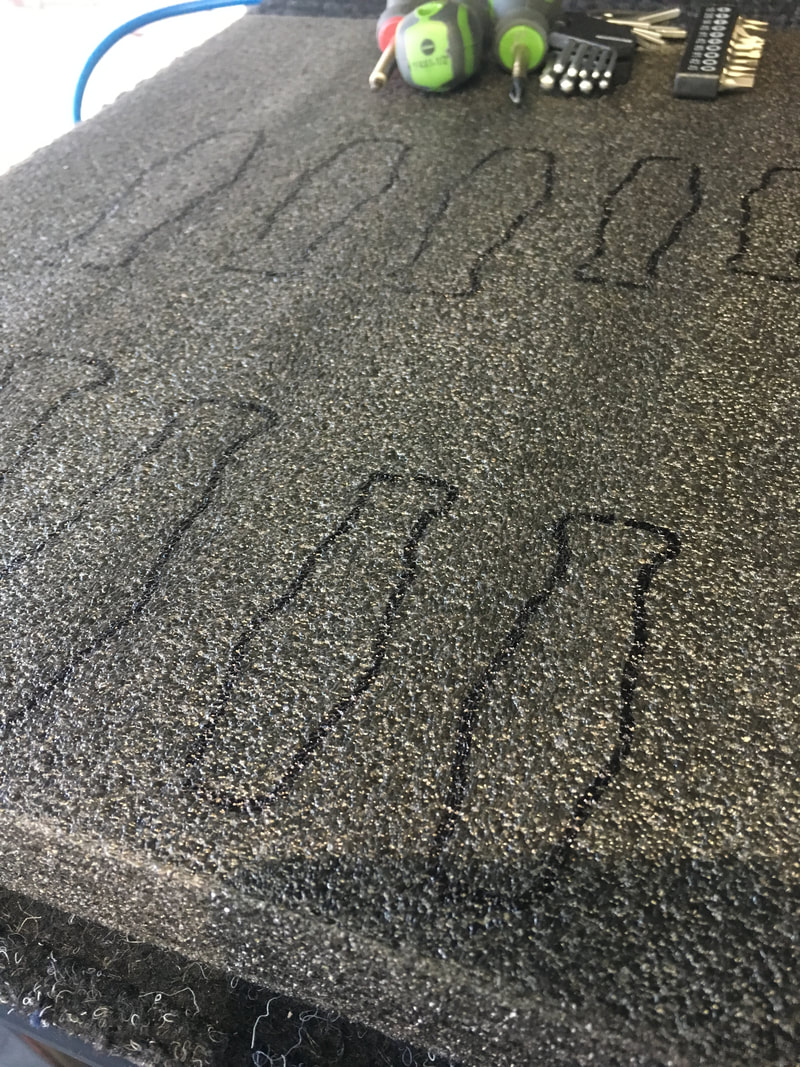
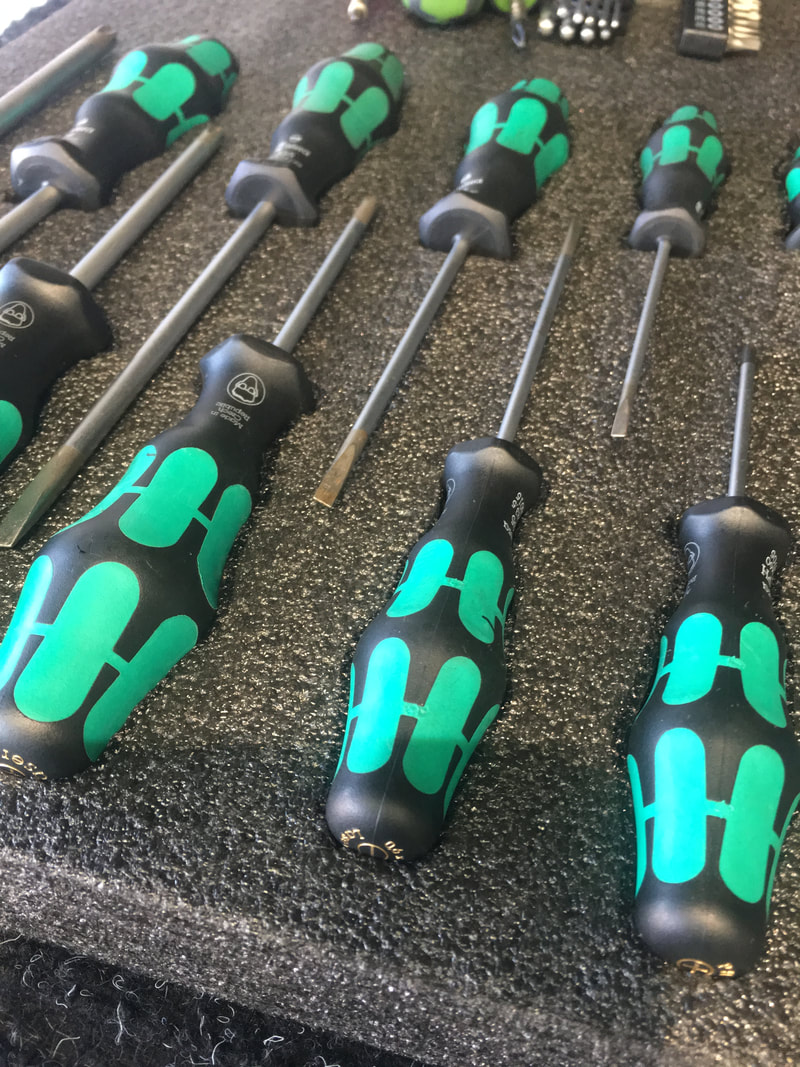
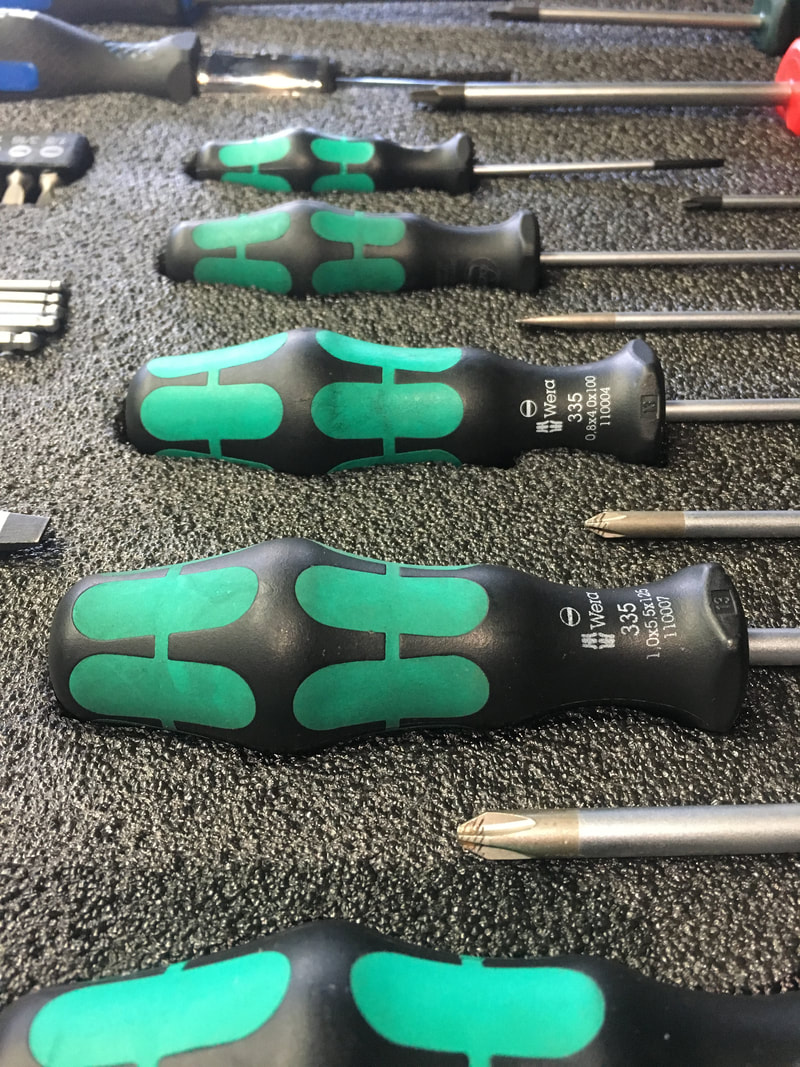
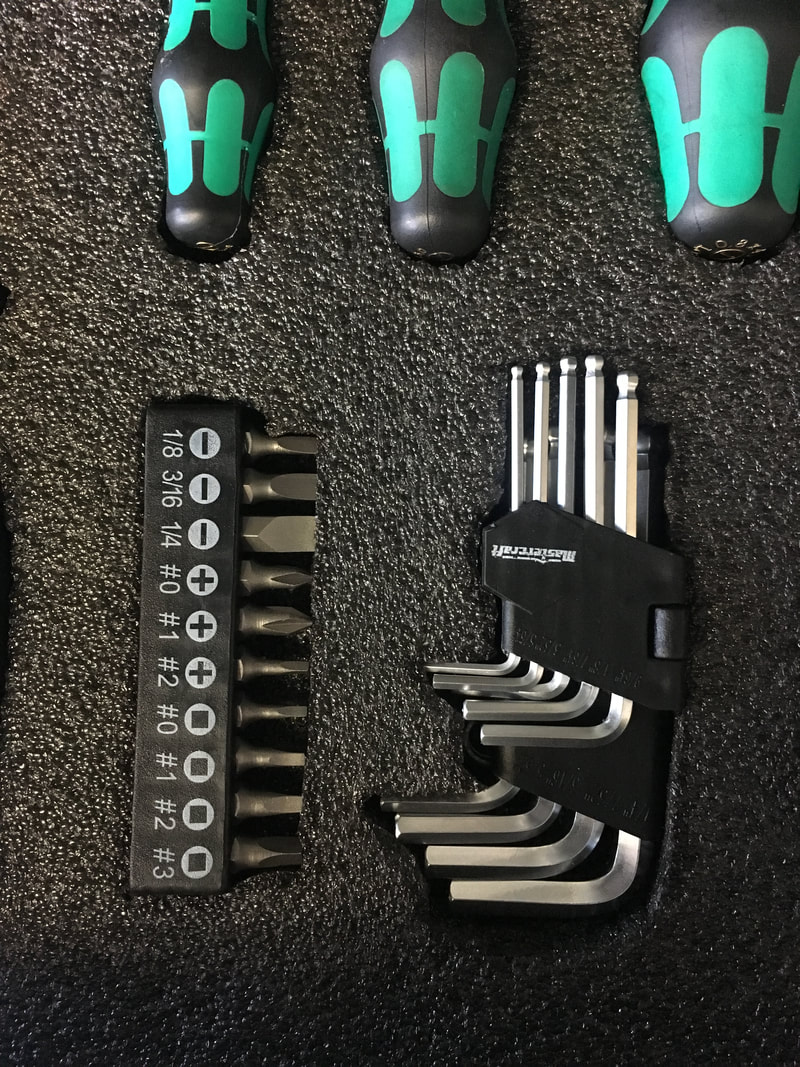
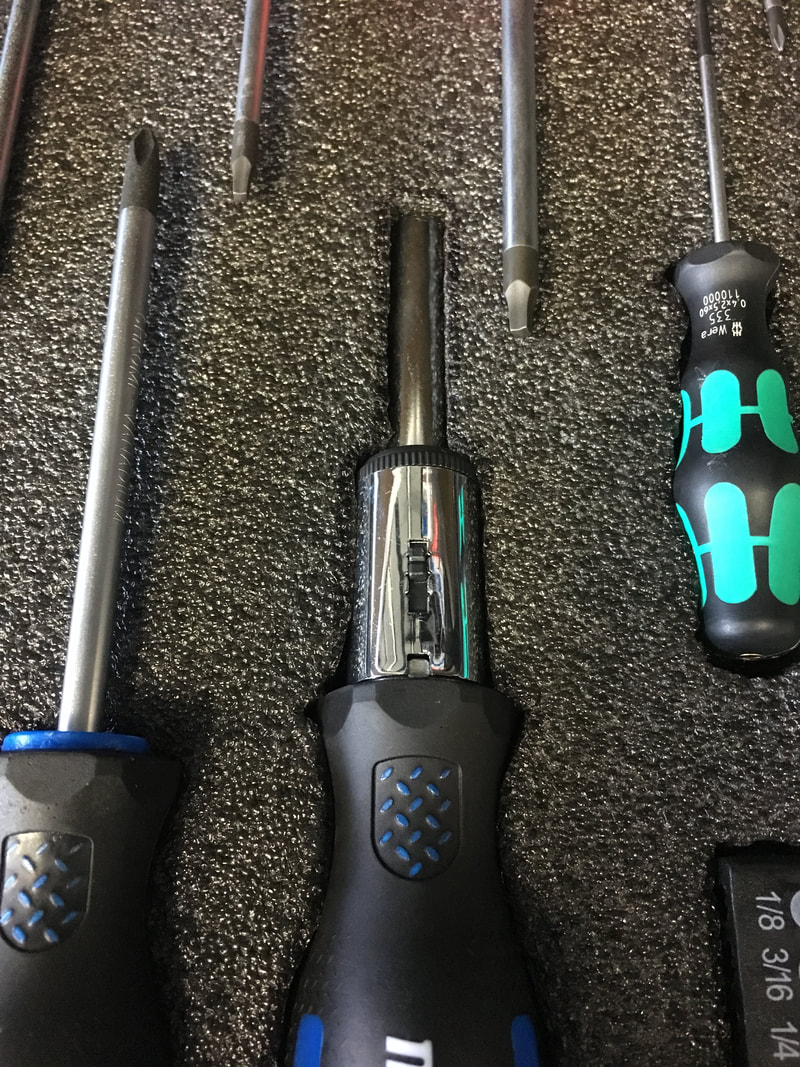
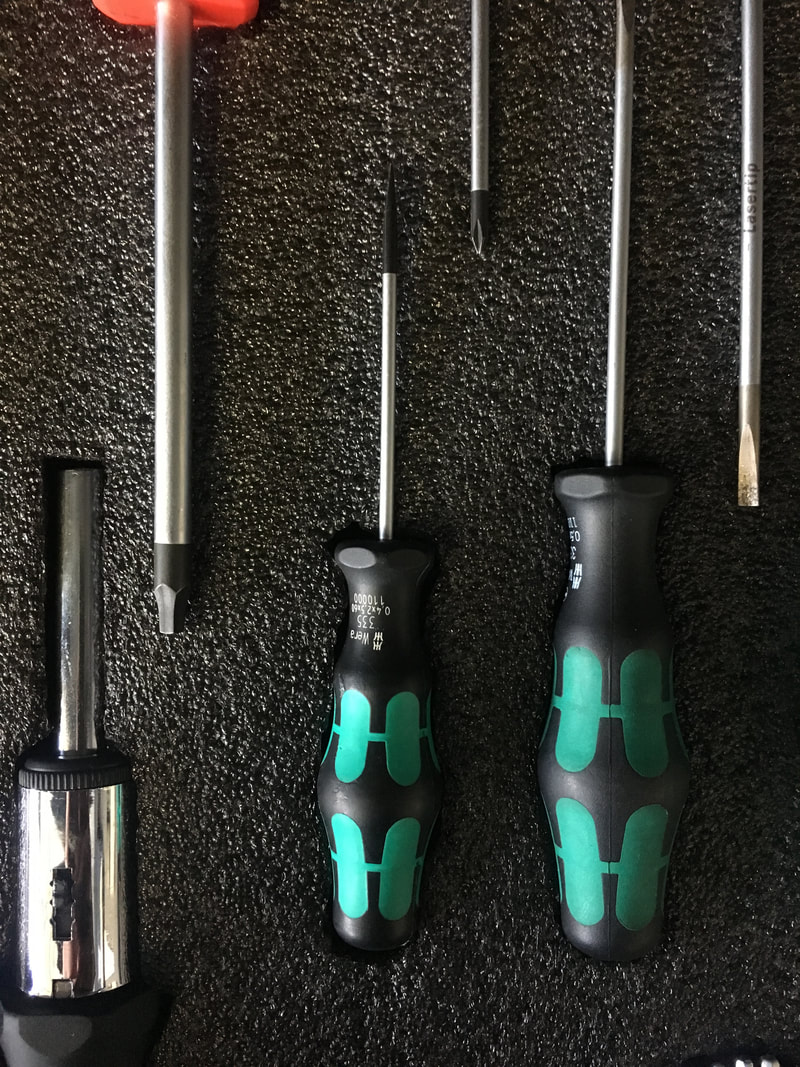
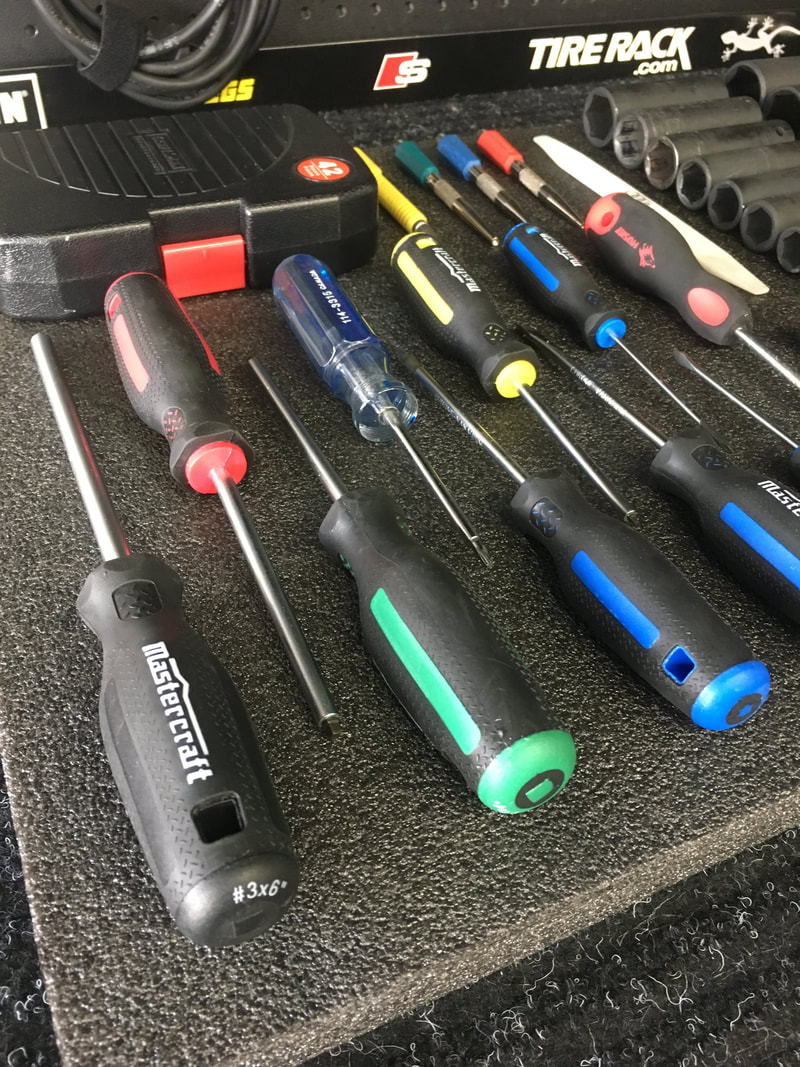
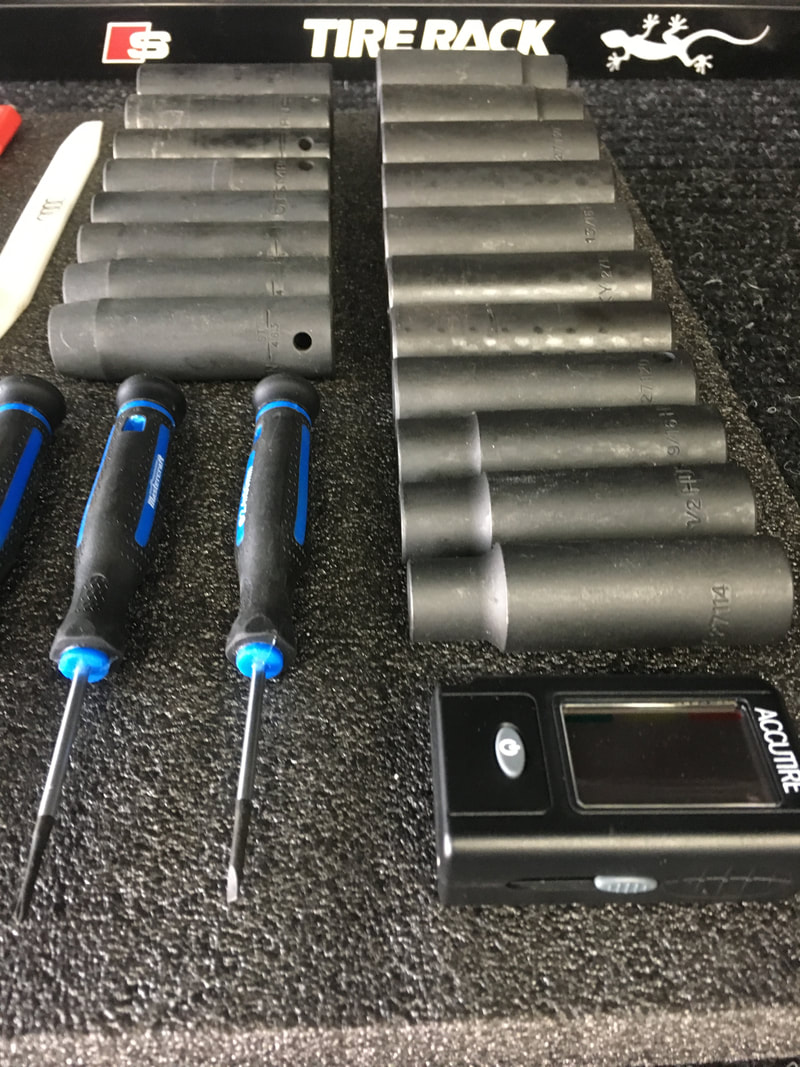
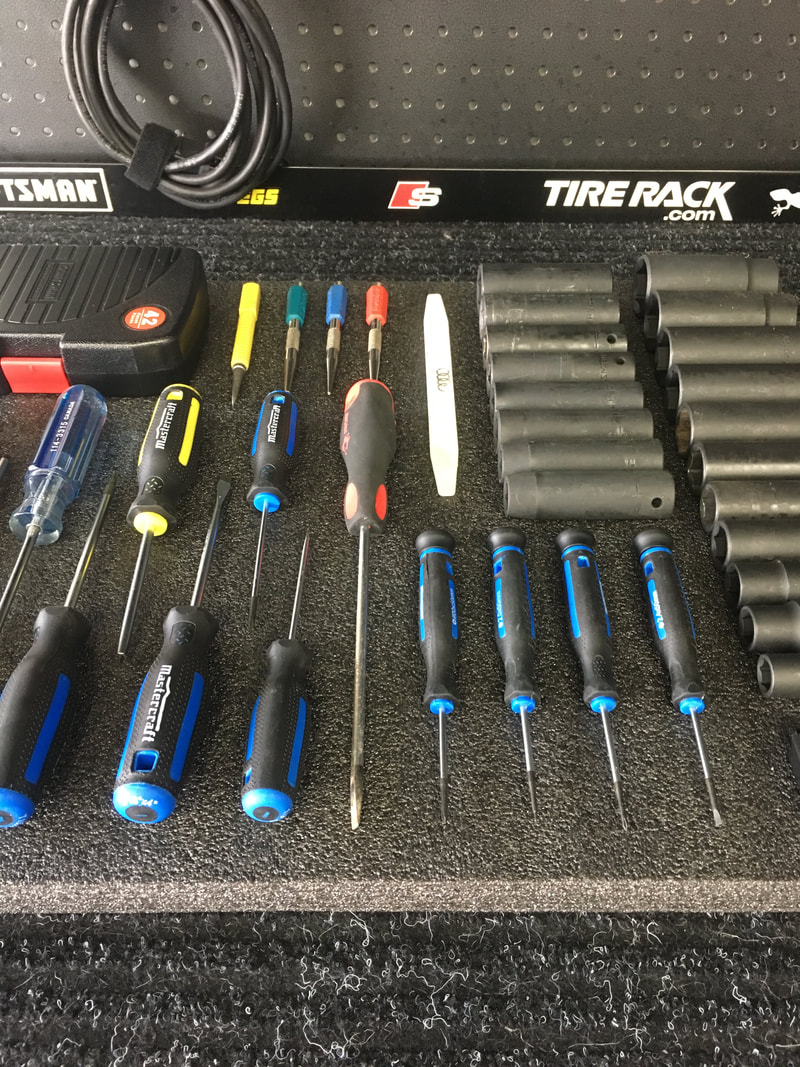
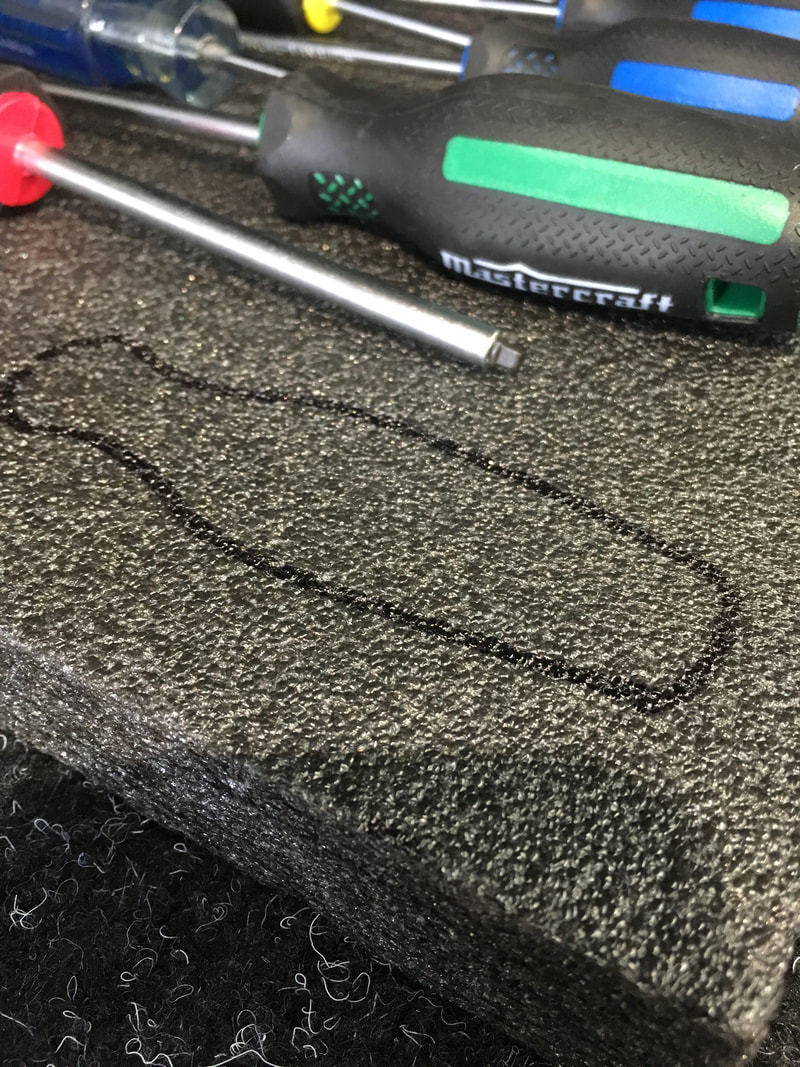
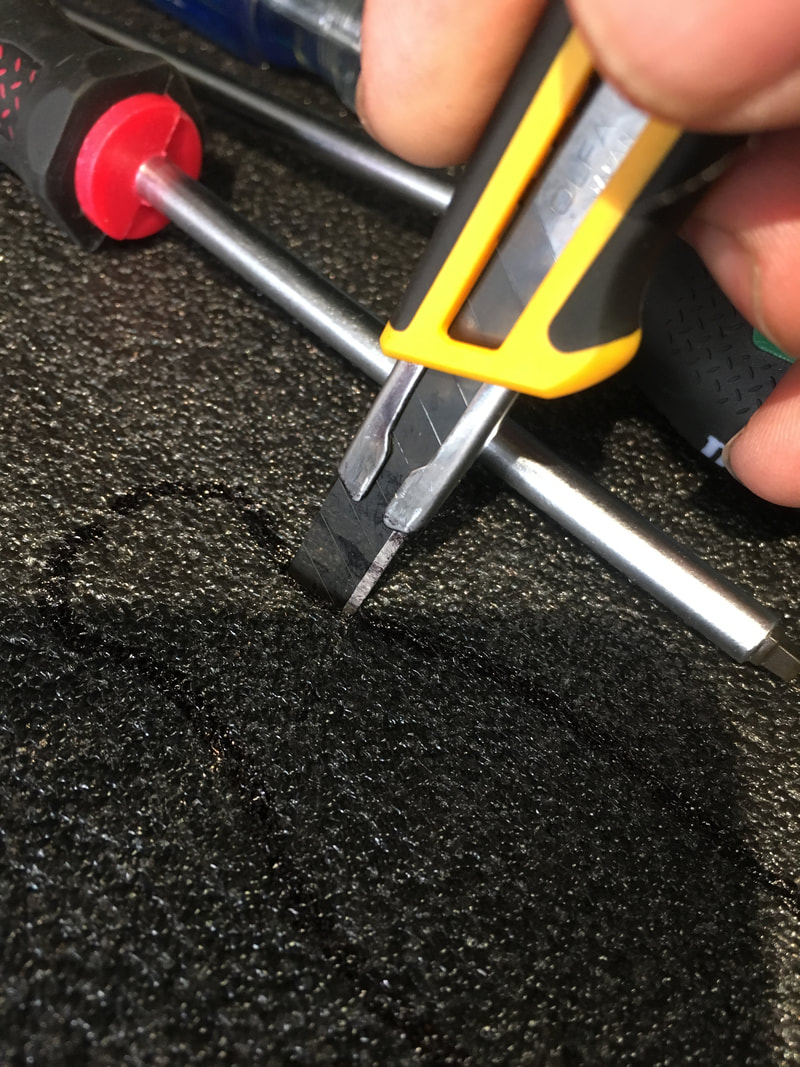
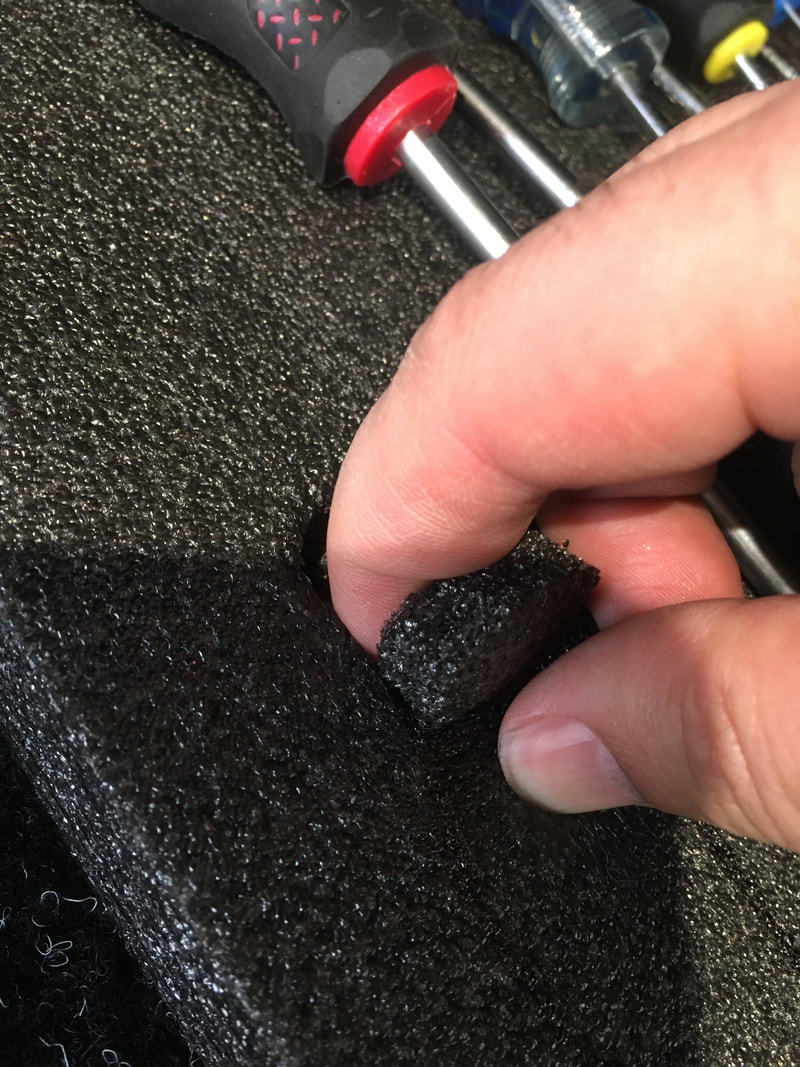
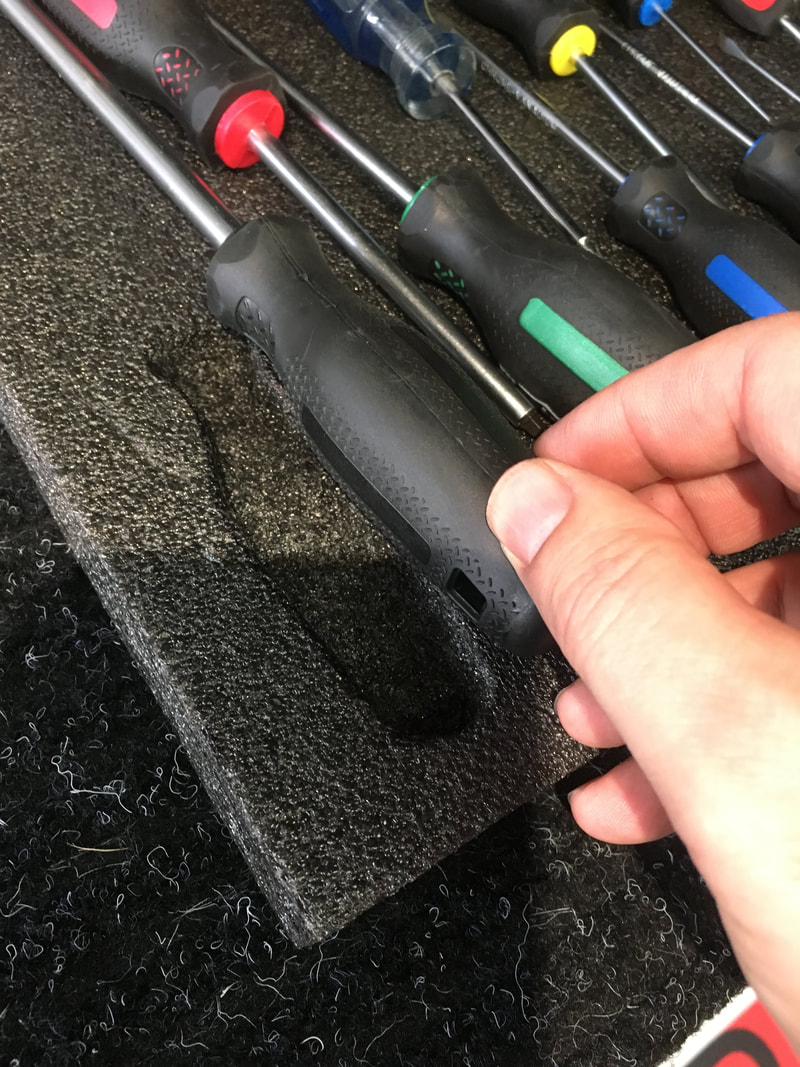
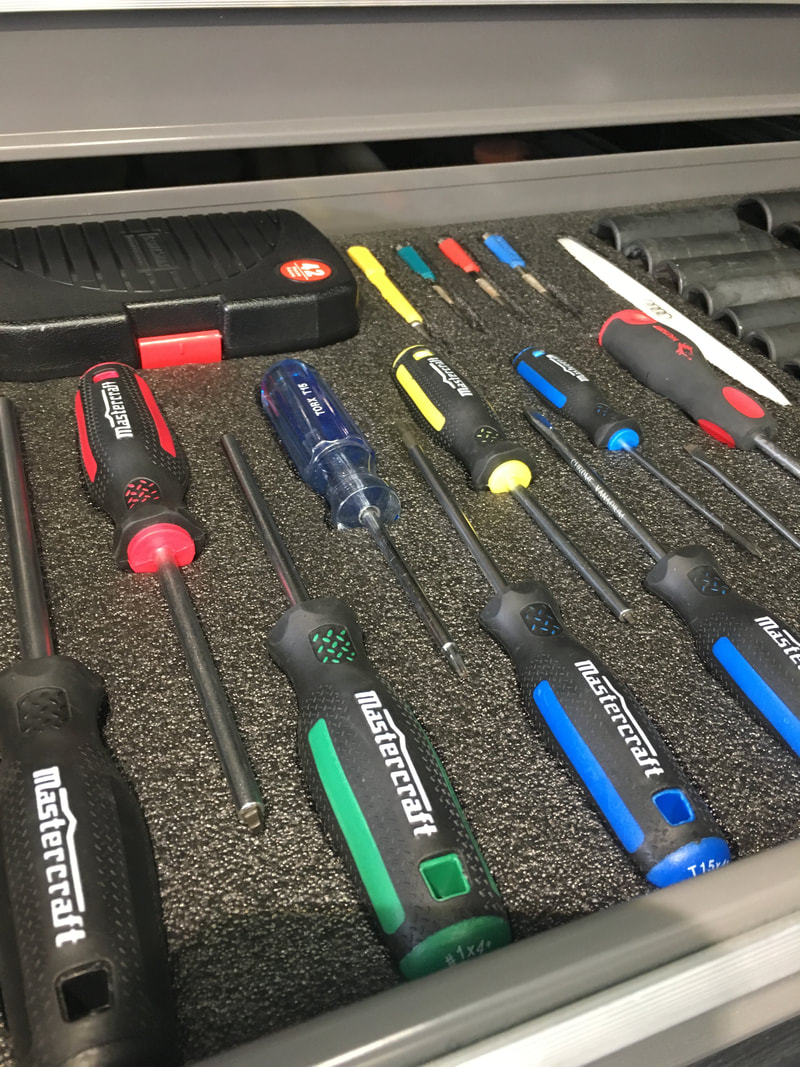
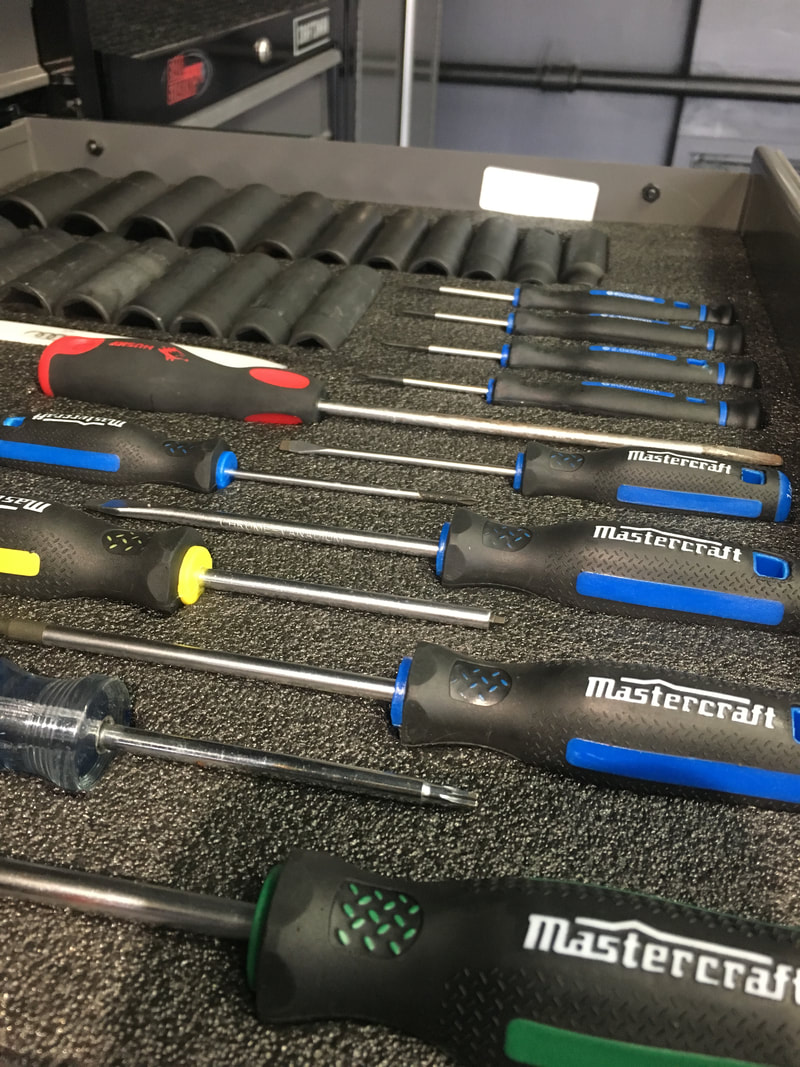
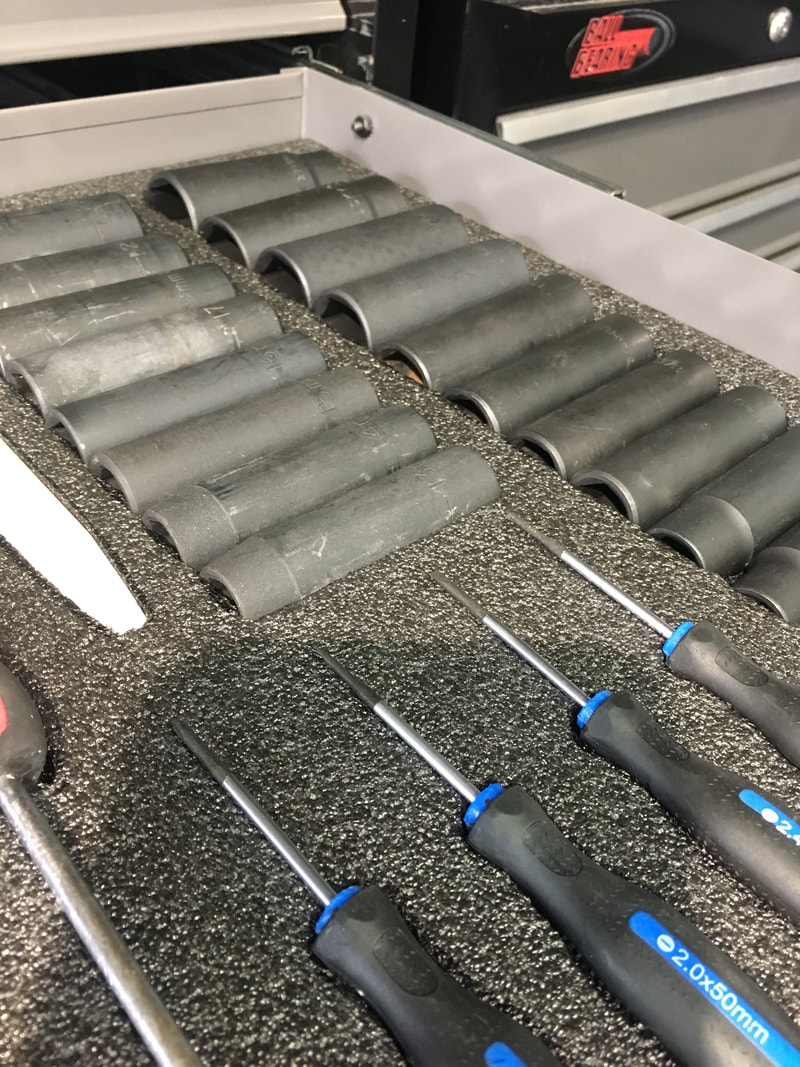
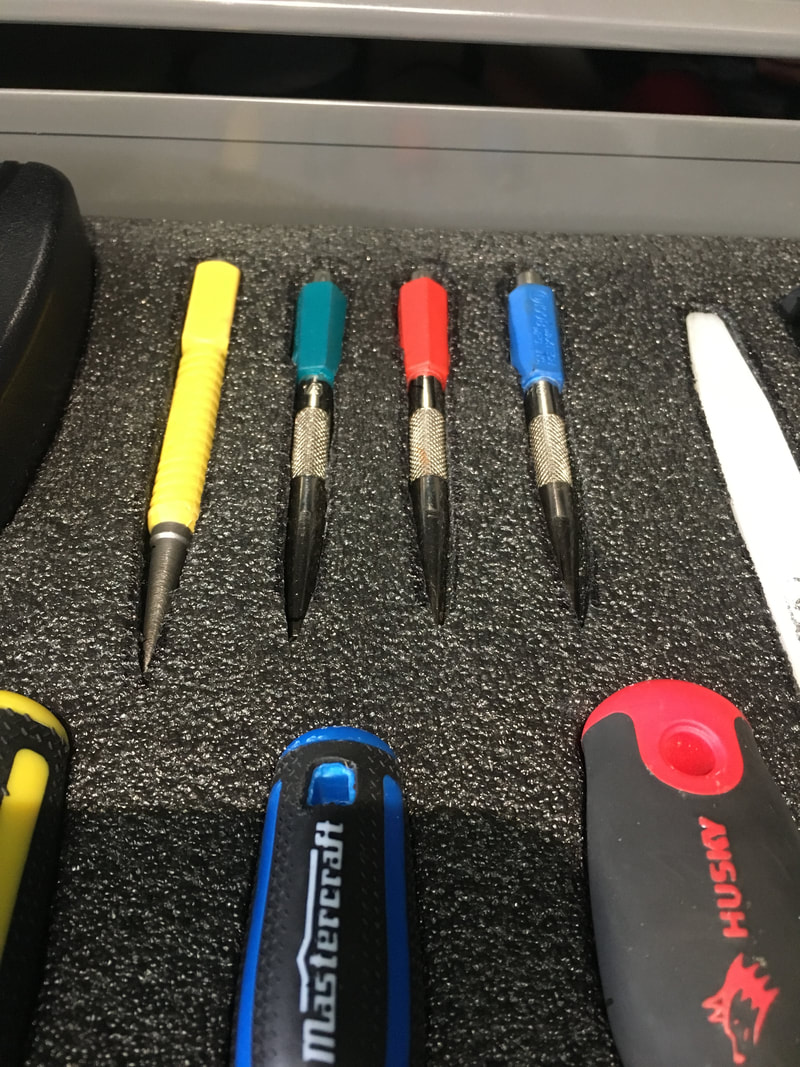
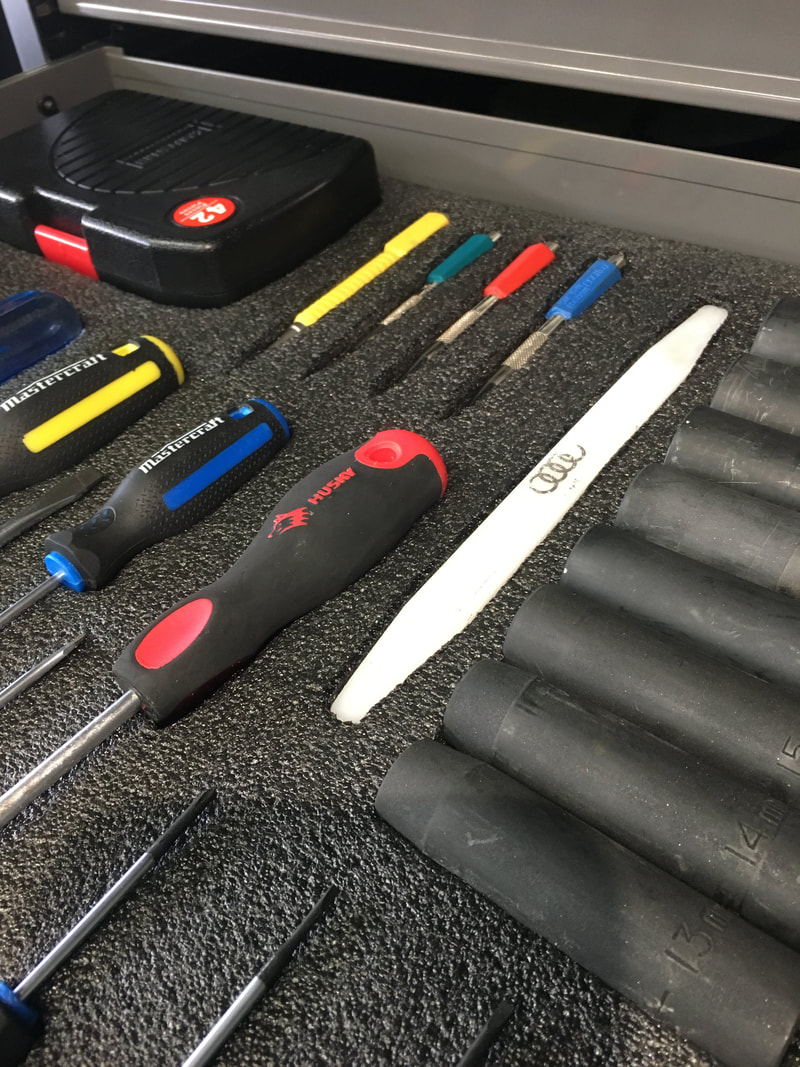
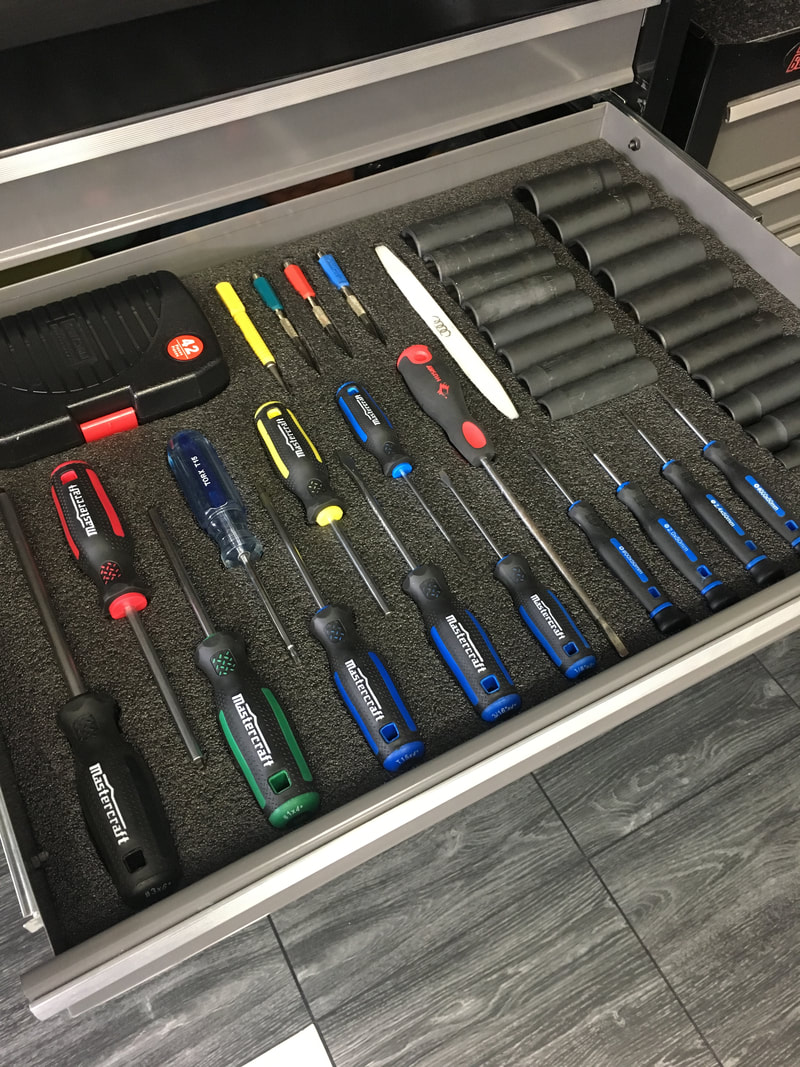
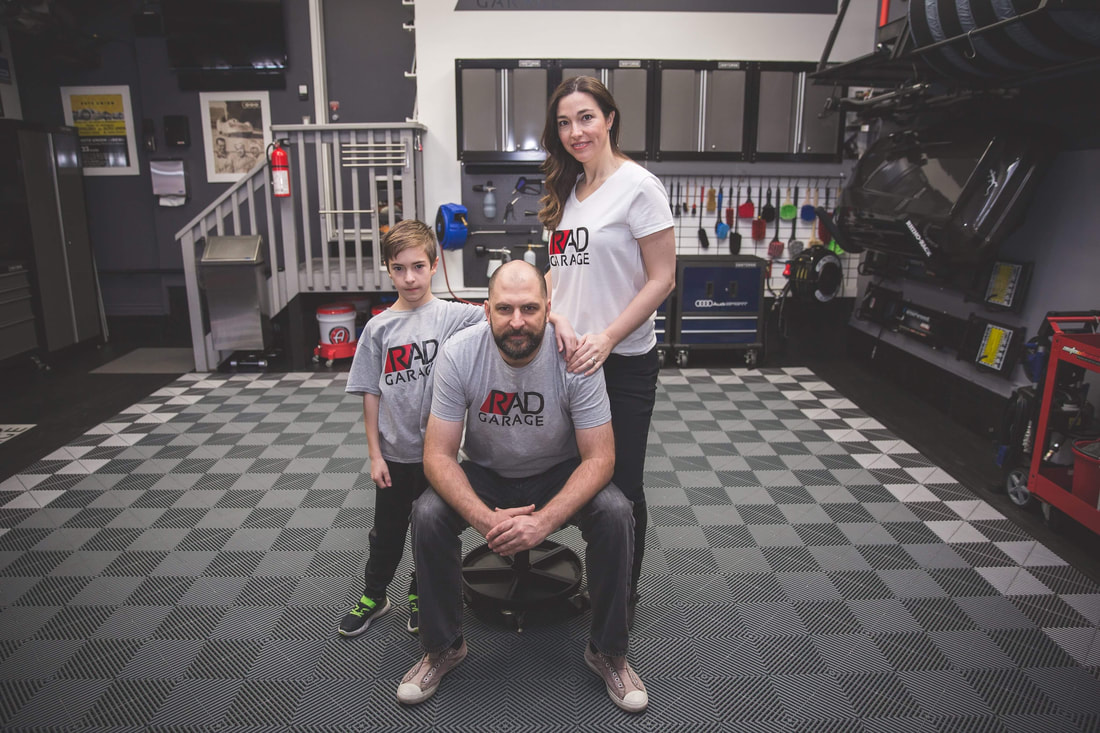
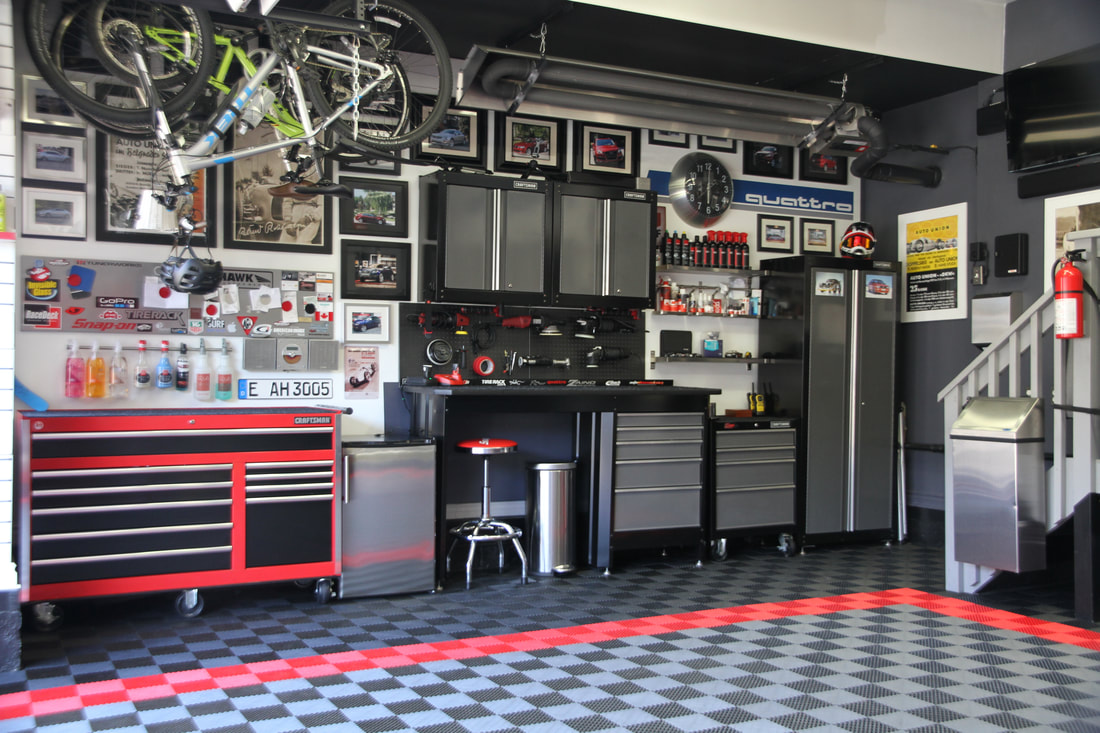
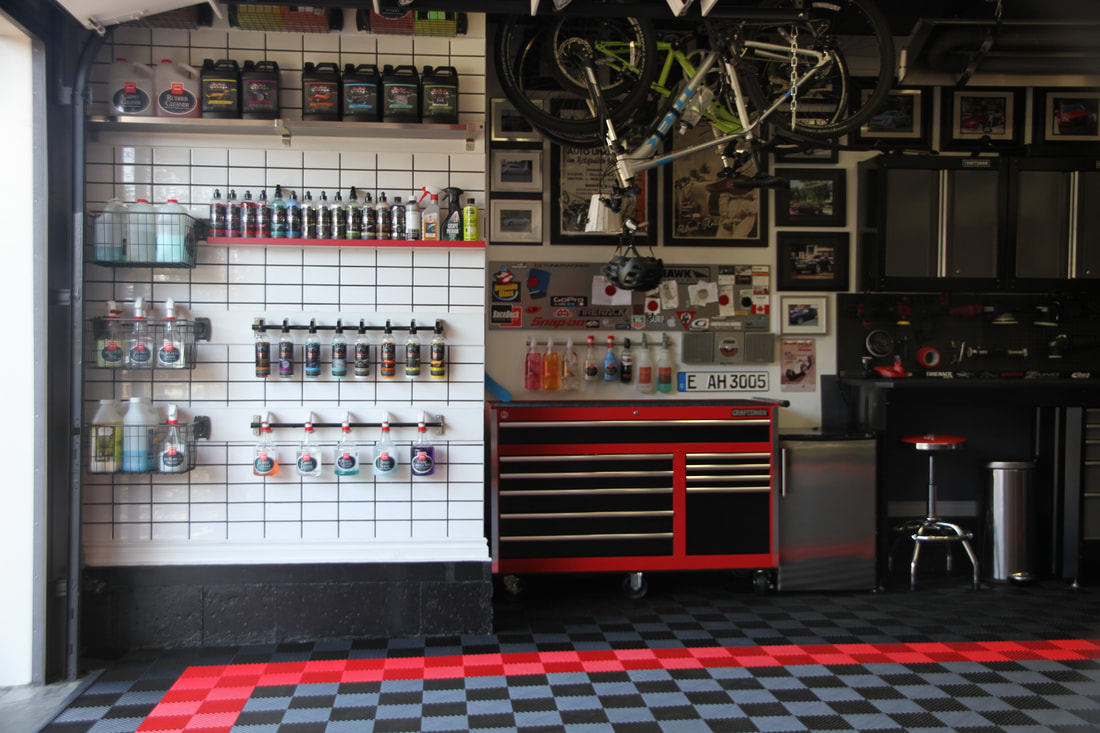
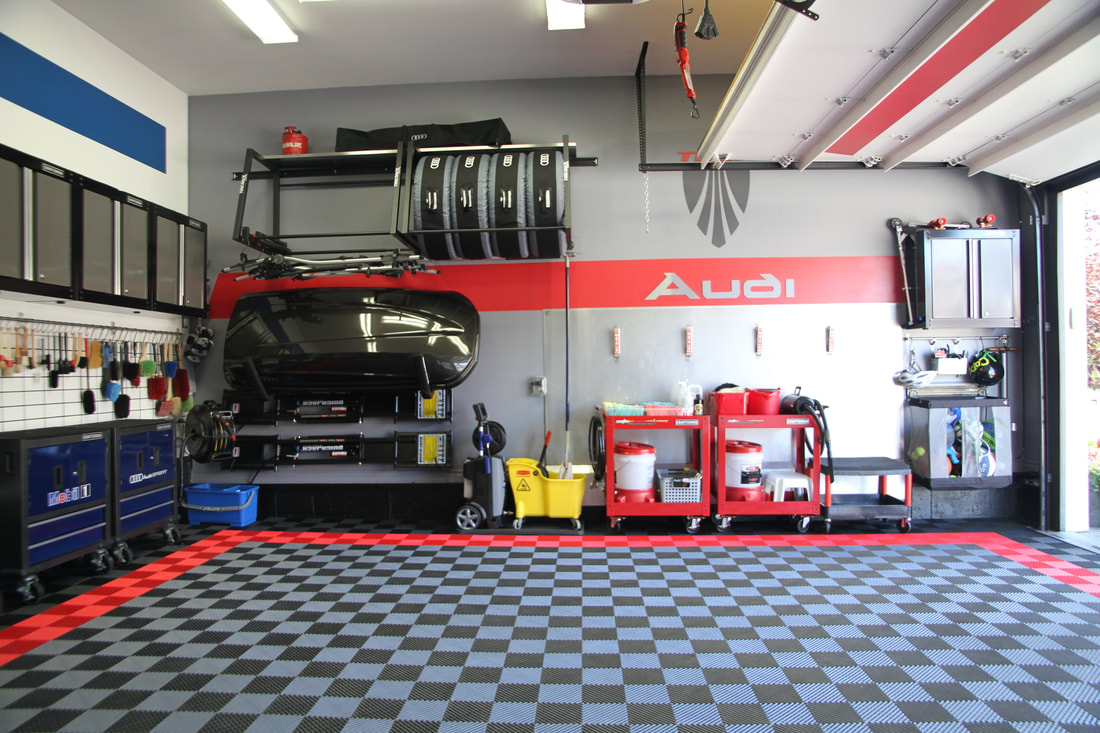
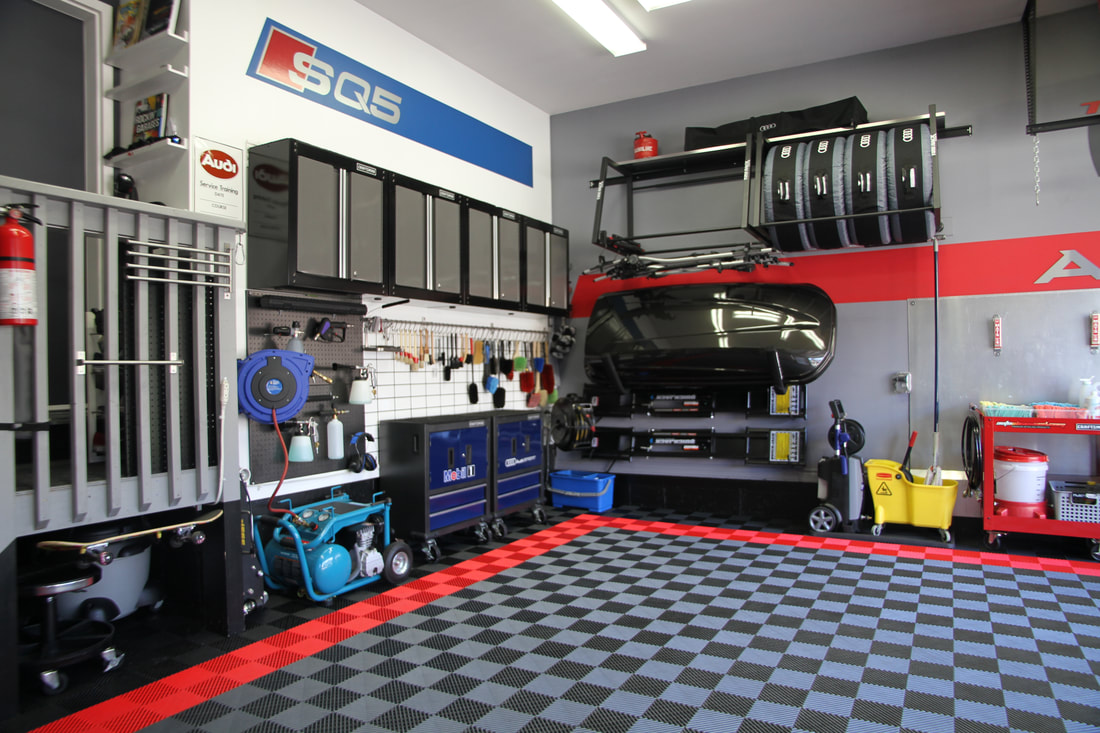
I am so happy to be introducing a new pressure washer system into the garage. I will be sharing the full story behind my AR630TSS acquisition in a forthcoming video, but I had to figure out how I was going to store it in the garage. I decided to position it in the dead centre of the garage on the house wall. Here, it will allow easy and convenient access to all corners of the garage. I sourced a 16"x24" John Boos & Company stainless steel shelf. This is a robust shelf that is specifically made for commercial kitchens so I felt it was the perfect choice to support the near-60lb AR unit. I removed the lower of my two Craftsman metal pegboard panels and affixed a 1" backer plate of wood to the wall using nails, screws and construction adhesive. This slab of wood isn't going anywhere. I used 3" wood screws to attach the shelf supports to the wall. I painted the panel with my darkest colour, "Film Noir". I am currently waiting on the MTM hose reel that will be positioned directly under the shelf. More updates coming soon! An extended Family Day weekend presented an opportunity for me to do some serious organizing in the garage. The garage was already highly organized, but with the spare time I set my sights on each and every drawer and cabinet in the space. Each of them is now completely and utterly dialled in. Here's some pics demonstrating just how organized I have this place at the moment. The trick will now be maintaining it to this level. There's a few significant changes to the product displays coming up so stay tuned. The team at QuickJack recently released a cool new set of black storage hooks. I reached out to them to see what it would take to procure a set of my own, and they just put a set in the mail. These will replace the steel versions I currently have. I am sending the old ones to a friend in Ottawa. The team at QuickJack has been absolutely awesome to me over the years. Be sure to check out my QuickJack page here. I am constantly making minor tweaks to the organization of my garage. Here are some recent photos that illustrate how and where I store my tools, products and equipment that enhance the efficiency of my garage. I was not happy with the performance of my aging garage door opener unit. It has served our family well for the past decade, but the entire system was dated and it was time for an upgrade. I connected with Mike Awada from Triton Door Services after a neighbor recommended him. He stopped by the garage and we chatted about all the possibilities and I settled on a Liftmaster 8500W side-mount "Jack Shaft" opener. The install process was somewhat complicated, but with the help of my amazing brother-in-law Ryan, we ran electrical service to the corner where the unit was mounted. We also rerouted the wall switch and sensor wires from the middle of the ceiling to the same corner. Then, we installed four slick little 4" LED pot lights (can lights) to provide some much needed task lighting to the lower ceiling portion of the garage. What an amazing difference these adjustable (3000-5000k) lights have made. This video isn't a complete step-by-step install guide, but more of a look into my thinking and how I integrated all the components into my already highly developed garage. If you are interested in upgrading your garage door opener, I highly recommend you find a qualified door technician in your area. It’s also a good idea to have a quality electrician on speed dial too! 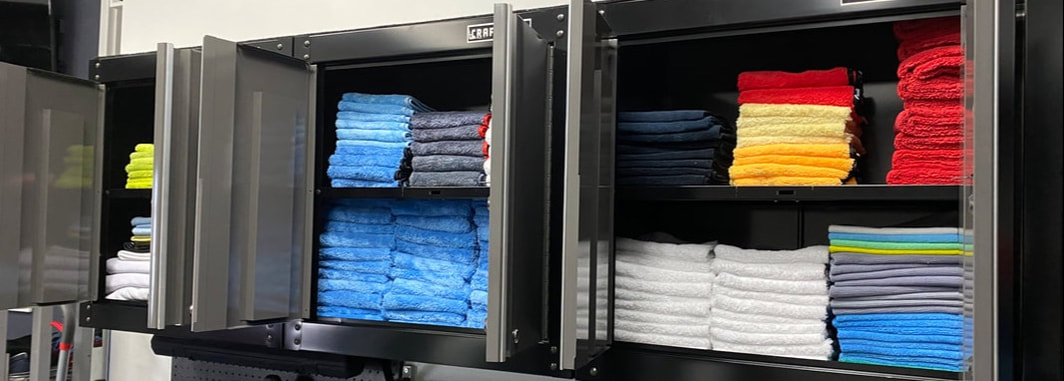 I have a lot of microfiber towels. Too many to be honest. So, today I tackled the big job of paring my collection down. I did this to streamline and bring consistency to my collection, but also to make room for almost 80 new towels. I made a big purchase of Detail POPO towels from Carzilla on the recommendation of someone who I respect. I think these new towels will breath life into my towel collection and come in very handy as summer approaches. Here's a video of the process along with a list of the specific towels I picked up. If you are a Canadian detailing pro or enthusiast like me, and you're looking to expand your detailing product or equipment arsenal, be sure to apply my "RADGARAGE" discount code to your CARZILLA.CA order to receive a 5% discount! I've posted four episodes of my new series called, "Wash & Chat". It's a fun way to connect with viewers. I will still produce artsy videos with chill music, but this is another way for me to enjoy sharing my garage and the projects I complete with viewers. Feel free to check them out when you have the time. I will warn you, they are around the thirty-minute mark in length. It's an ongoing battle keeping the garage clean, but I enjoy the process. I was able to do a full wash of the floor yesterday and then my son and I filmed a guided tour video. Check them out: My buddies at QuickJack sent me these cool wall hangers recently. I used to store my QJ frame units horizontally under my Thule roof box, but now I have them hanging vertically on the opposite side of that big wall. I took the opportunity to repaint a large portion of the wall and install some shelves I had in the basement. Things worked out great. Here's a video as well as some photos showing the progress and final result. Here's a project I have been anticipating for a long time and finally got around to tackling. I ordered two slabs of Kaizen foam made by Fastway. I don't have an extensive collection of exotic tools, but the tools I have are now super organized. Here's a breakdown of the three drawers I customized using this innovative and easy-to-work-with layered foam. Drawer one This is the big drawer in my 56" Craftsman rolling chest. There is an awkward channel that runs along the middle of the base to strengthens the structure, so I was able to carve out a niche so the slab of foam sits flush on the base of the shelf. I burrowed out cavities for all my main tools. Because Kaizen comes in 48" lengths, I had to add a portion on the left side to fill the entire space. It came out great. Drawer two This drawer houses my collection of drivers. The most fun part of this project is laying out your tools in a pattern prior to tracing. I am looking forward to having much more organized tool drawers now. Drawer three This drawer houses a variety of useful tools including my sockets. This gallery illustrates the process you use to trace, cut, and burrow out the cavities for each of the tools. I found the entire process very satisfying and the results are highly pleasing. I'm excited to be featured on the second in a series of videos produced by YouTube sensation, Pan the Organizer! His "Pan & the Organizers" series features viewers touring people through their detailing themed garage spaces. I am enjoying reading through the comments left by Pan's viewers and feel very proud that people seem to dig what I have created. The best part of being featured on Pan's channel is the amount of feedback from his viewers. I will admit to reading each and every comment and I am so impressed with the amount of positive feedback my garage has received. Here's a sampling. Click image to enlarge.  Our friend came by last weekend to photograph my garage. Heather is super talented and I am very pleased with the final results of her work. Here's a little gallery highlighting her talent and the beauty of my place! 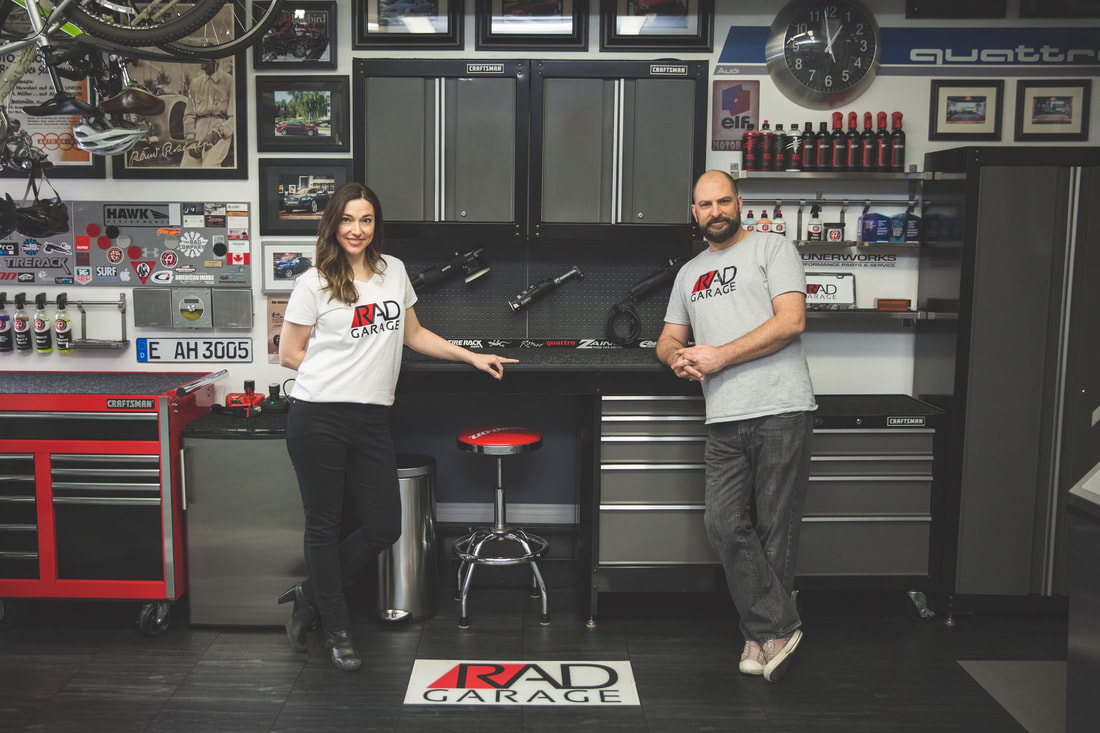 Last weekend, a good friend came by to snap some photographs. She is quite talented so I am very eager to see how they turned out. She sent a few teaser pics and they look great. I even convinced my family to pose for a few. My plan is to use her shots to update my website. Since I had the garage tidied up, I did a new tour video because the last tour video is a couple of years old and things have changed a bit since then. I am excited to share this charming garage from Reykjavik, Iceland. Brynjar Hartharson is a mechanic who works primarily on GM cars. He has created an impeccable detailing environment he uses to care for his cars and the cars of others. I have been a fan of his space since I first caught wind of it on his Instagram. It was instantly apparent that Brynjar and I have similar tastes in many regards. Like me, he is an avid hobbyist detailer, obsessively pampers his German car, and prides himself in maintaining a very neat and organized workspace. I am thankful he agreed to answer my questions about his garage story and I was extremely flattered he mentioned my garage as one of his design inspirations. I am confident you will be as impressed with his space as I am. So, off we go to Iceland!  The vitals
The inspiration I have always been passionate about cars, dreaming of one day buying my own house with a garage. After I stumbled upon The Garage Journal in 2011, I spent a lot of time looking at garage projects and getting inspiration for my own in the future, I had designed the basic layout and look in my mind long before I had a garage.
Take a look at this spectacular North Carolinian estate belonging to my longtime garage buddy, Larry. For years, I have been a fan of Larry's clinically clean and expertly organized garage, but what impresses me even more is Larry's remarkable detailing work that he completes inside it. When I made the decision to feature garage spaces of others on my blog, I immediately sent Larry an invite and he graciously accepted. He furnished me with comprehensive responses to all of my questions along with quality photos that showcase the pristine environment he has created to pursue his passion for detailing.  Name: Larry Bishop Location: Charlotte, NC Garage vitals:
We moved to Charlotte from the DMV area in mid-2016 and built our first single family home. Construction was completed late August and I quickly started on the garage. Fortunately, the builder finished both garages and installed baseboards which gave us a great starting point. In the first month of ownership, we completed the epoxy, lights, and all the gladiator wall tracks/cabinets. Since we built the house, I spent the construction period researching and accumulating products which meant I had the bulk of the items upon move in. I originally met Rick on Garage Journal, where I spent a good amount of my research time. Yes, I went through all 88 pages of Rick's build journal and contributed greatly to his 630k views! I lost steam on my garage journal thread but the following is what I started: Click here to connect to Larry's informative build thread on garagejournal.com
I'm always talking about and showing off my own garage, but I also spend a significant amount of time obsessing about other peoples' garages. One garage that has always impressed me is the one that belongs to Tyson Hugie. This past holiday season, Tyson emailed me to share a flooring project he was undertaking. He had an epoxy coating applied to his garage floor and he wanted to share the process with me. I enjoyed the story and photos he sent and thought it would be interesting to share the story here on my blog. 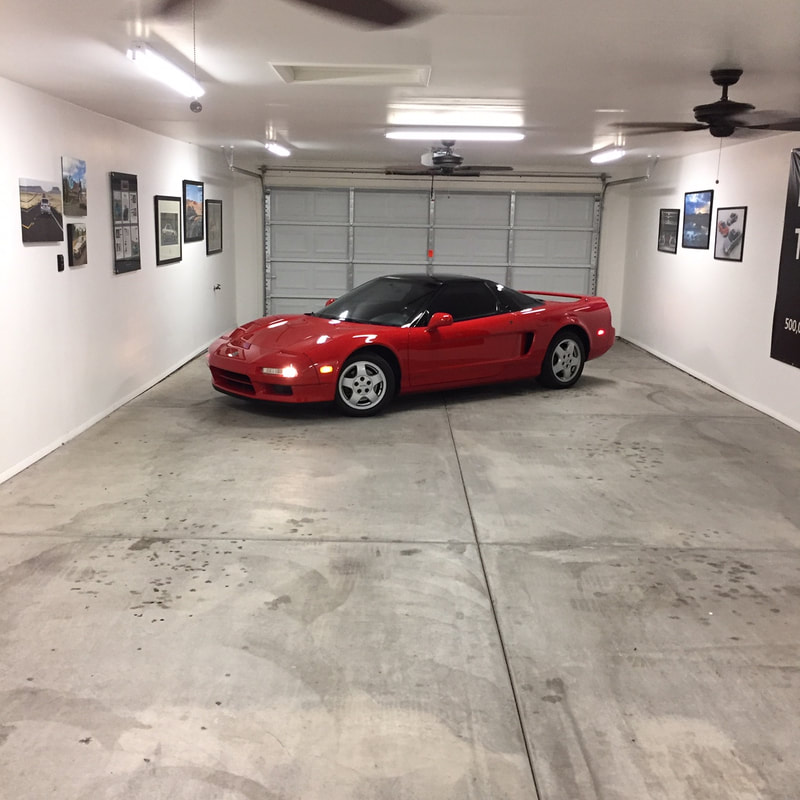 Tyson's Arizona garage is a shade under 1000 square feet and is set up in a triple tandem configuration (6 cars). In addition to being large, it is home to an extensive collection of Acura cars. Currently, he owns eight of them! What makes his collection even more impressive is that they are all impeccably maintained and driven on a regular basis. In fact, he gained notoriety a few years back when his pristine 1994 Acura Legend coupe surpassed the 500,000 mile mark. In the early summer of 2013, Acura honored this incredible milestone with a red carpet ceremony. Six months later, Acura presented him with the keys to a silver 2013 ILX. Tyson has done a fantastic job of documenting his automotive passion and accomplishments on his "Drive to Five" website and has been featured in a number of videos on Acura's YouTube channel.
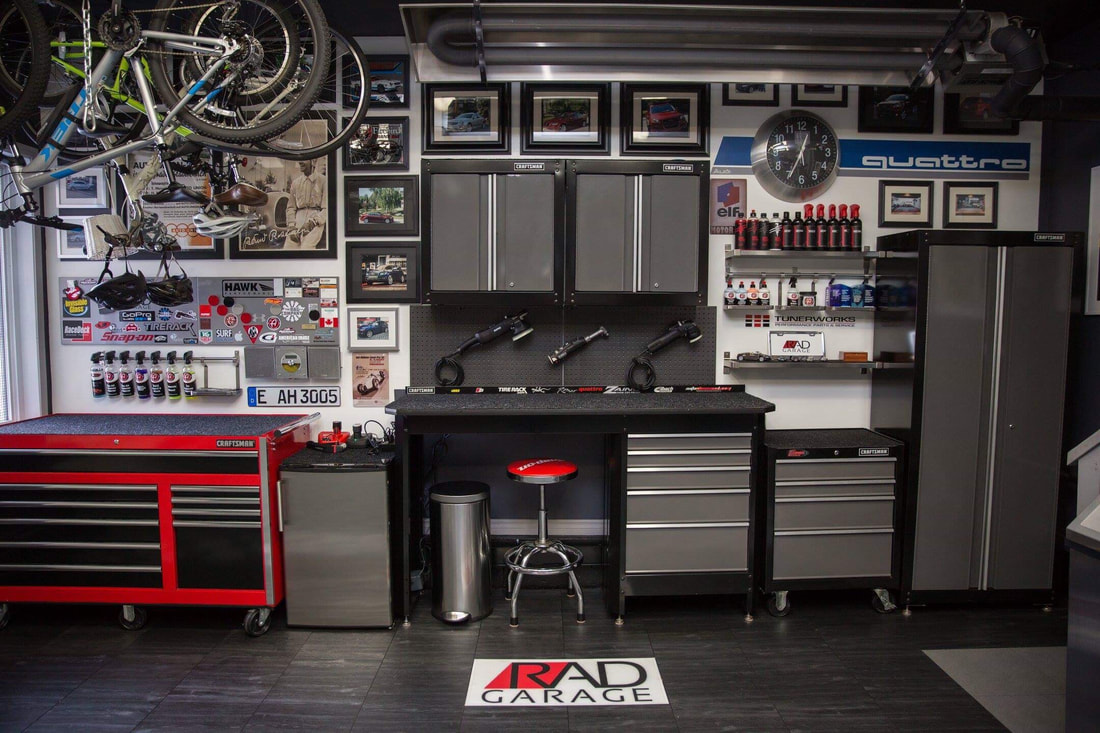
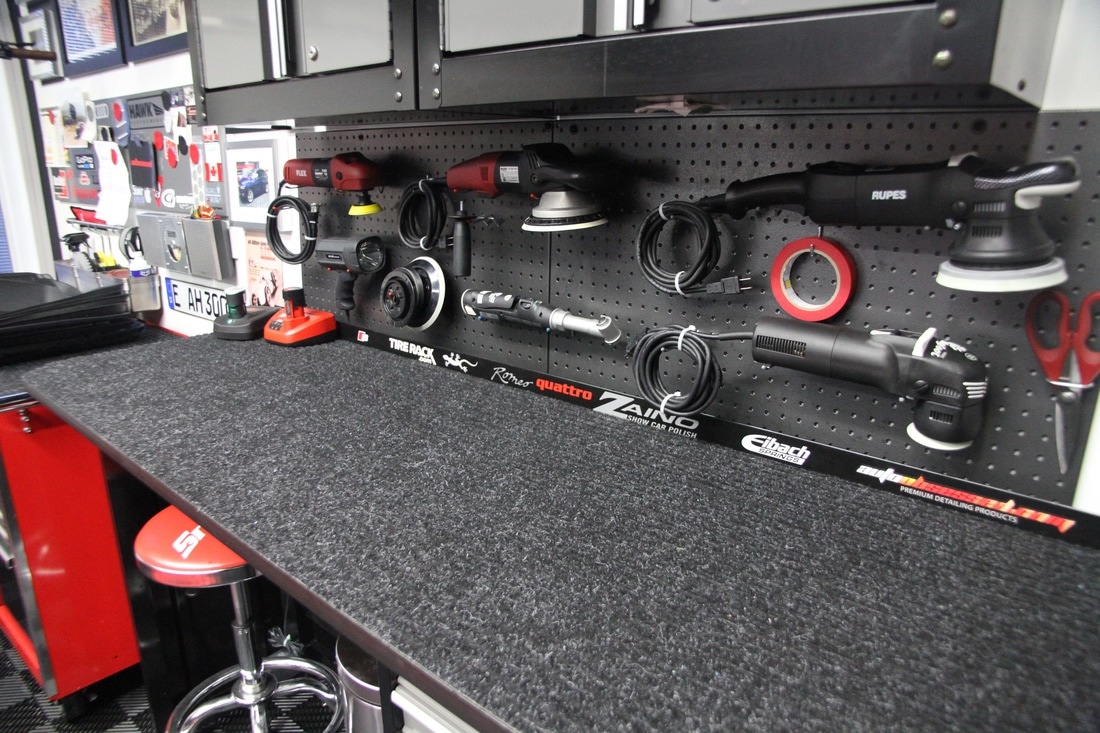
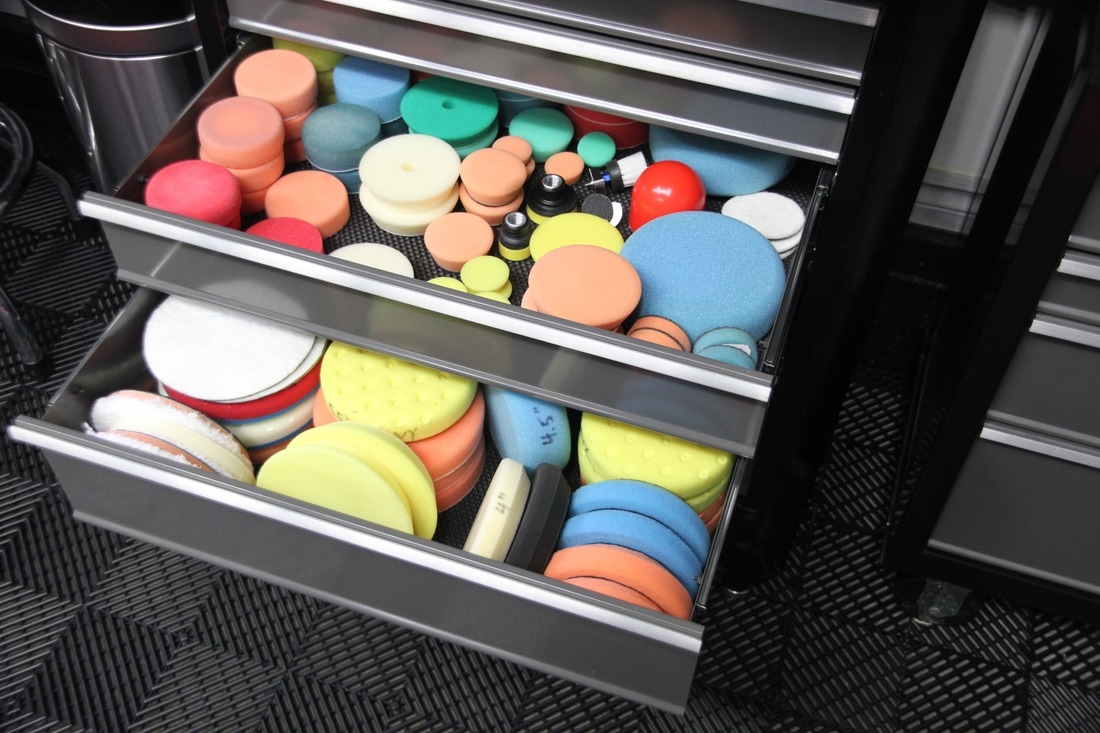
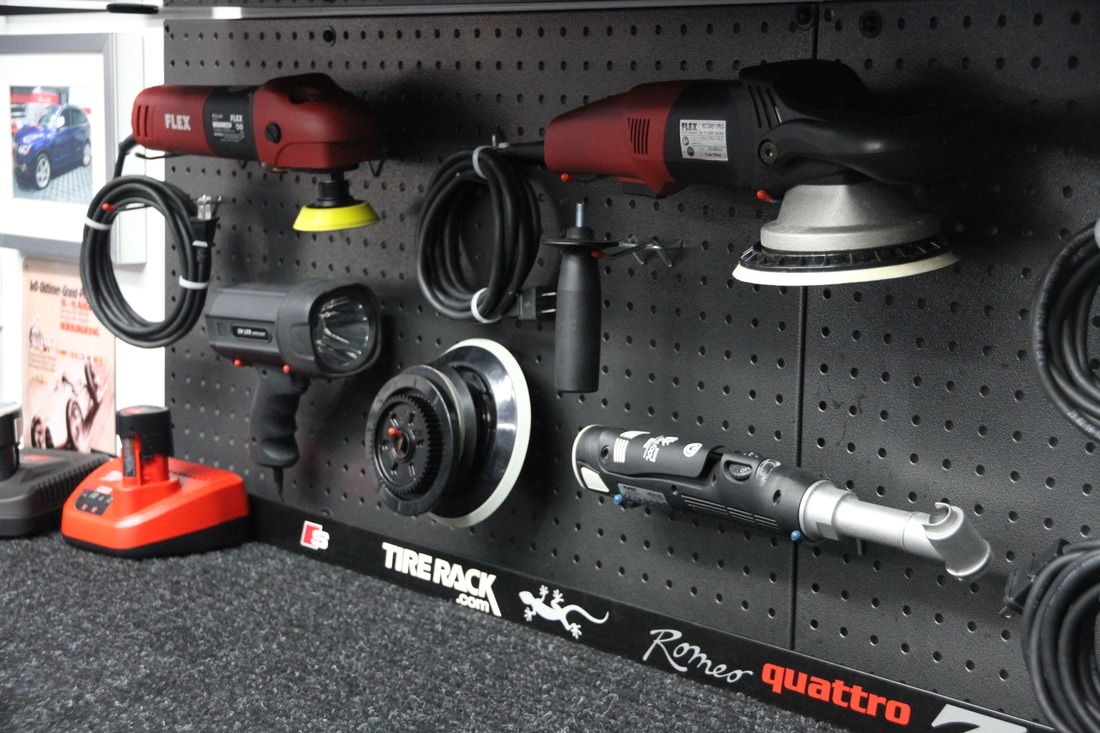
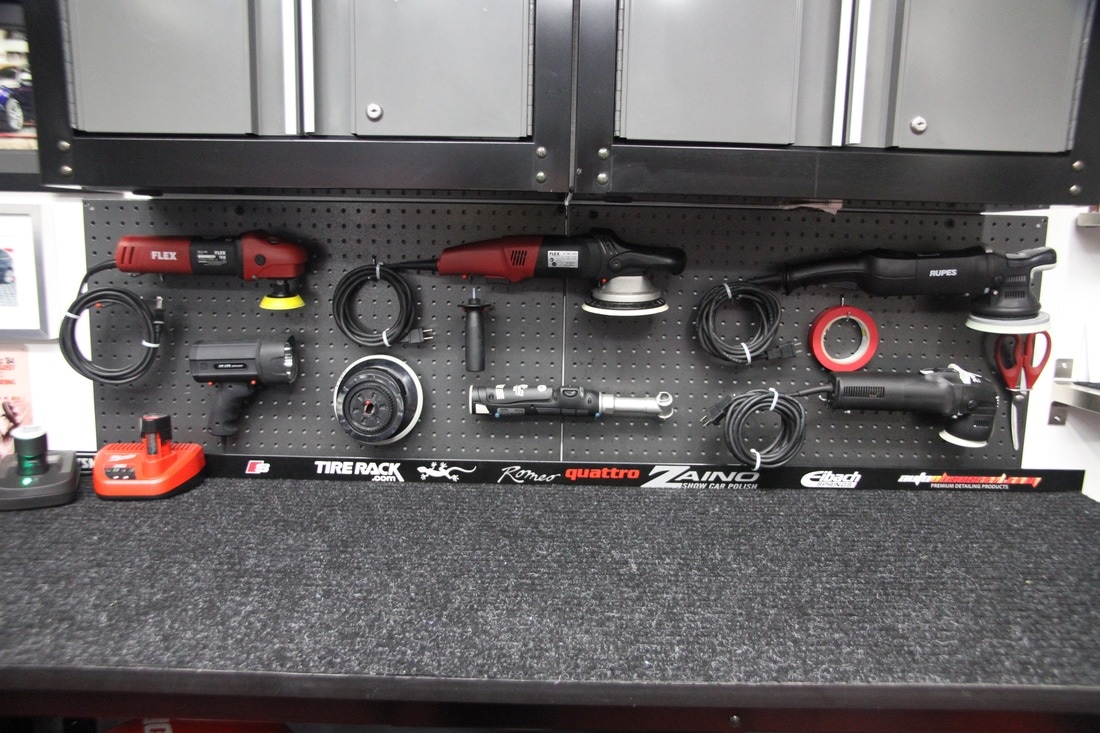
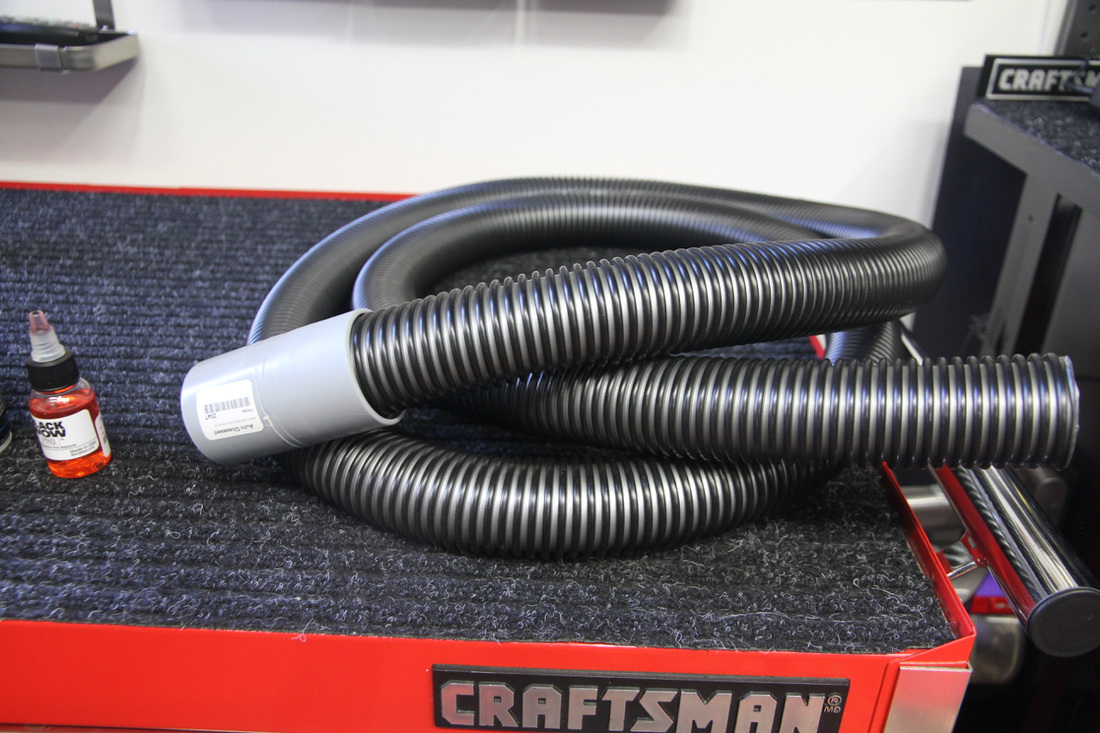
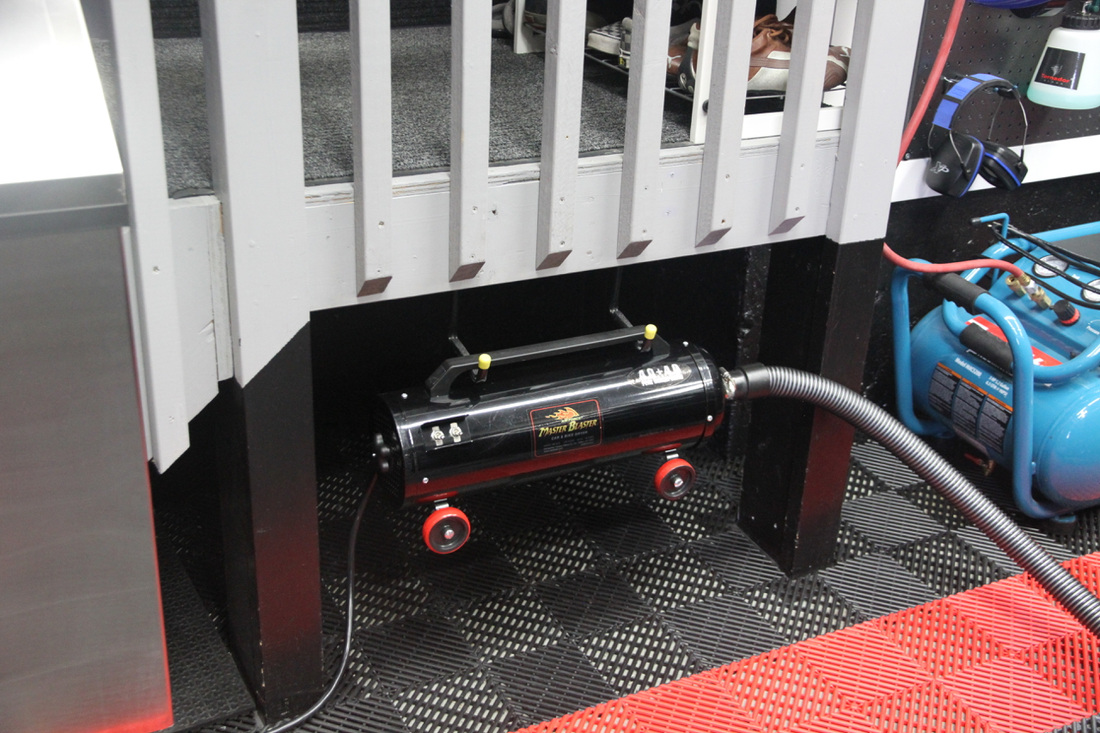
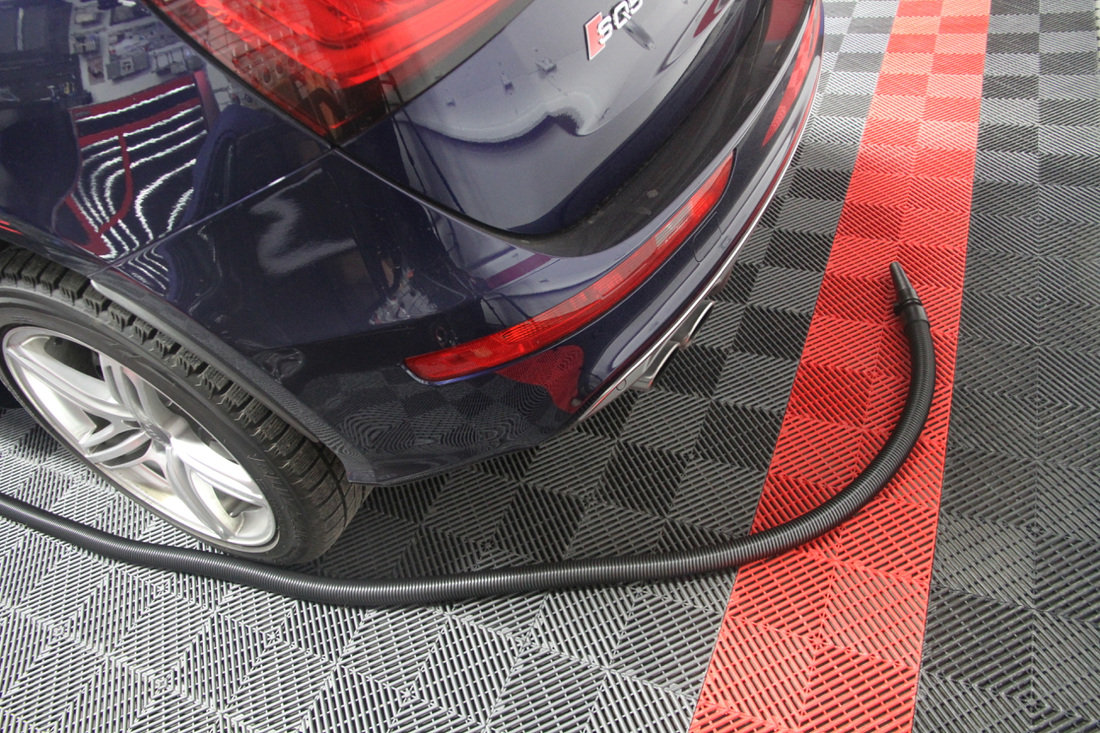
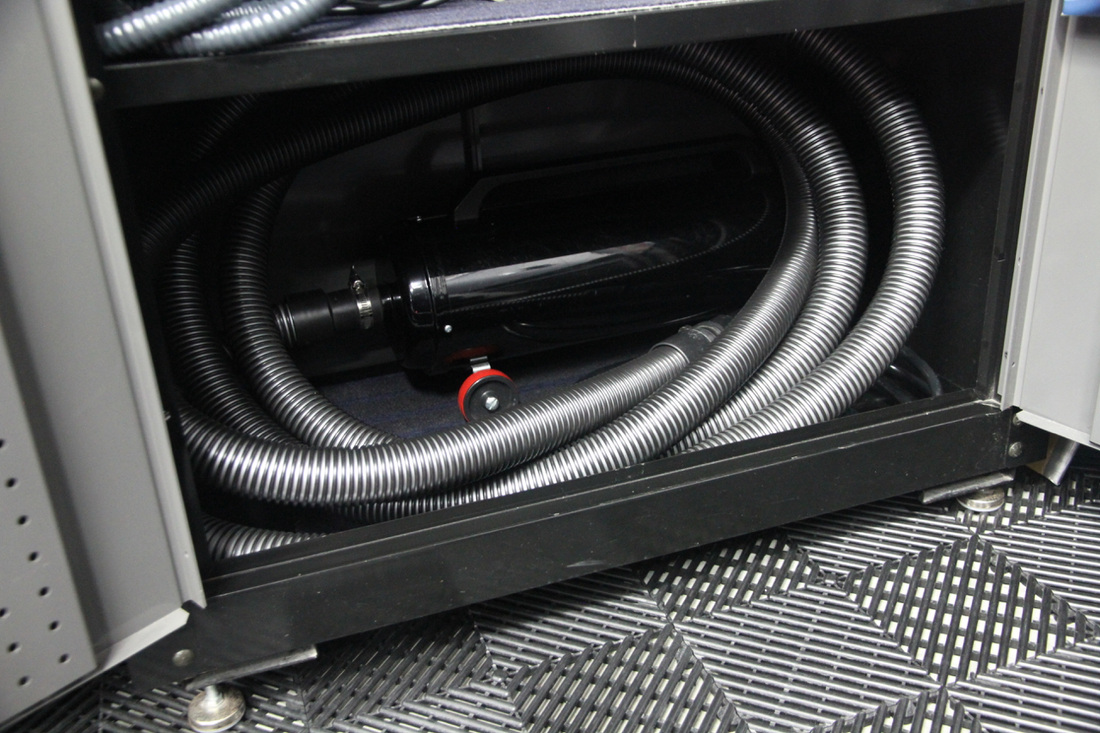
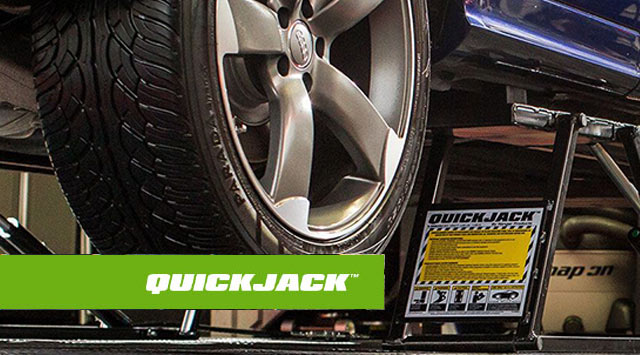
Here's a collection of photos that represent the current state of my garage. No major changes, just little tweaks here and there. I'm pretty much satisfied with how I have things laid out. Time to just use and enjoy it. I was tired of having my polisher arsenal stored away and out of sight, so I mounted them on the Craftsman pegboard above my workbench. I want to add one more polisher to my collection, but that will have to wait until Father's Day. I also moved my pad collection from my 56" Craftsman to two of the drawers beneath my workbench. Here's a few pics: A recent spat of mild weather enabled me to do a thorough spring clean of the garage. The floor wasn't too bad, but a lot of grime and debris was lurking in the vents of the Free Flow tiles and it was time to get rid of it. The entire process took a few hours. I put a video together that demonstrates each step of the process. Enjoy. Since purchasing my BL-5000SLX QuickJack lift, I have been putting it to the test quite regularly. I have taken the wheels off a number of times to gain access to the wheel wells and I have been able to perform some touch ups on the paint around the rotor hats. It has been a helpful tool as well as a cool one. My friend, Geoff popped by a little while ago with his camera gear to snap some shots of the QuickJack in action and here's a little slideshow that demonstrates how it has helped me raise my detailing game. The photos give you an idea of how I have the system set up. Like I have said before, it works great for my needs and it is a purchase I am very happy with. A Lowe's just opened in my neck of the woods so I stopped by to check it out. Man, is that a nice store. I picked up a ball caddy by Gladiator to help keep my son's various toys organized in the garage. It was a quick and easy install. Once the rail was in place, I painted it to match the wall. He loves it. This virtual tour should give you a great sense of how things are laid out in my garage. I have to say, things are approaching perfection. It's just a matter of fine tuning the little details at this point. I hope you enjoy. I had a few hours to myself today, so I decided to give the floor a thorough clean. This meant removing every RaceDeck tile and power washing the entire floor underneath. Moving items in the garage is a breeze with the RaceDeck floor, so its a relatively easy process. Here's some shots of the big event. I tend to hold on to products I don't use. Today, I took a big step and deleted perfectly good products from my collection in an effort to streamline things a bit. I am going to take the products to work for anyone who wants them. I was at a stage a while back where I wanted to try everything. I think I'm at a point now where I know what products I like, and the days of experimenting are behind me. I received my latest order of detailing supplies from autoobsessed. One of the items I purchased was a 10' extension hose for my Metro Master Blaster car dryer. With this extension, I now have enough hose length to dry my entire car while the machine remains stationary. Until now, I've had to roll it around the garage. This is not a huge deal, but it was somewhat annoying having to ensure it never came into contact with the car. When in use, it will now be suspended on two retractable hooks. Here's a few pics to demonstrate where I'm coming from. |

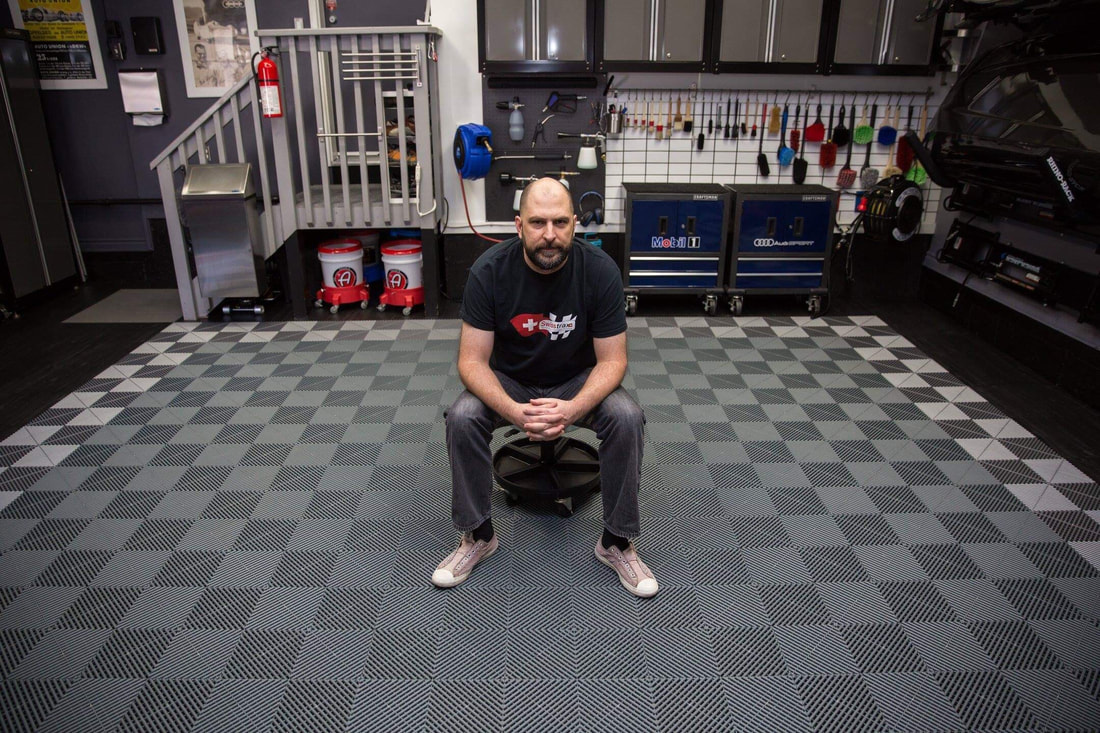
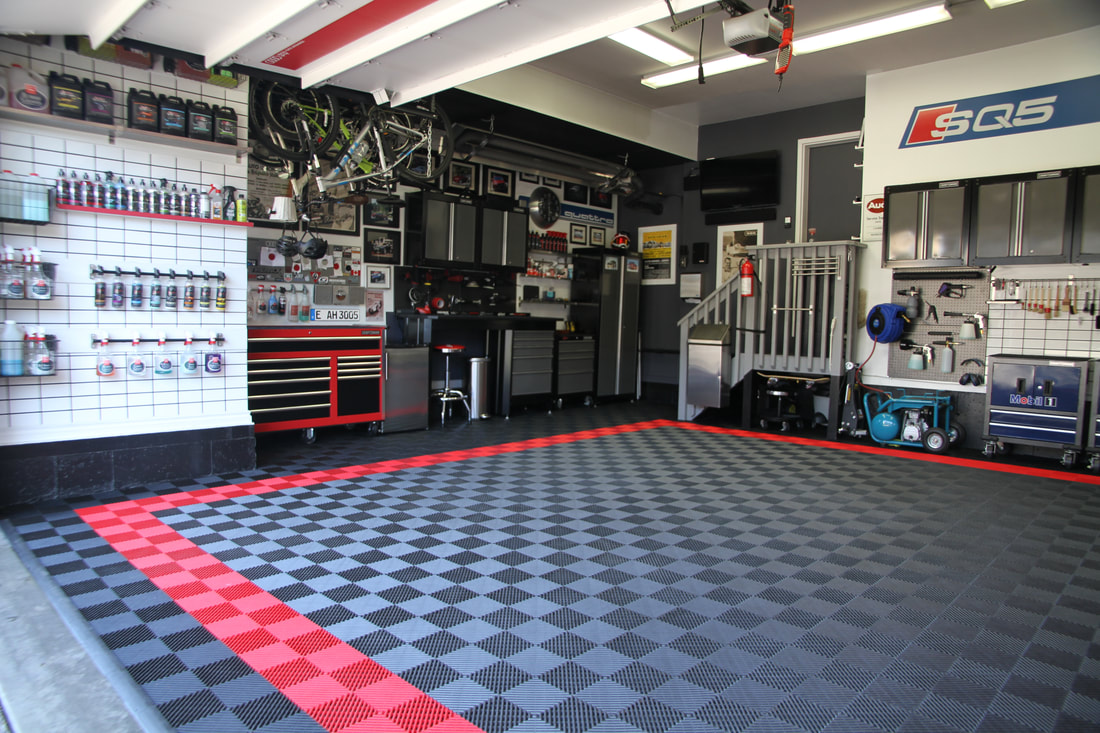
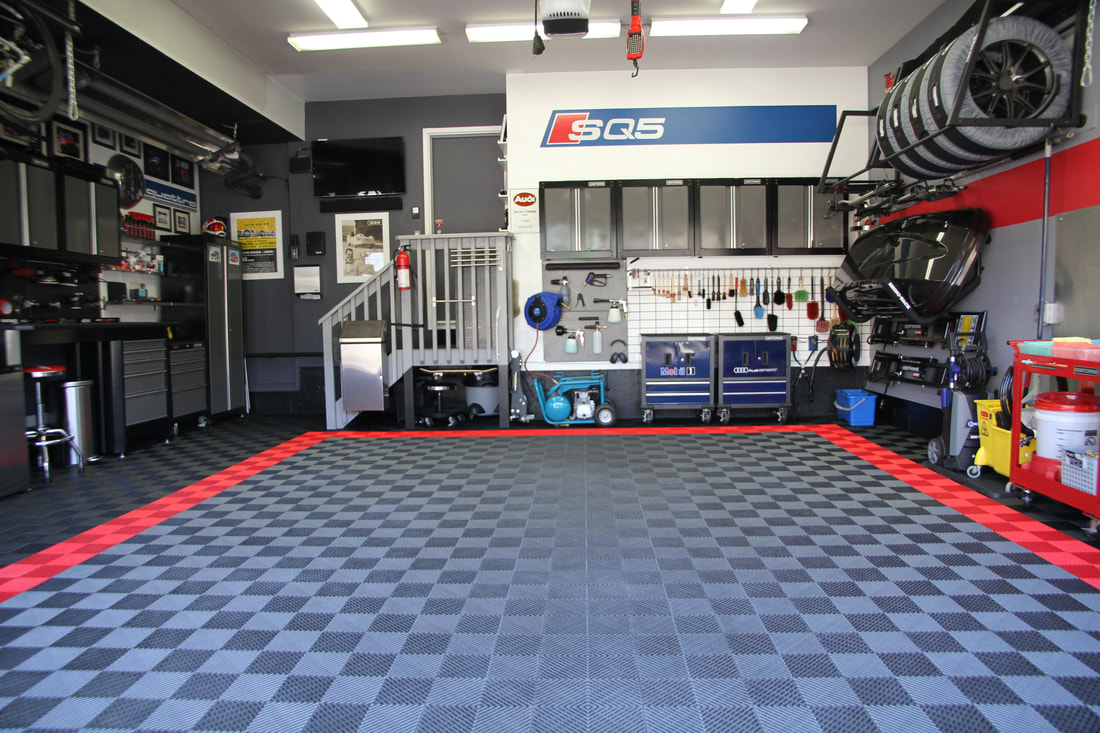
RAD GARAGE is my personal detailing theatre. I am a teacher who finds immense pleasure in completing deeply therapeutic, thorough and highly satisfying detailing projects in my residential garage. I have converted my suburban double car garage into a world class detailing environment and I enjoy caring for my own car and select cars belonging to others. The garage and the work I complete in it have allowed me to connect with other detailing enthusiasts from around the world.

I have teamed up with Teespring to offer viewers an opportunity to grab some RAD gear! Click here to see the current inventory of RAD merchandise available at my Teespring store!
Use "RAD10" to save yourself 10% until the end of March, 2021.

Carzilla is a local detailing store that caters to the North American community of professional and enthusiast detailers. I have been a longtime customer and I am fortunate to call the owner a friend. Besides stocking a vast quantity of top quality detailing products, the owner has supported various garage and detailing projects of mine over the years.
5% discount code
|


 RSS Feed