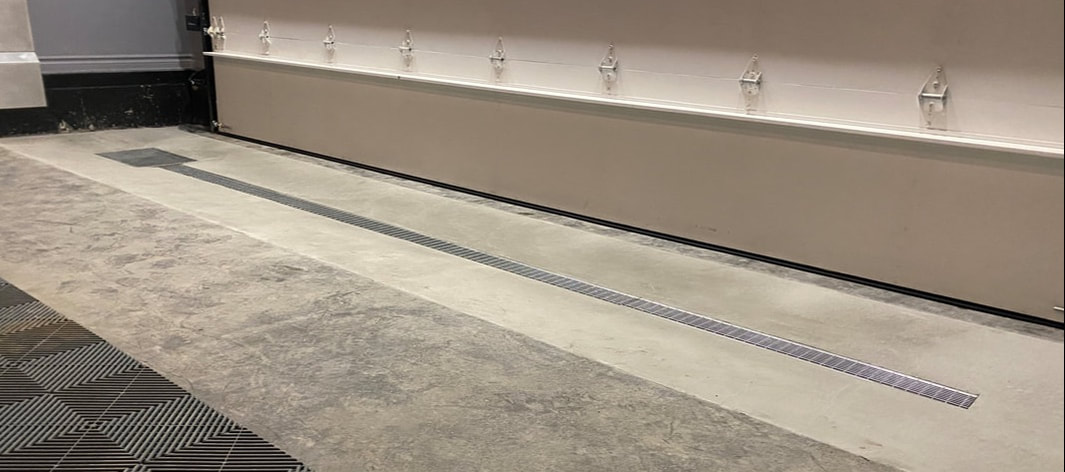
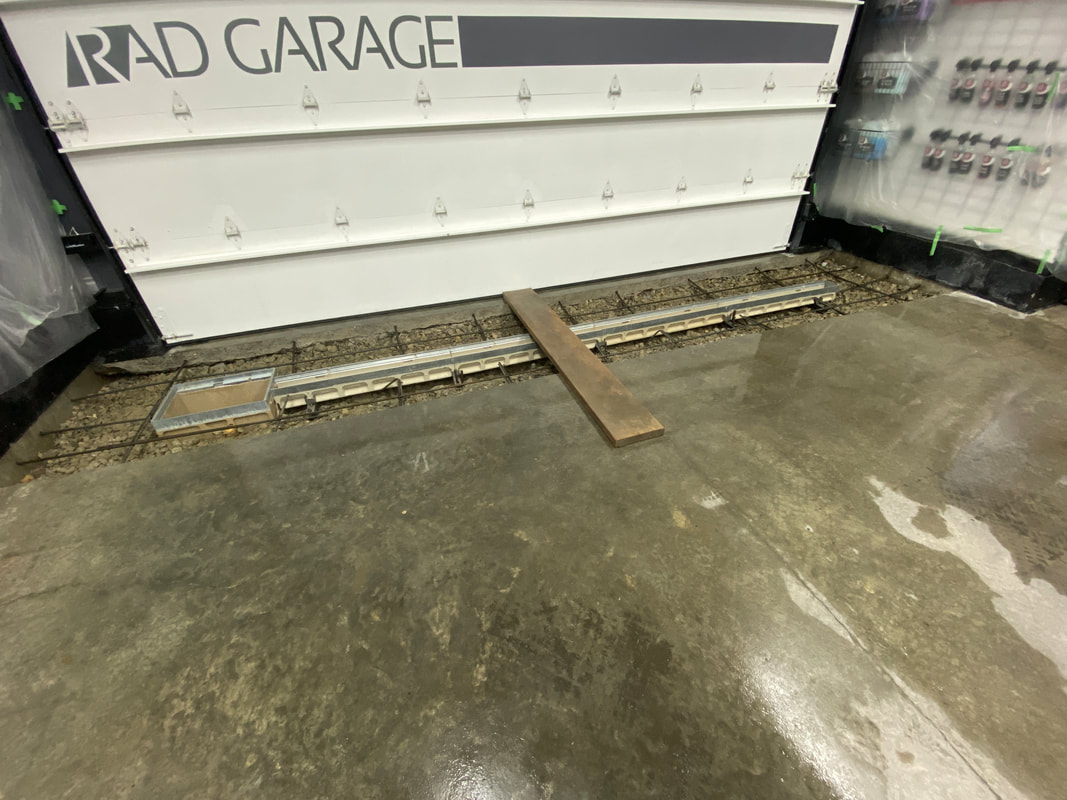
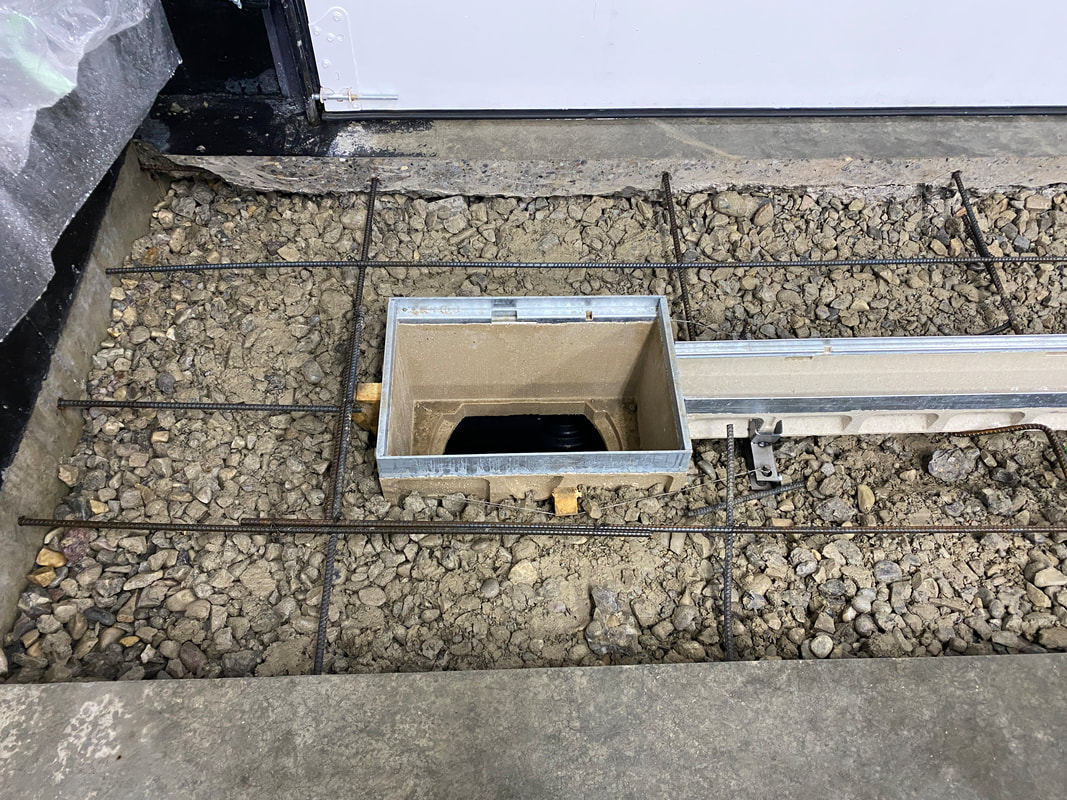
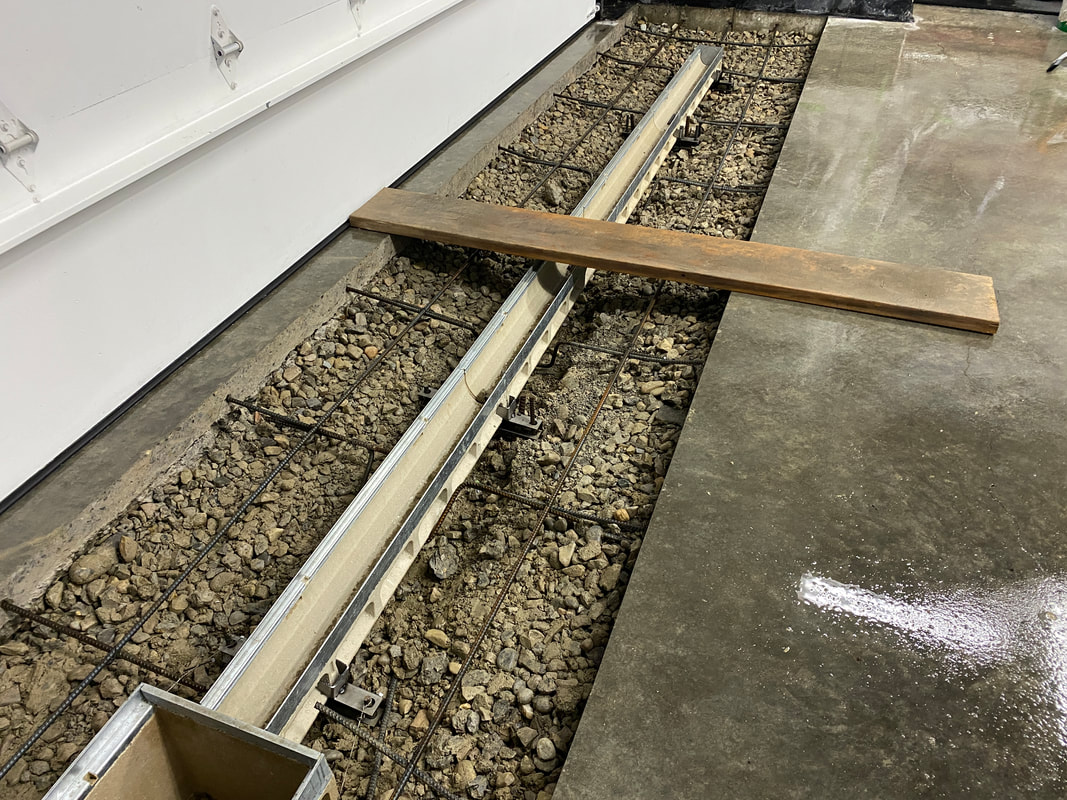
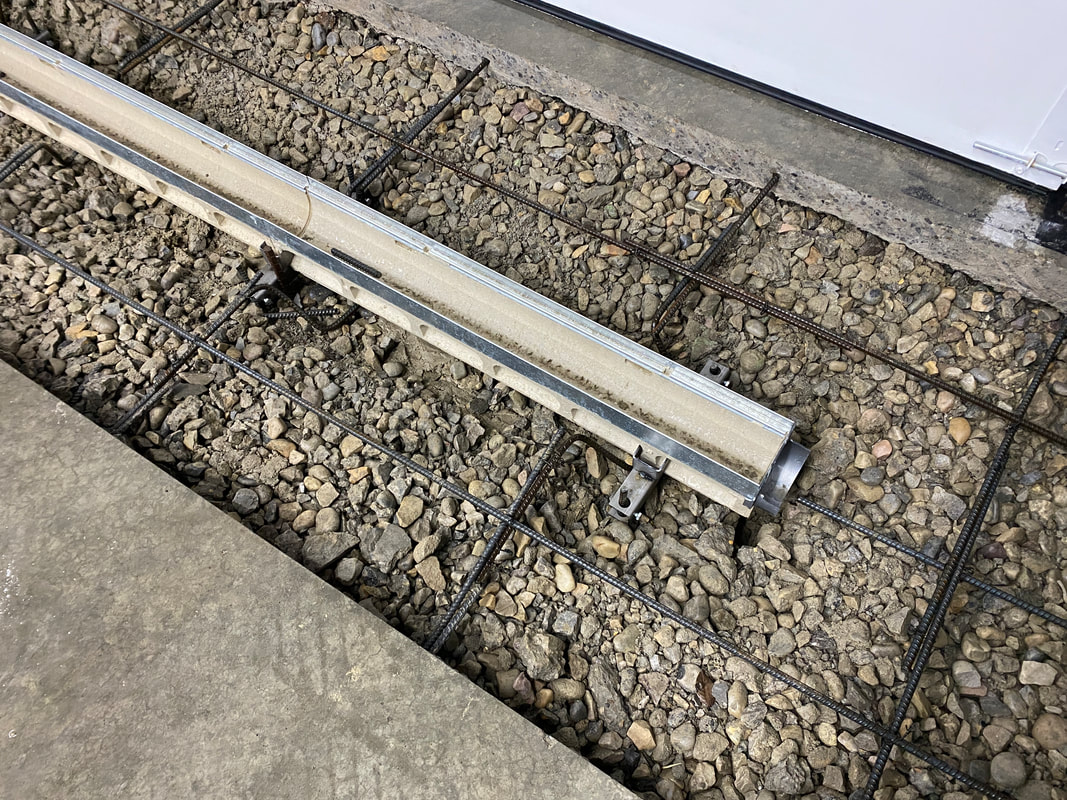
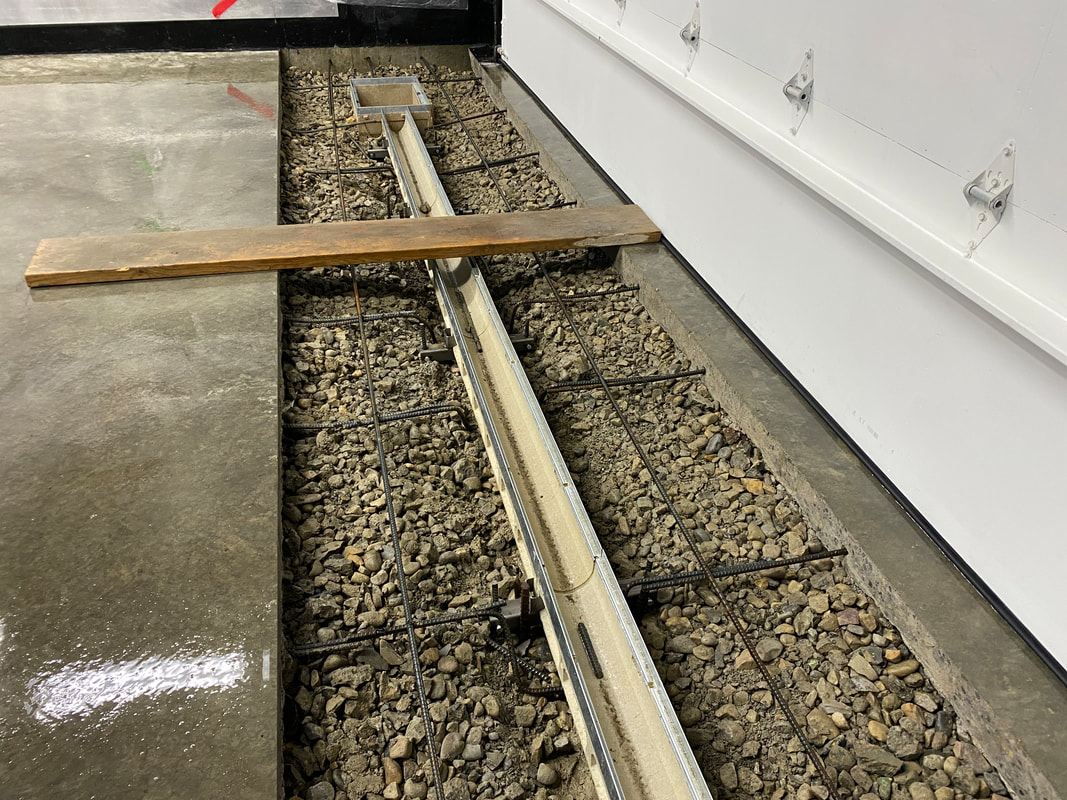
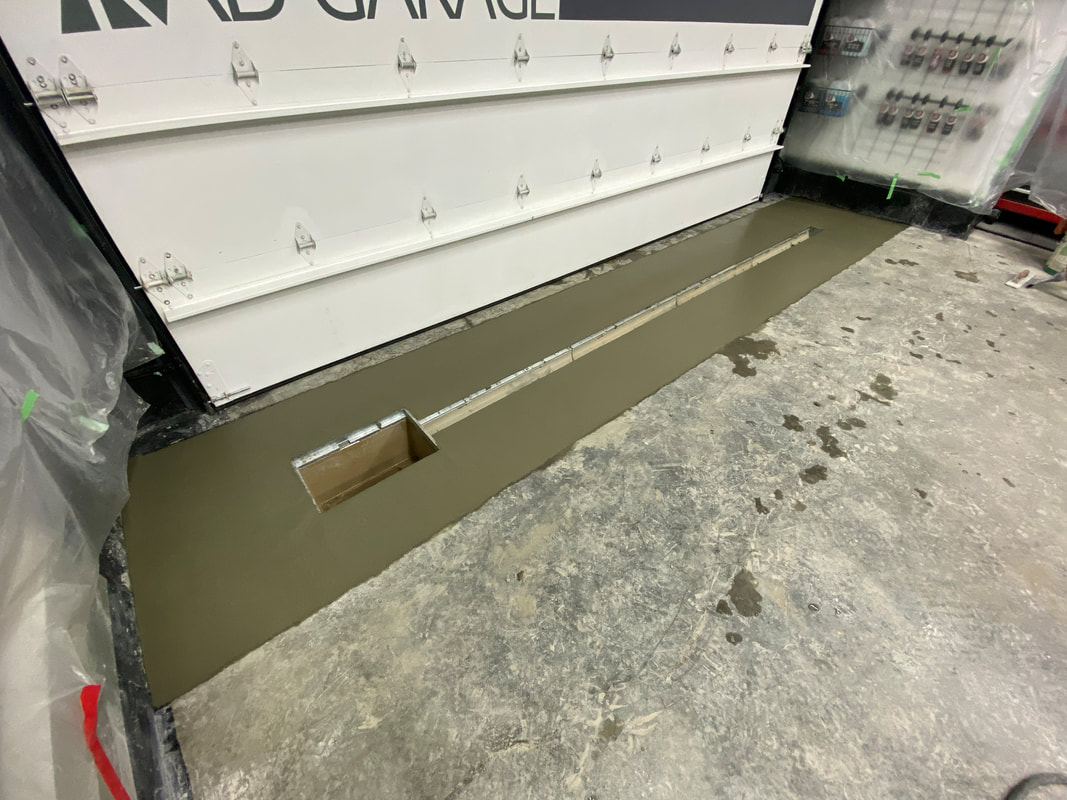
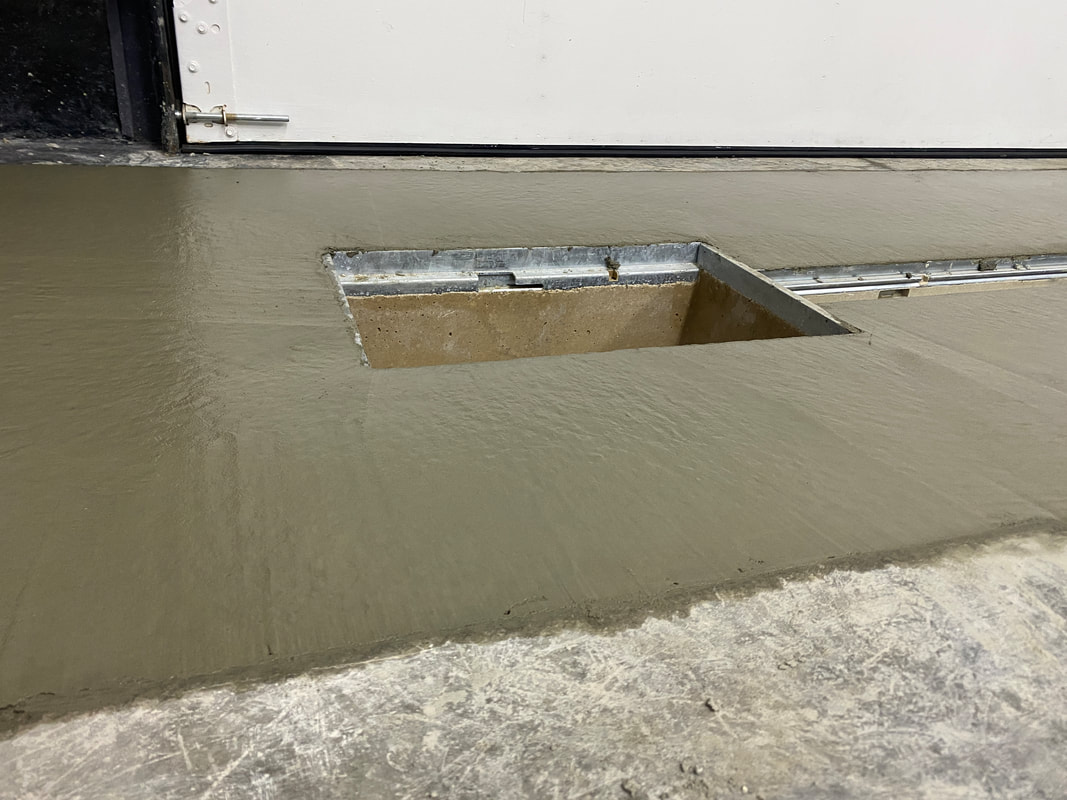
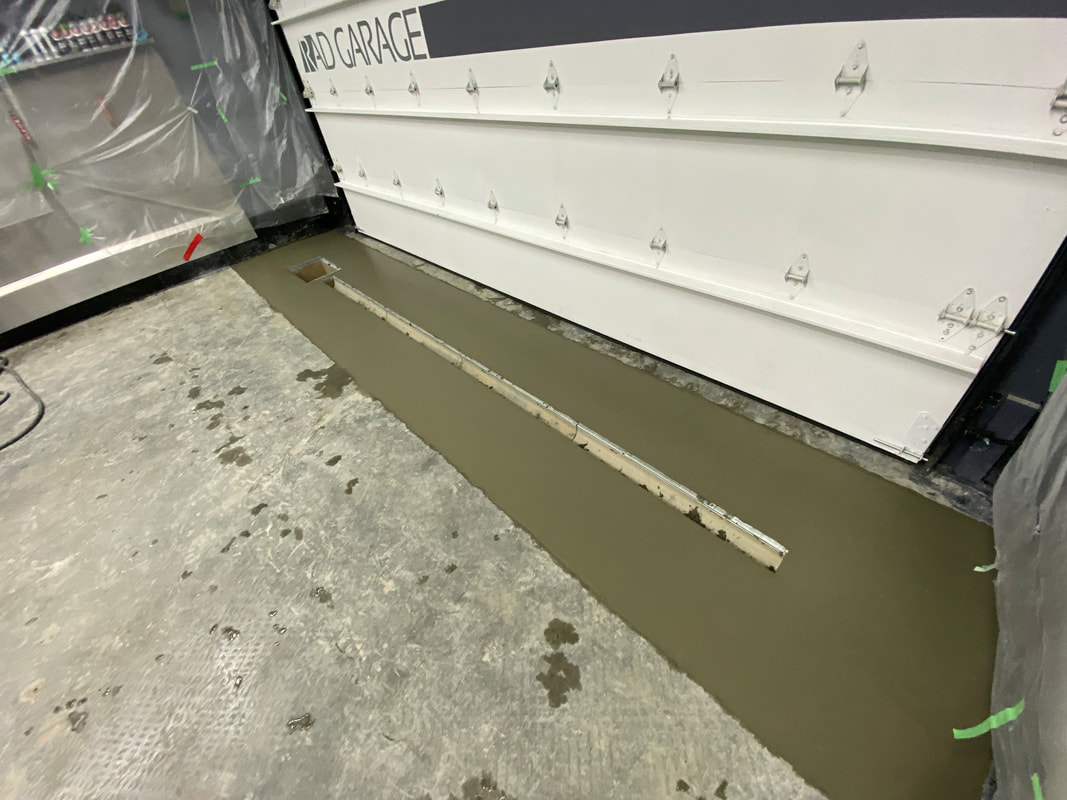
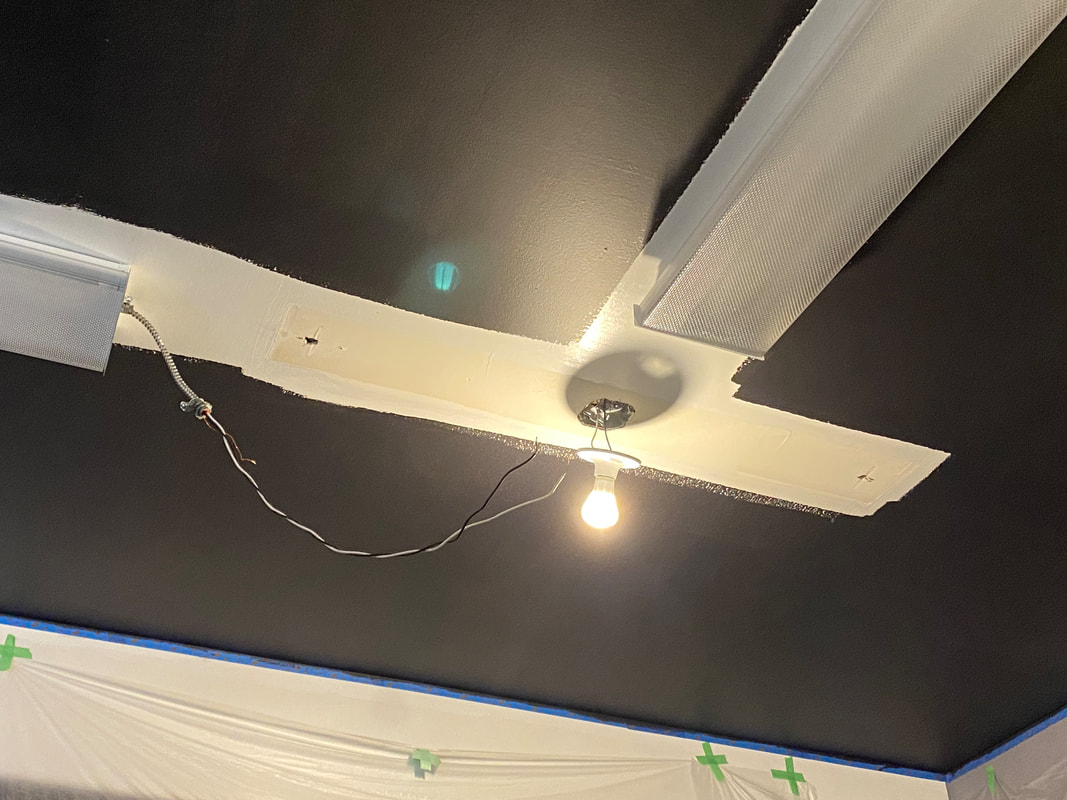
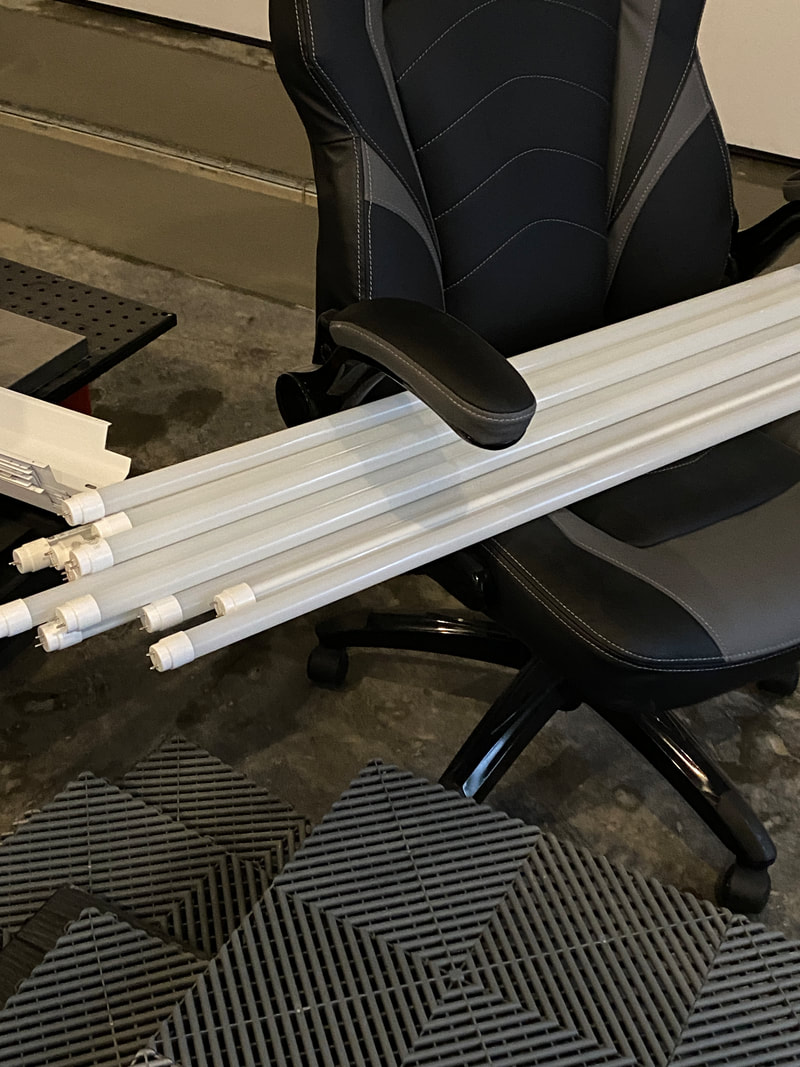
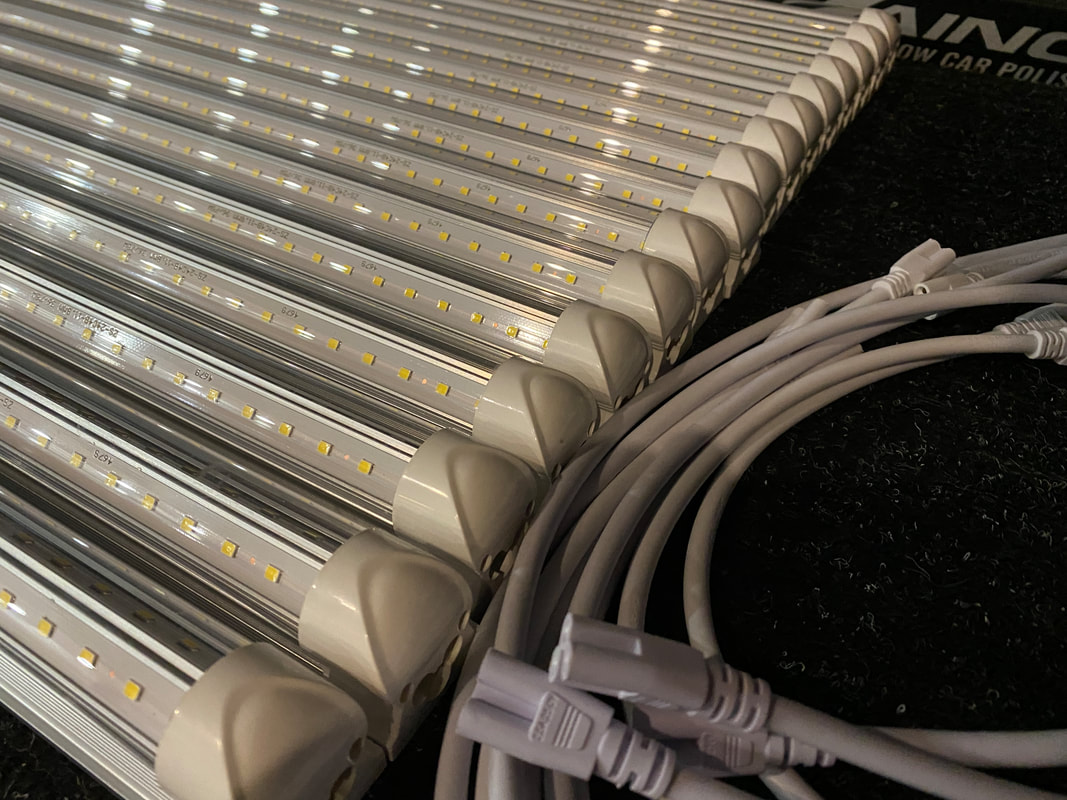
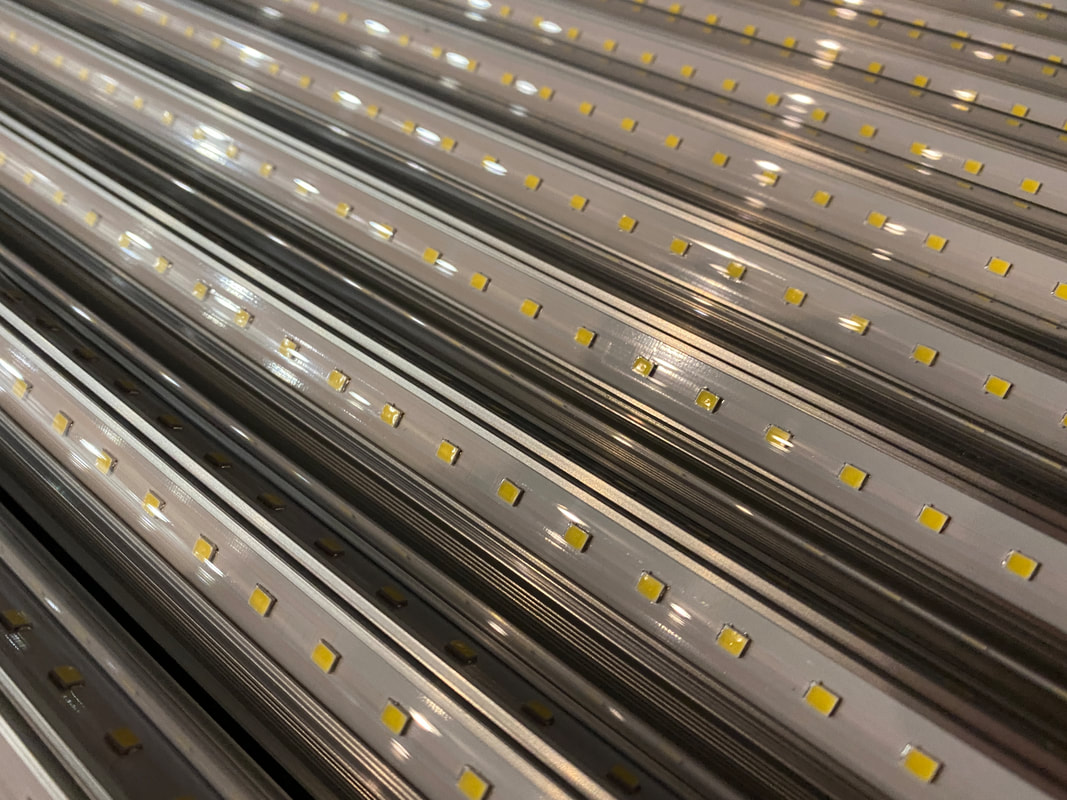
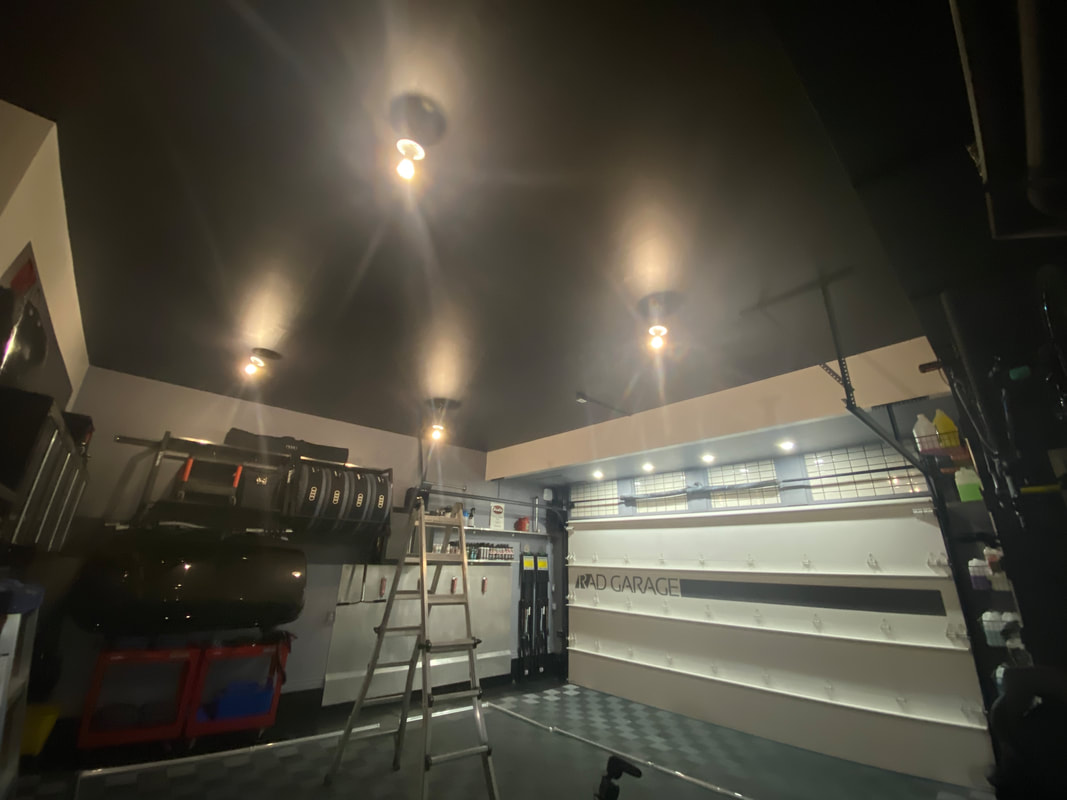
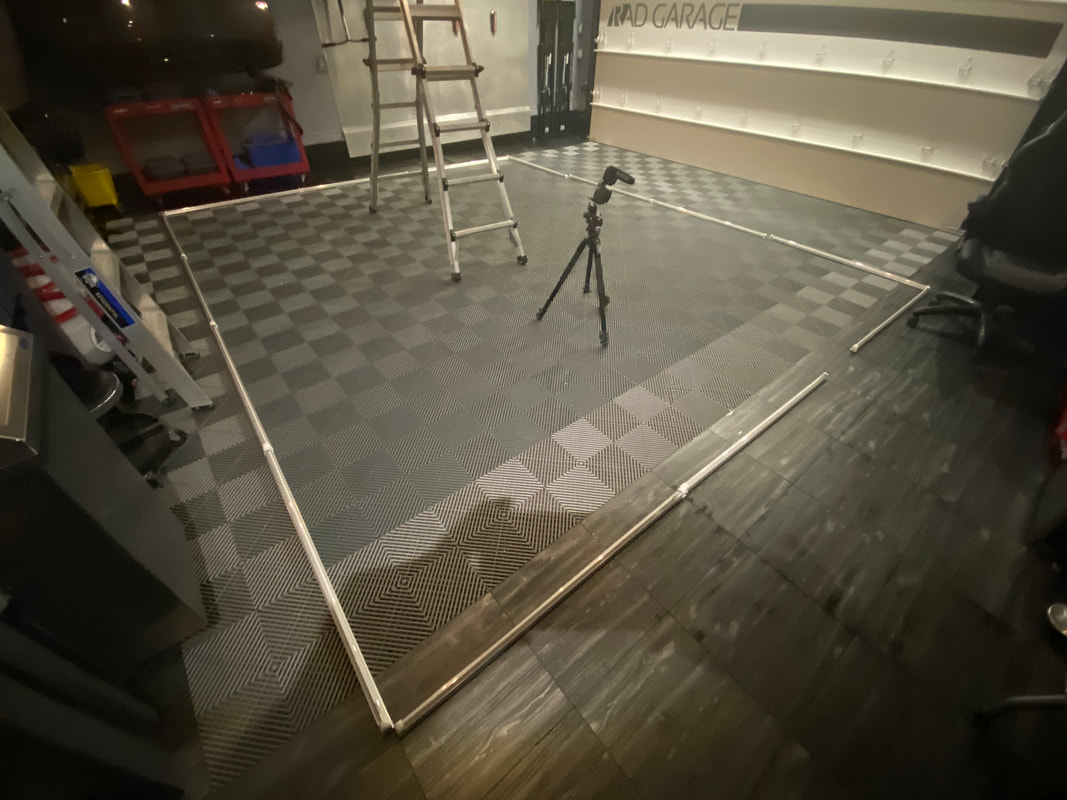
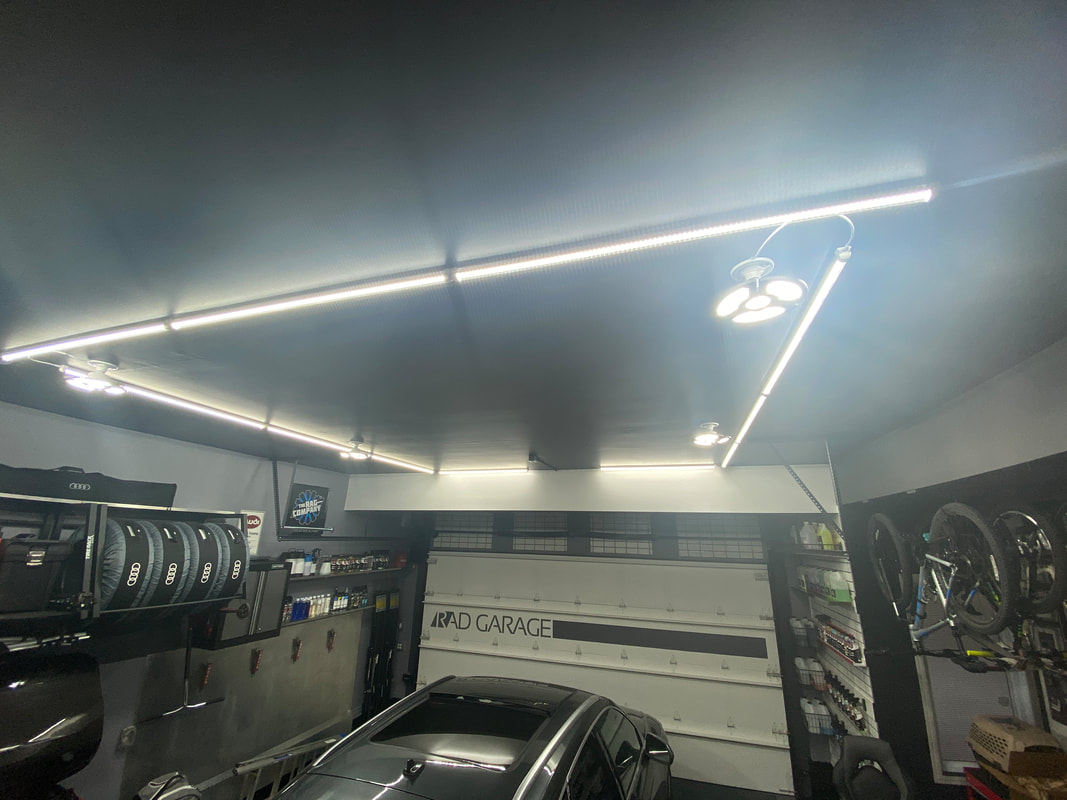
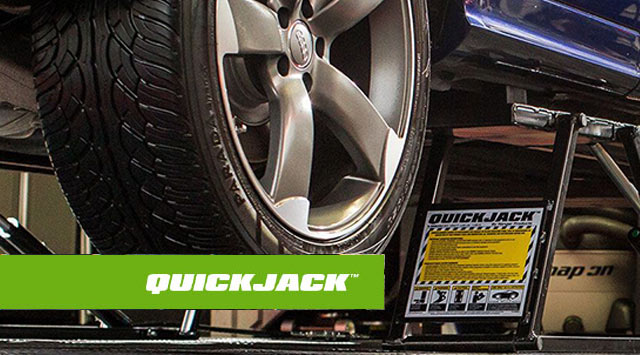
 Winter is the perfect time of year to shift my focus to the garage itself. I have always endured drainage challenges that come with snow and ice melting and then freezing just outside the garage door. This ice damning can occur often in the winter, so conceiving a drainage system that prevents water from escaping the garage and wrecking havoc on my driveway has always been a goal of mine. I finally pulled the trigger and enlisted a concrete firm to install a channel drain/catch basin system. The installation process was labor intensive and required a 48" wide section of the existing floor to be demolished and removed by hand. Once the concrete was removed, four 1-meter sections of trench drain were precisely positioned one inch below the level of the existing floor and pitched towards a large catch basin with a 30-gallon capacity. The concrete was then poured and shaped in such a way that all water will be directed towards the channel sections. No water will now escape the garage and cause me headaches in the winter. While that job was in progress, I took it upon myself to paint the ceiling and install all new lighting. A company out of Saskatchewan called LevKom reached out to me and generously offered to supply me with all new LED lighting necessary to turn my space into an even more effective detailing environment. With the help of an electrician friend, we removed all nine existing fluorescent 2-bulb fixtures and installed four 60-watt "trilights" and eleven 30-watt 48" LED linkable tubes. The lighting install took six hours in total and turned out great. These three upgrades have breathed a lot of new life into my garage. I am still in the process of cleaning up all the dust from the concrete work and sanding of the ceiling, but it already looks even more amazing than before. In addition to just looking better, I am now able to conduct details year-round. The garage is now a much more comfortable and efficient place to do my thing! I have documented all of these changes in a 3-video series I call "Floor to Ceiling". This video demonstrates the demolition stage of the drainage project. The crew worked tirelessly for about six or seven hours removing a 48" wide portion of the existing slab. I wasn't able to record the footage of the actual drain and basin placement, but this video shows how they were placed in the excavated portion of the floor. This video demonstrates the final result after the concrete was poured to fill in the system. It also demonstrates the system in action as I perform a quick floor clean.
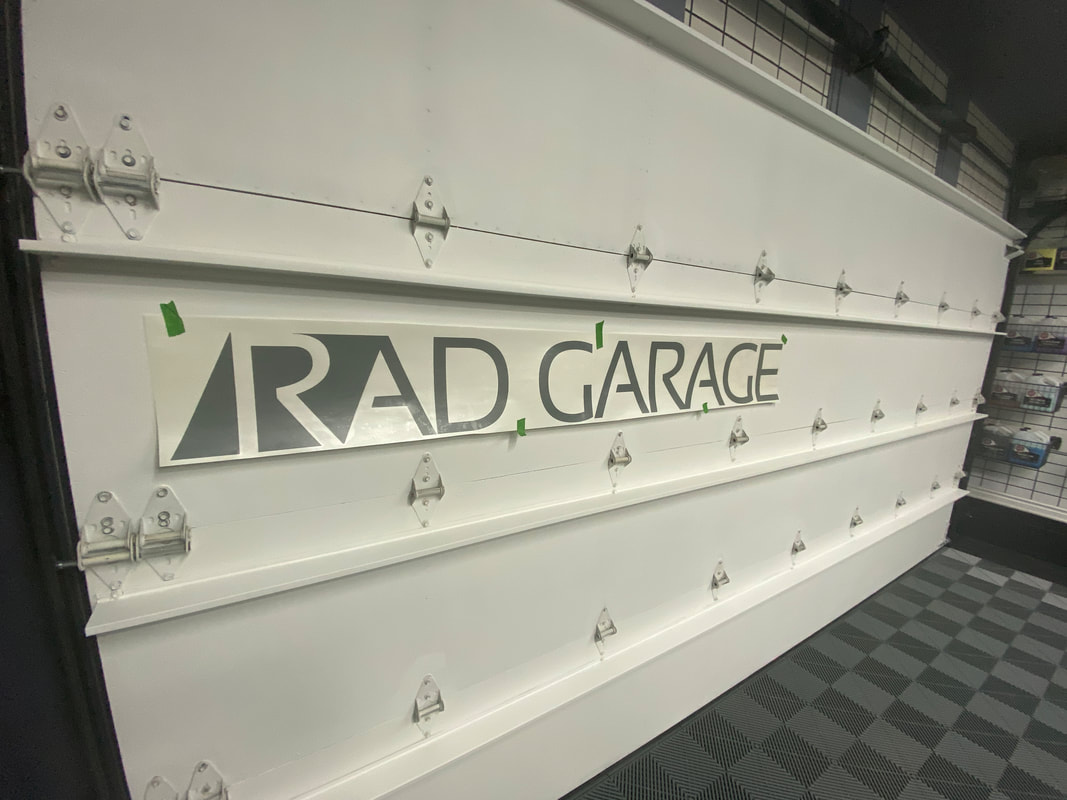
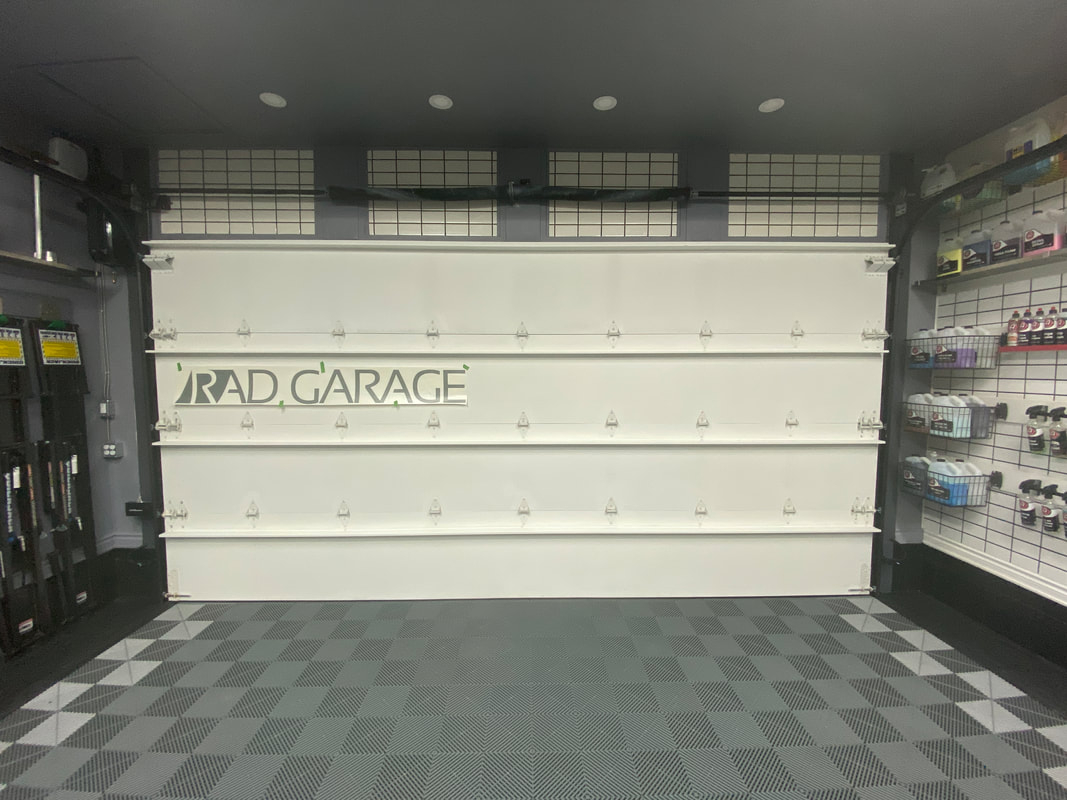
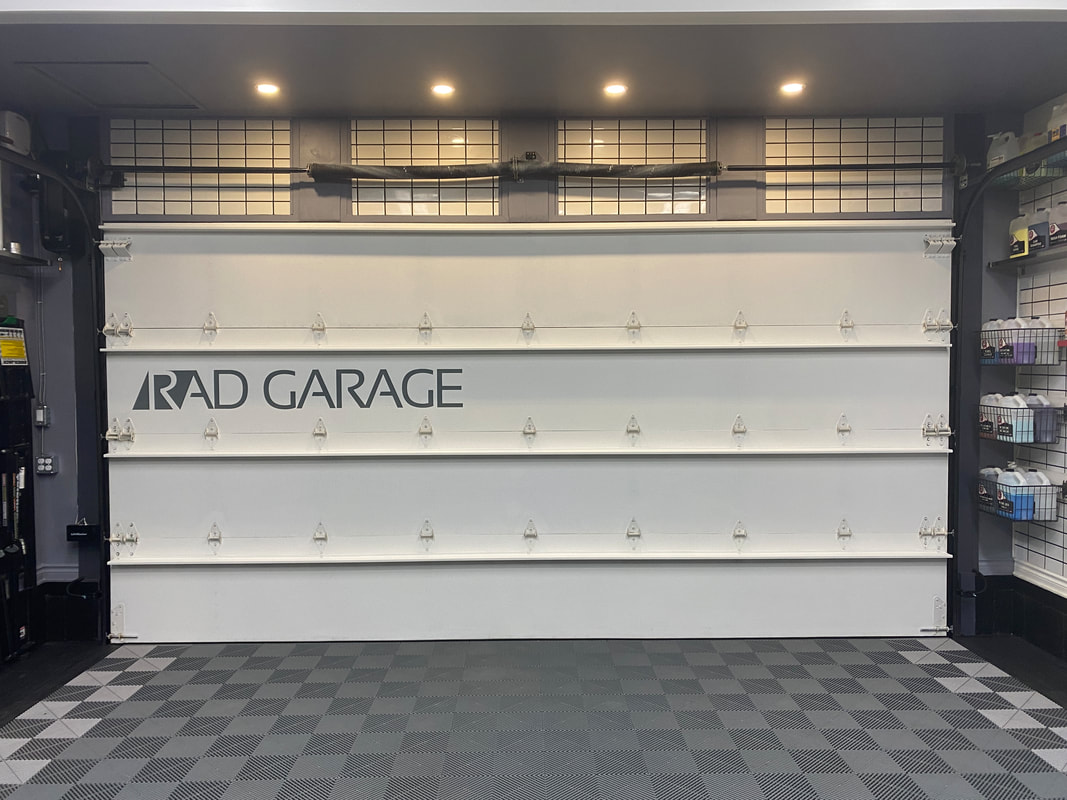
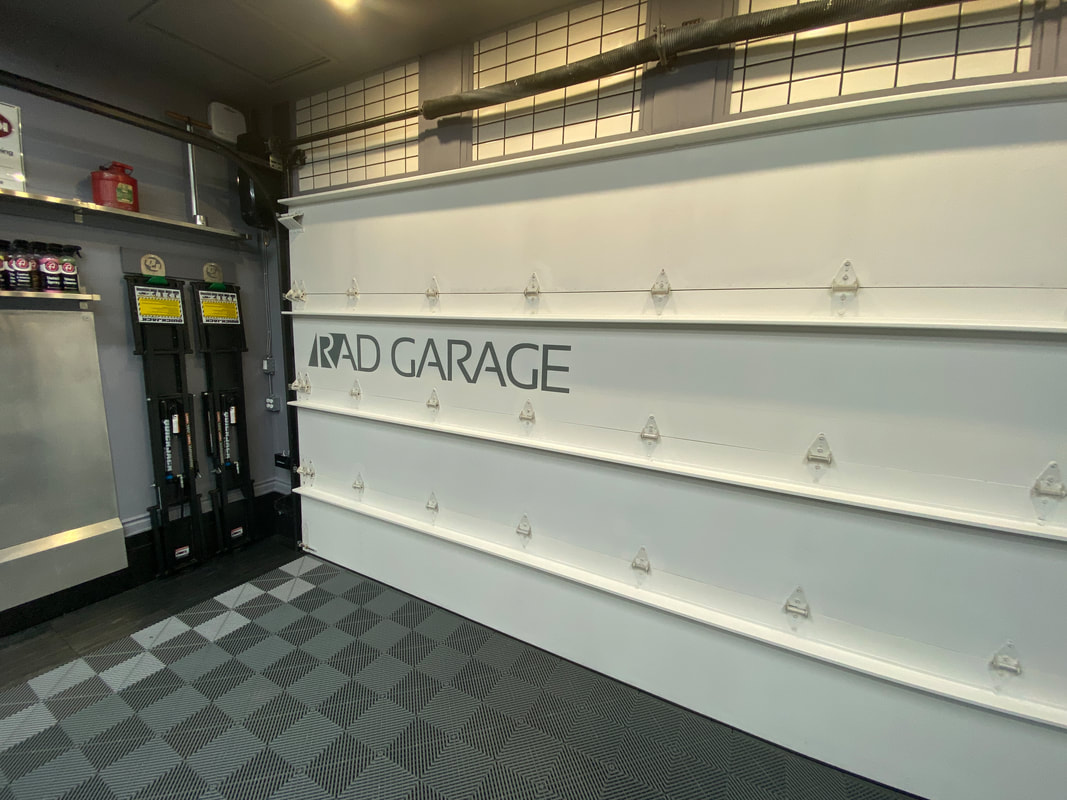
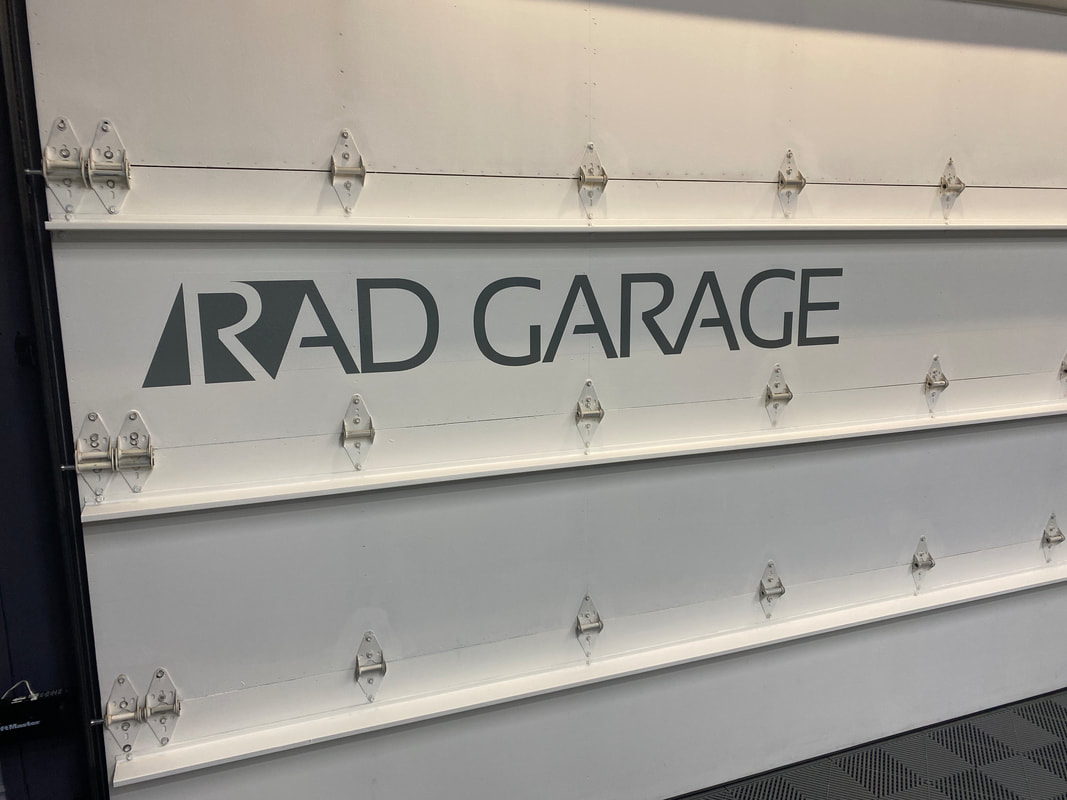
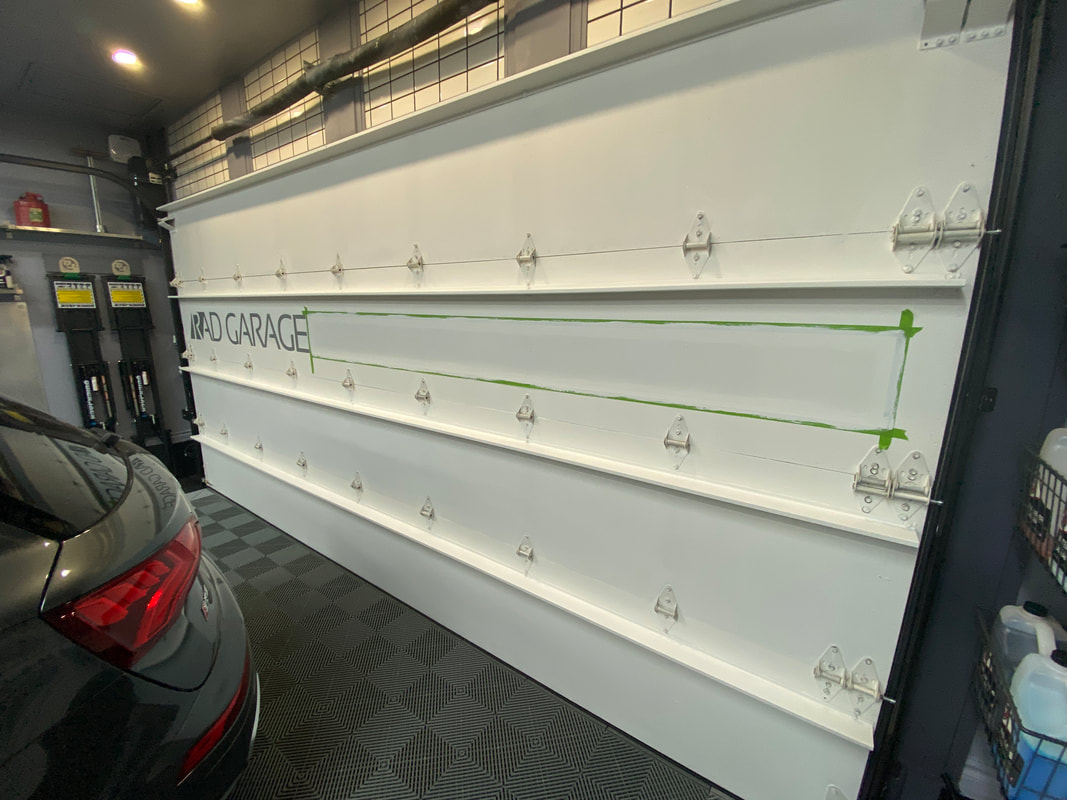
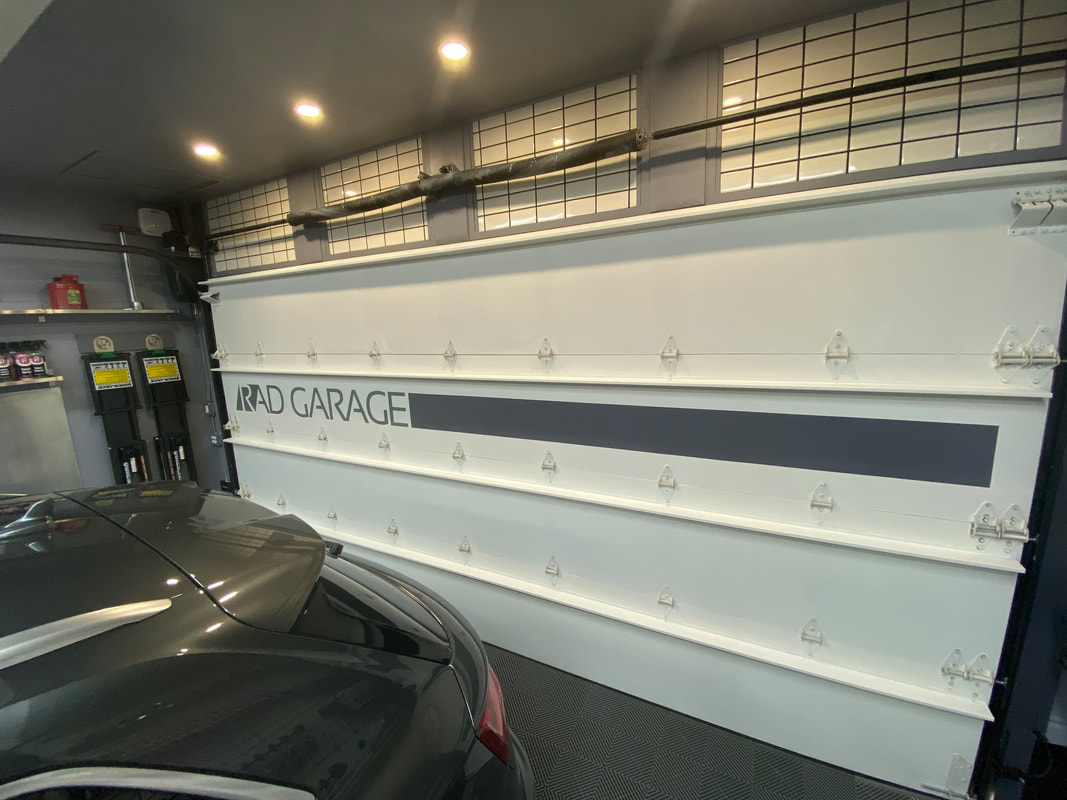
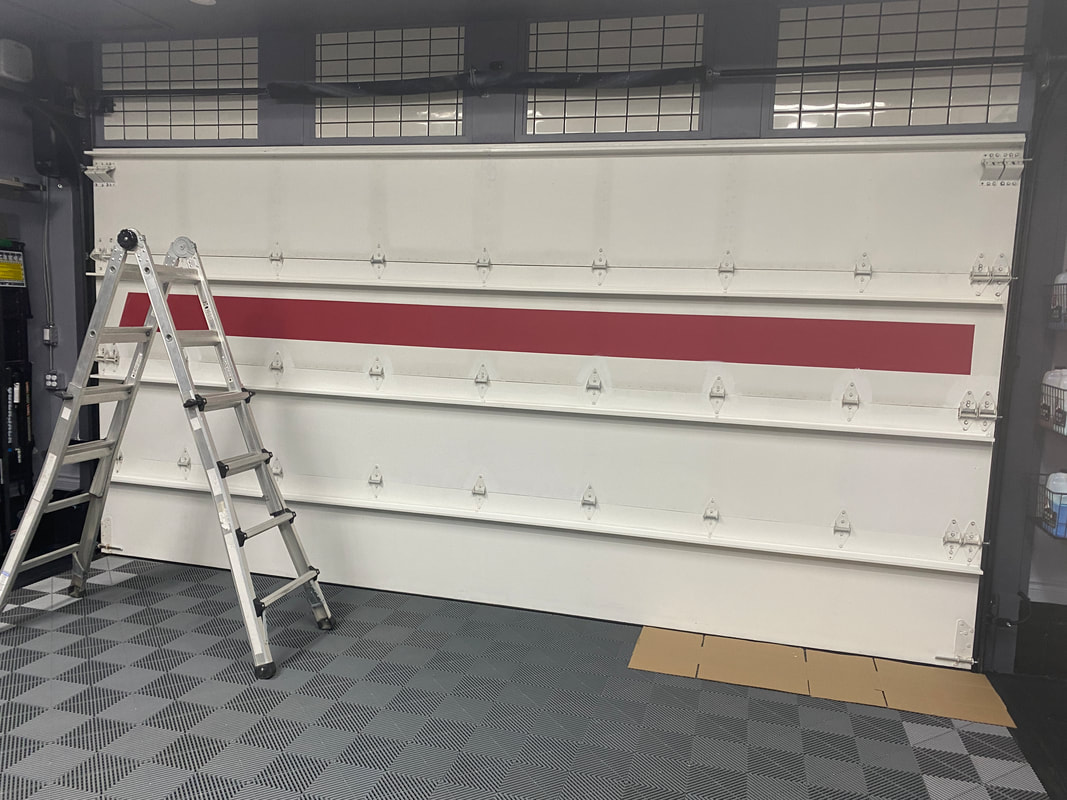
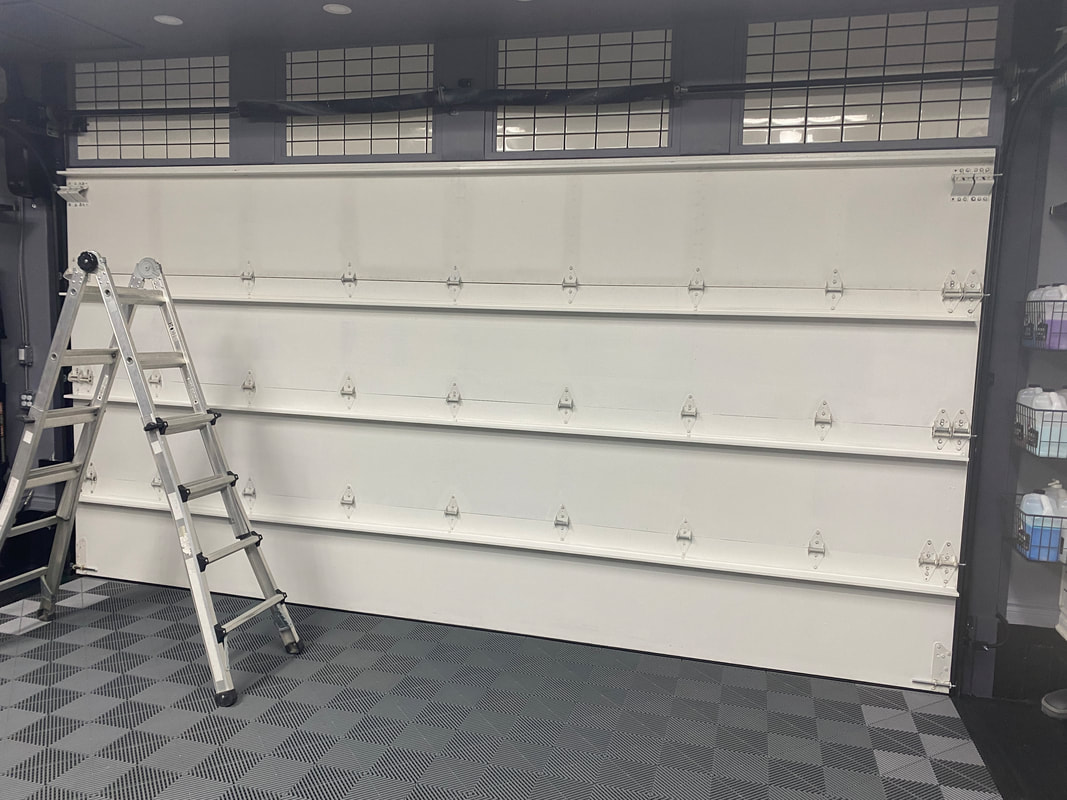
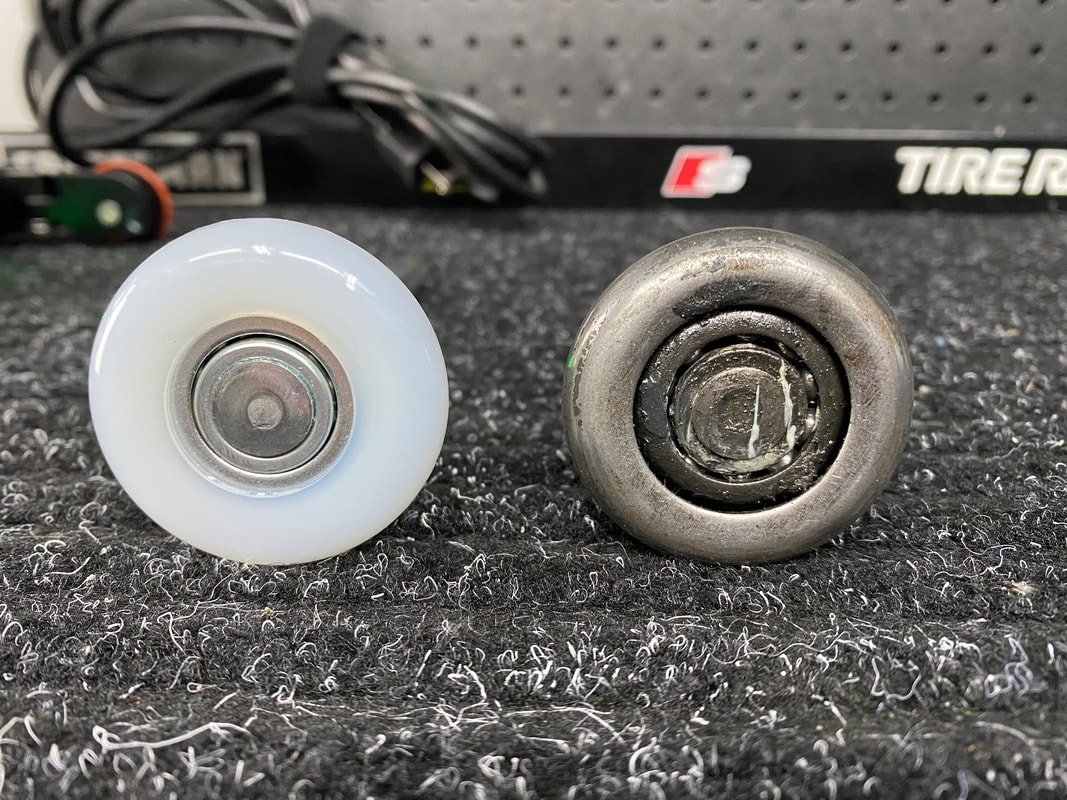
I hand-painted a grey stripe to play off the new decal on my door. I am now considering having some lettering printed out. Below, I have a photo of the garage door as it stands today, and next to that, I have a rendering of what I an considering doing. I refreshed the design on the back of the garage door. I had the team at Custom Decals YYC print me up a 9" decal and I then I painted a corresponding stripe. I went with grey for the decal and the stripe as to tie into the existing grey colour theme. I am quite happy with the results. As with pretty much every aspect of my garage design, I am changing up the look of the inside of my garage door. I've enjoyed the red stripe in the Audi motif, but I thought it was time for a bit of an overhaul. I recently repainted the entire interior side of the door with a white eggshell paint from Rona. Now, what will I do with it? I guess you'll just have to check back in a few weeks to see. I was not happy with the performance of my aging garage door opener unit. It has served our family well for the past decade, but the entire system was dated and it was time for an upgrade. I connected with Mike Awada from Triton Door Services after a neighbor recommended him. He stopped by the garage and we chatted about all the possibilities and I settled on a Liftmaster 8500W side-mount "Jack Shaft" opener. The install process was somewhat complicated, but with the help of my amazing brother-in-law Ryan, we ran electrical service to the corner where the unit was mounted. We also rerouted the wall switch and sensor wires from the middle of the ceiling to the same corner. Then, we installed four slick little 4" LED pot lights (can lights) to provide some much needed task lighting to the lower ceiling portion of the garage. What an amazing difference these adjustable (3000-5000k) lights have made. This video isn't a complete step-by-step install guide, but more of a look into my thinking and how I integrated all the components into my already highly developed garage. If you are interested in upgrading your garage door opener, I highly recommend you find a qualified door technician in your area. It’s also a good idea to have a quality electrician on speed dial too! The ten metal rollers on the garage door were starting to make a lot of noise so I contacted a garage door technician to see if it was possible to replace them with something quieter. I now have these nylon rollers that have dramatically quieted things down. I am now planning on doing a few upgrades to the door opener. Stay tuned. |

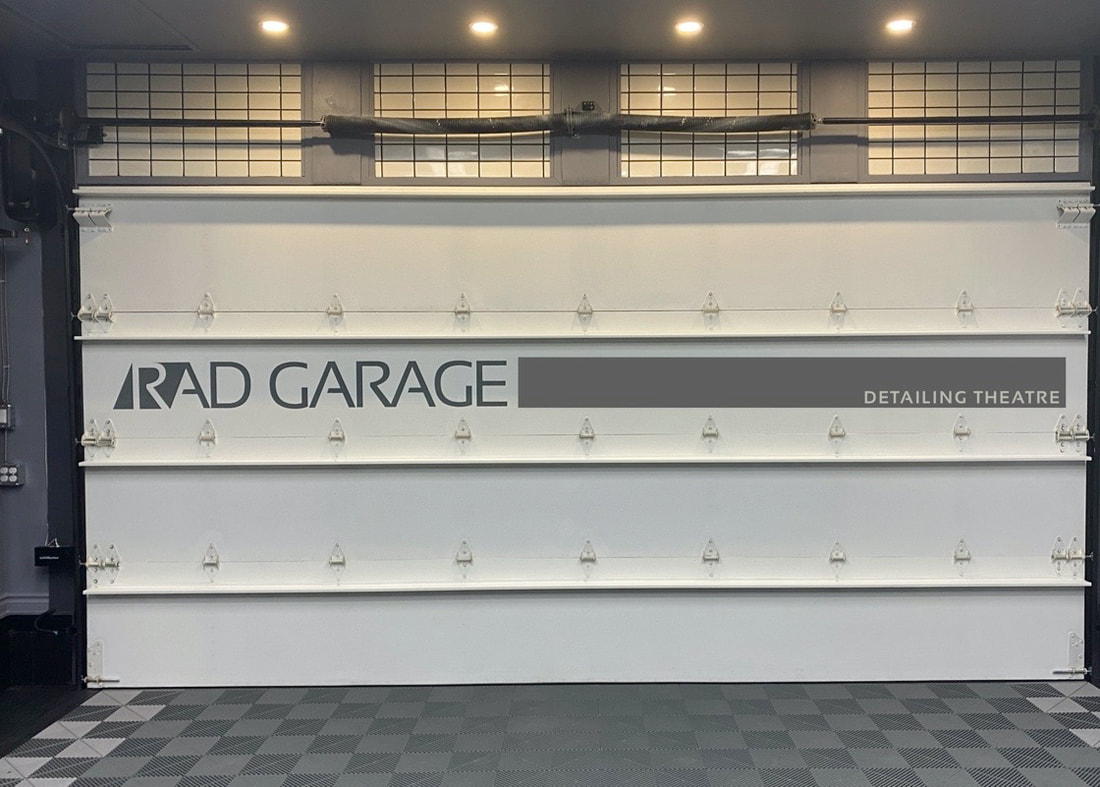
RAD GARAGE is my personal detailing theatre. I am a teacher who finds immense pleasure in completing deeply therapeutic, thorough and highly satisfying detailing projects in my residential garage. I have converted my suburban double car garage into a world class detailing environment and I enjoy caring for my own car and select cars belonging to others. The garage and the work I complete in it have allowed me to connect with other detailing enthusiasts from around the world.

I have teamed up with Teespring to offer viewers an opportunity to grab some RAD gear! Click here to see the current inventory of RAD merchandise available at my Teespring store!
Use "RAD10" to save yourself 10% until the end of March, 2021.

Carzilla is a local detailing store that caters to the North American community of professional and enthusiast detailers. I have been a longtime customer and I am fortunate to call the owner a friend. Besides stocking a vast quantity of top quality detailing products, the owner has supported various garage and detailing projects of mine over the years.
5% discount code
|


 RSS Feed